

















Last Update: August 31, 2026
Use this guide to send Gutenverse Form submissions to any service that can receive an HTTPS webhook request.
What You Need
Enable Webhook in Gutenverse Form
You can configure these settings either in the Form Action or globally in the integration settings.
The global settings serve as a fallback and are used only when the integration settings are not configured in the Form Action.
Note: If any Integration settings are configured in the Form Action, the form will use only the Form Action settings. It will not combine or merge them with the global settings.
Setup Globally
1. Navigate to Gutenverse → Form Integrations.
2. Enable the Webhook integration.
3. Then Click “Continue Setup”
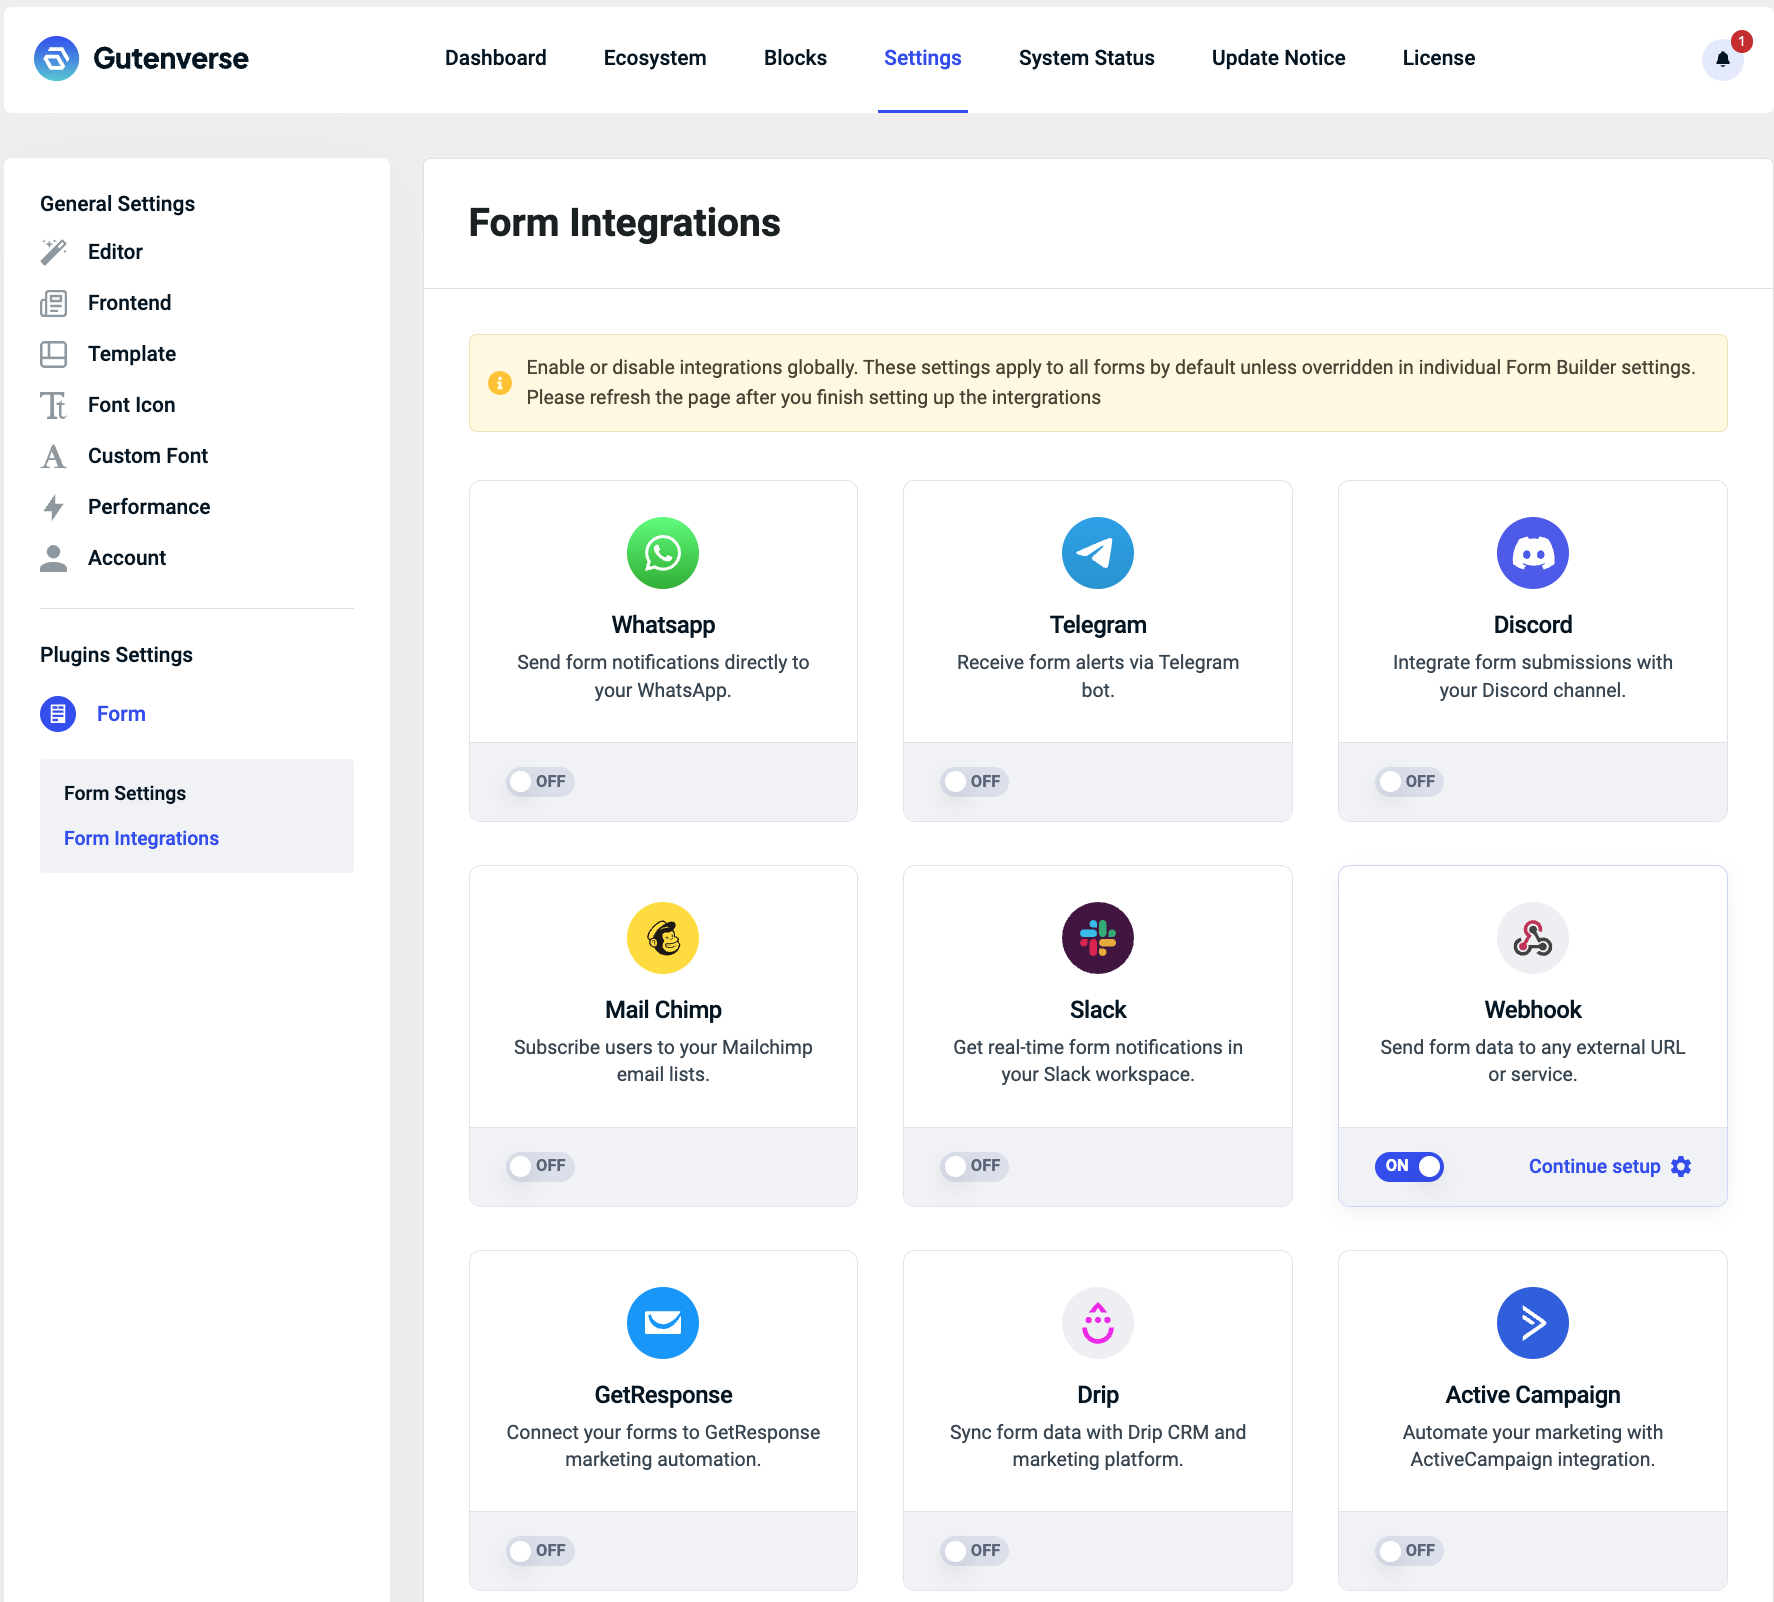
4. Configure the required settings:
Recommended plain text template:
New form submission

Form: {{form_title}}
Entry ID: {{entry_id}}
Site: {{site_title}}

Name: {{name}}
Email: {{email}}
Phone: {{phone}}

Message:
{{message}}

All fields:
{{all_fields}}
If your destination expects JSON, use a JSON template like this:
{
  "form_title": "{{form_title}}",
  "entry_id": "{{entry_id}}",
  "site_title": "{{site_title}}",
  "name": "{{name}}",
  "email": "{{email}}",
  "phone": "{{phone}}",
  "message": "{{message}}"
}
Gutenverse Form supports placeholders in Drip fields. Placeholders are replaced with submitted values.
Common placeholders:
| Placeholder | Output |
| {{site_title}} | WordPress site title |
| {{form_title}} | Form title |
| {{form_id}} | Form ID |
| {{entry_id}} | Submission entry ID |
| {{all_fields}} | All submitted fields |
| {{field-id}} | Value from a specific Form Builder input |
For field placeholders, use the input ID from the Form Builder field.
Examples:
5. After filling the settings, click Save.
Setup in Form Action
1. In Editor, Select Form Builder then open Form Action.
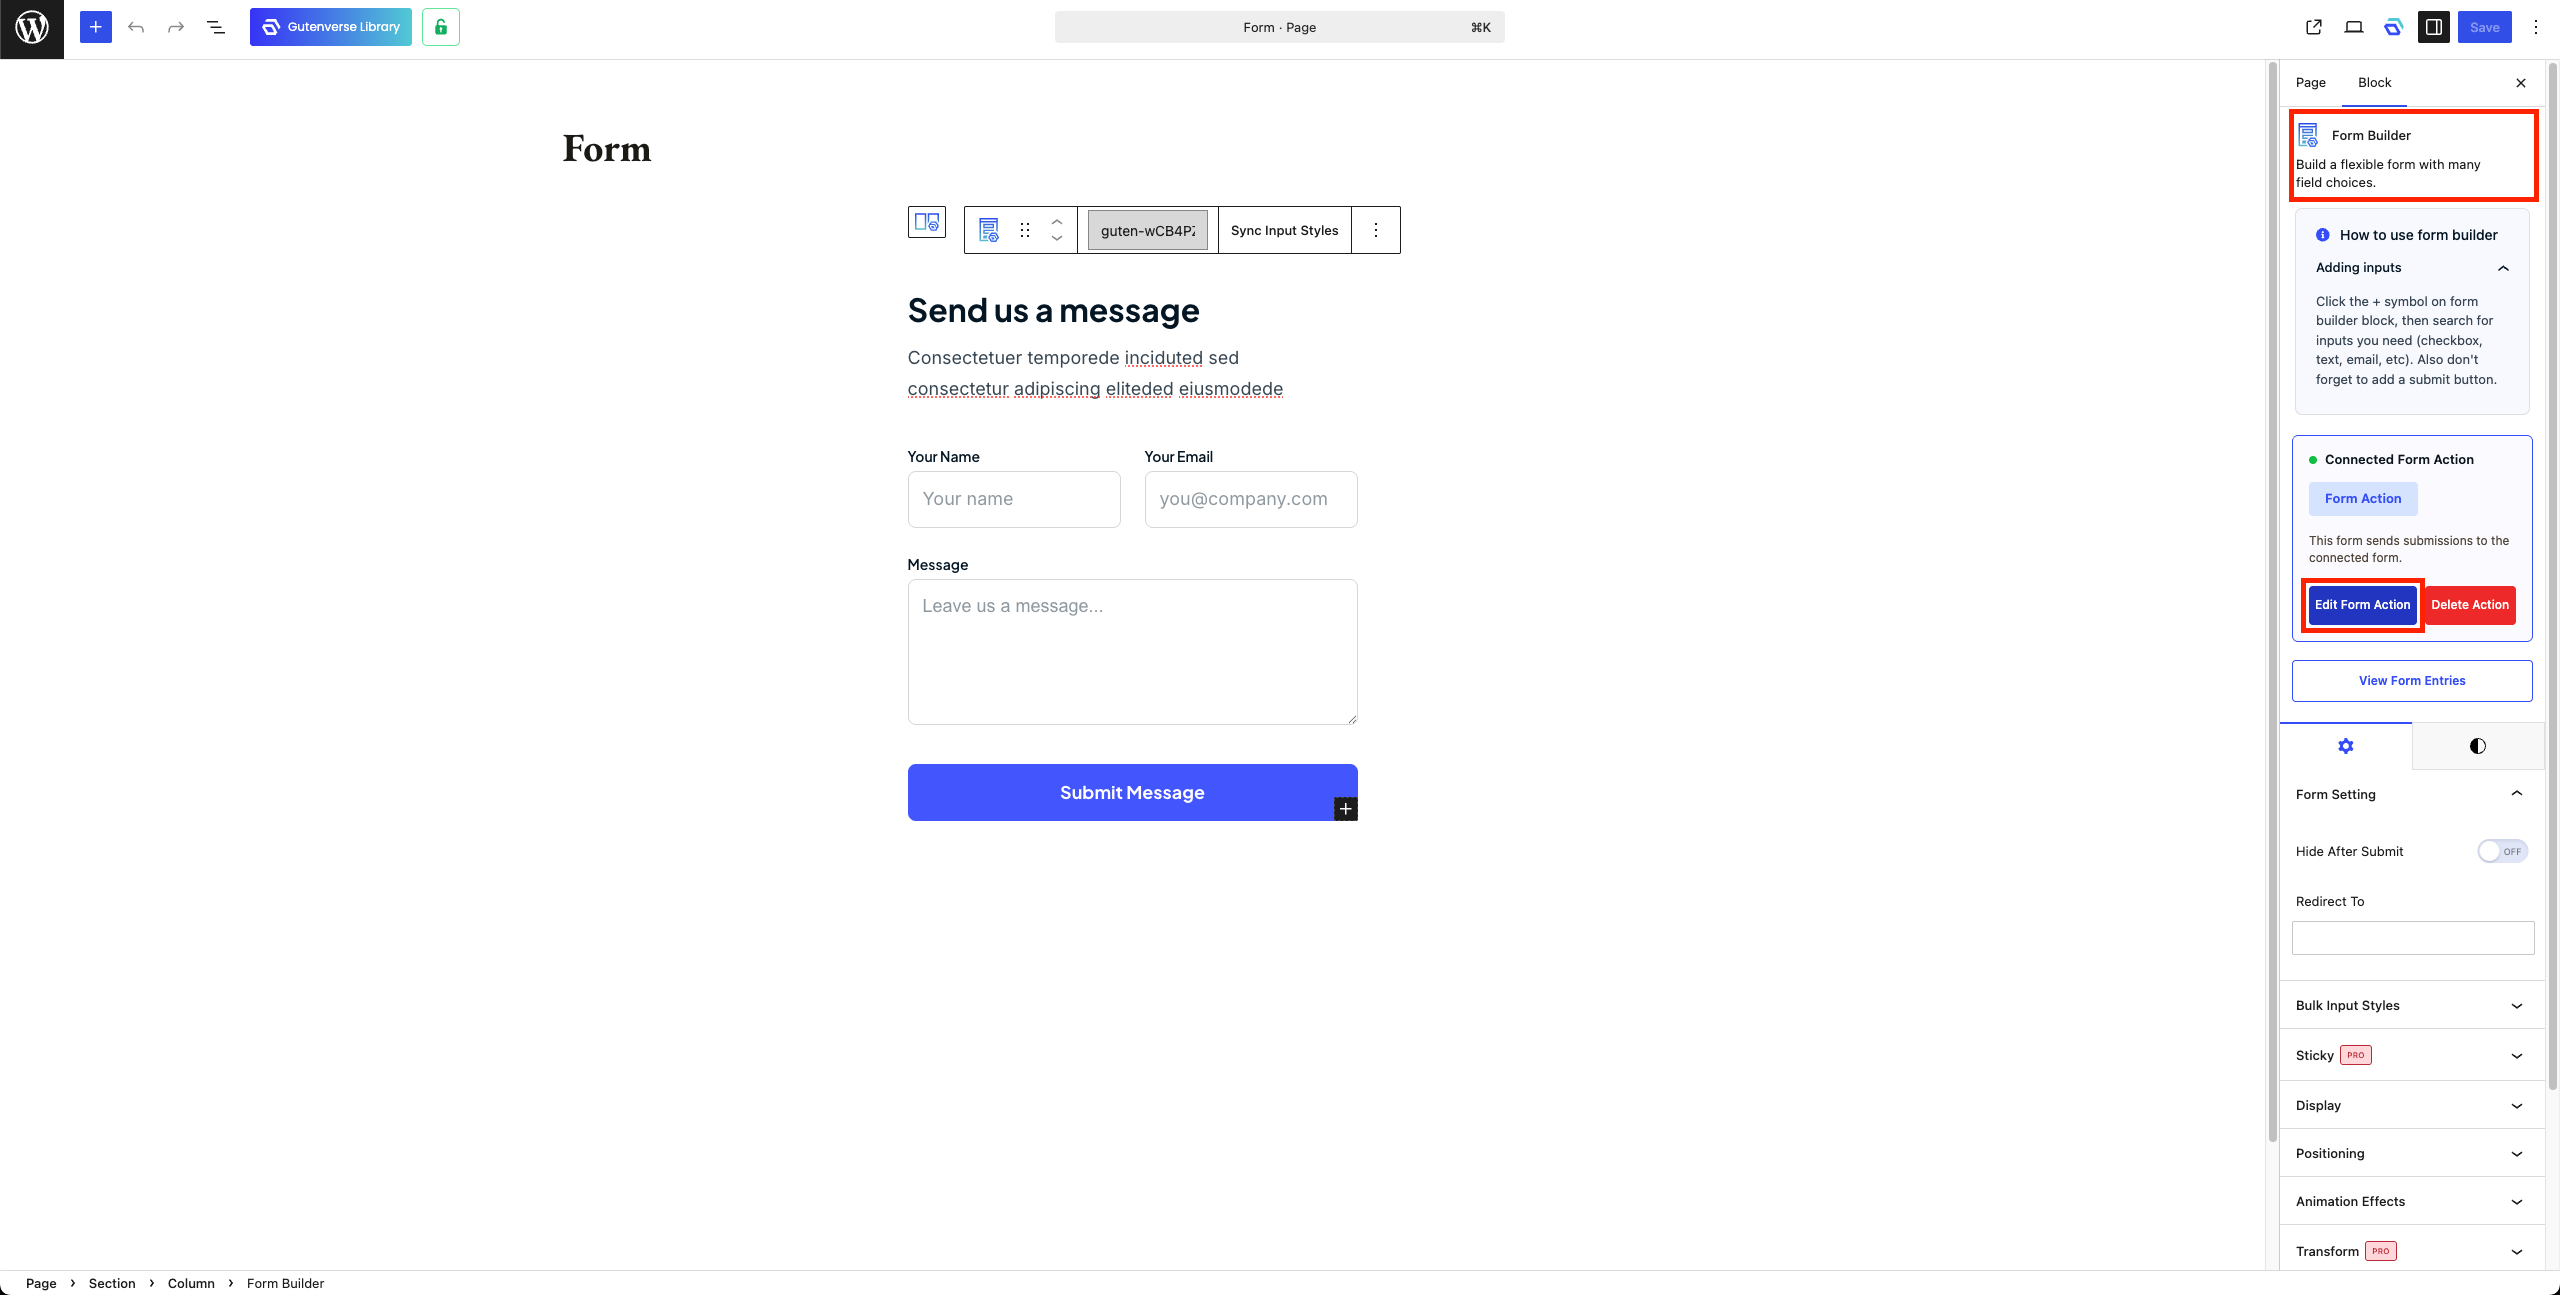
2. Open Integration Tab.
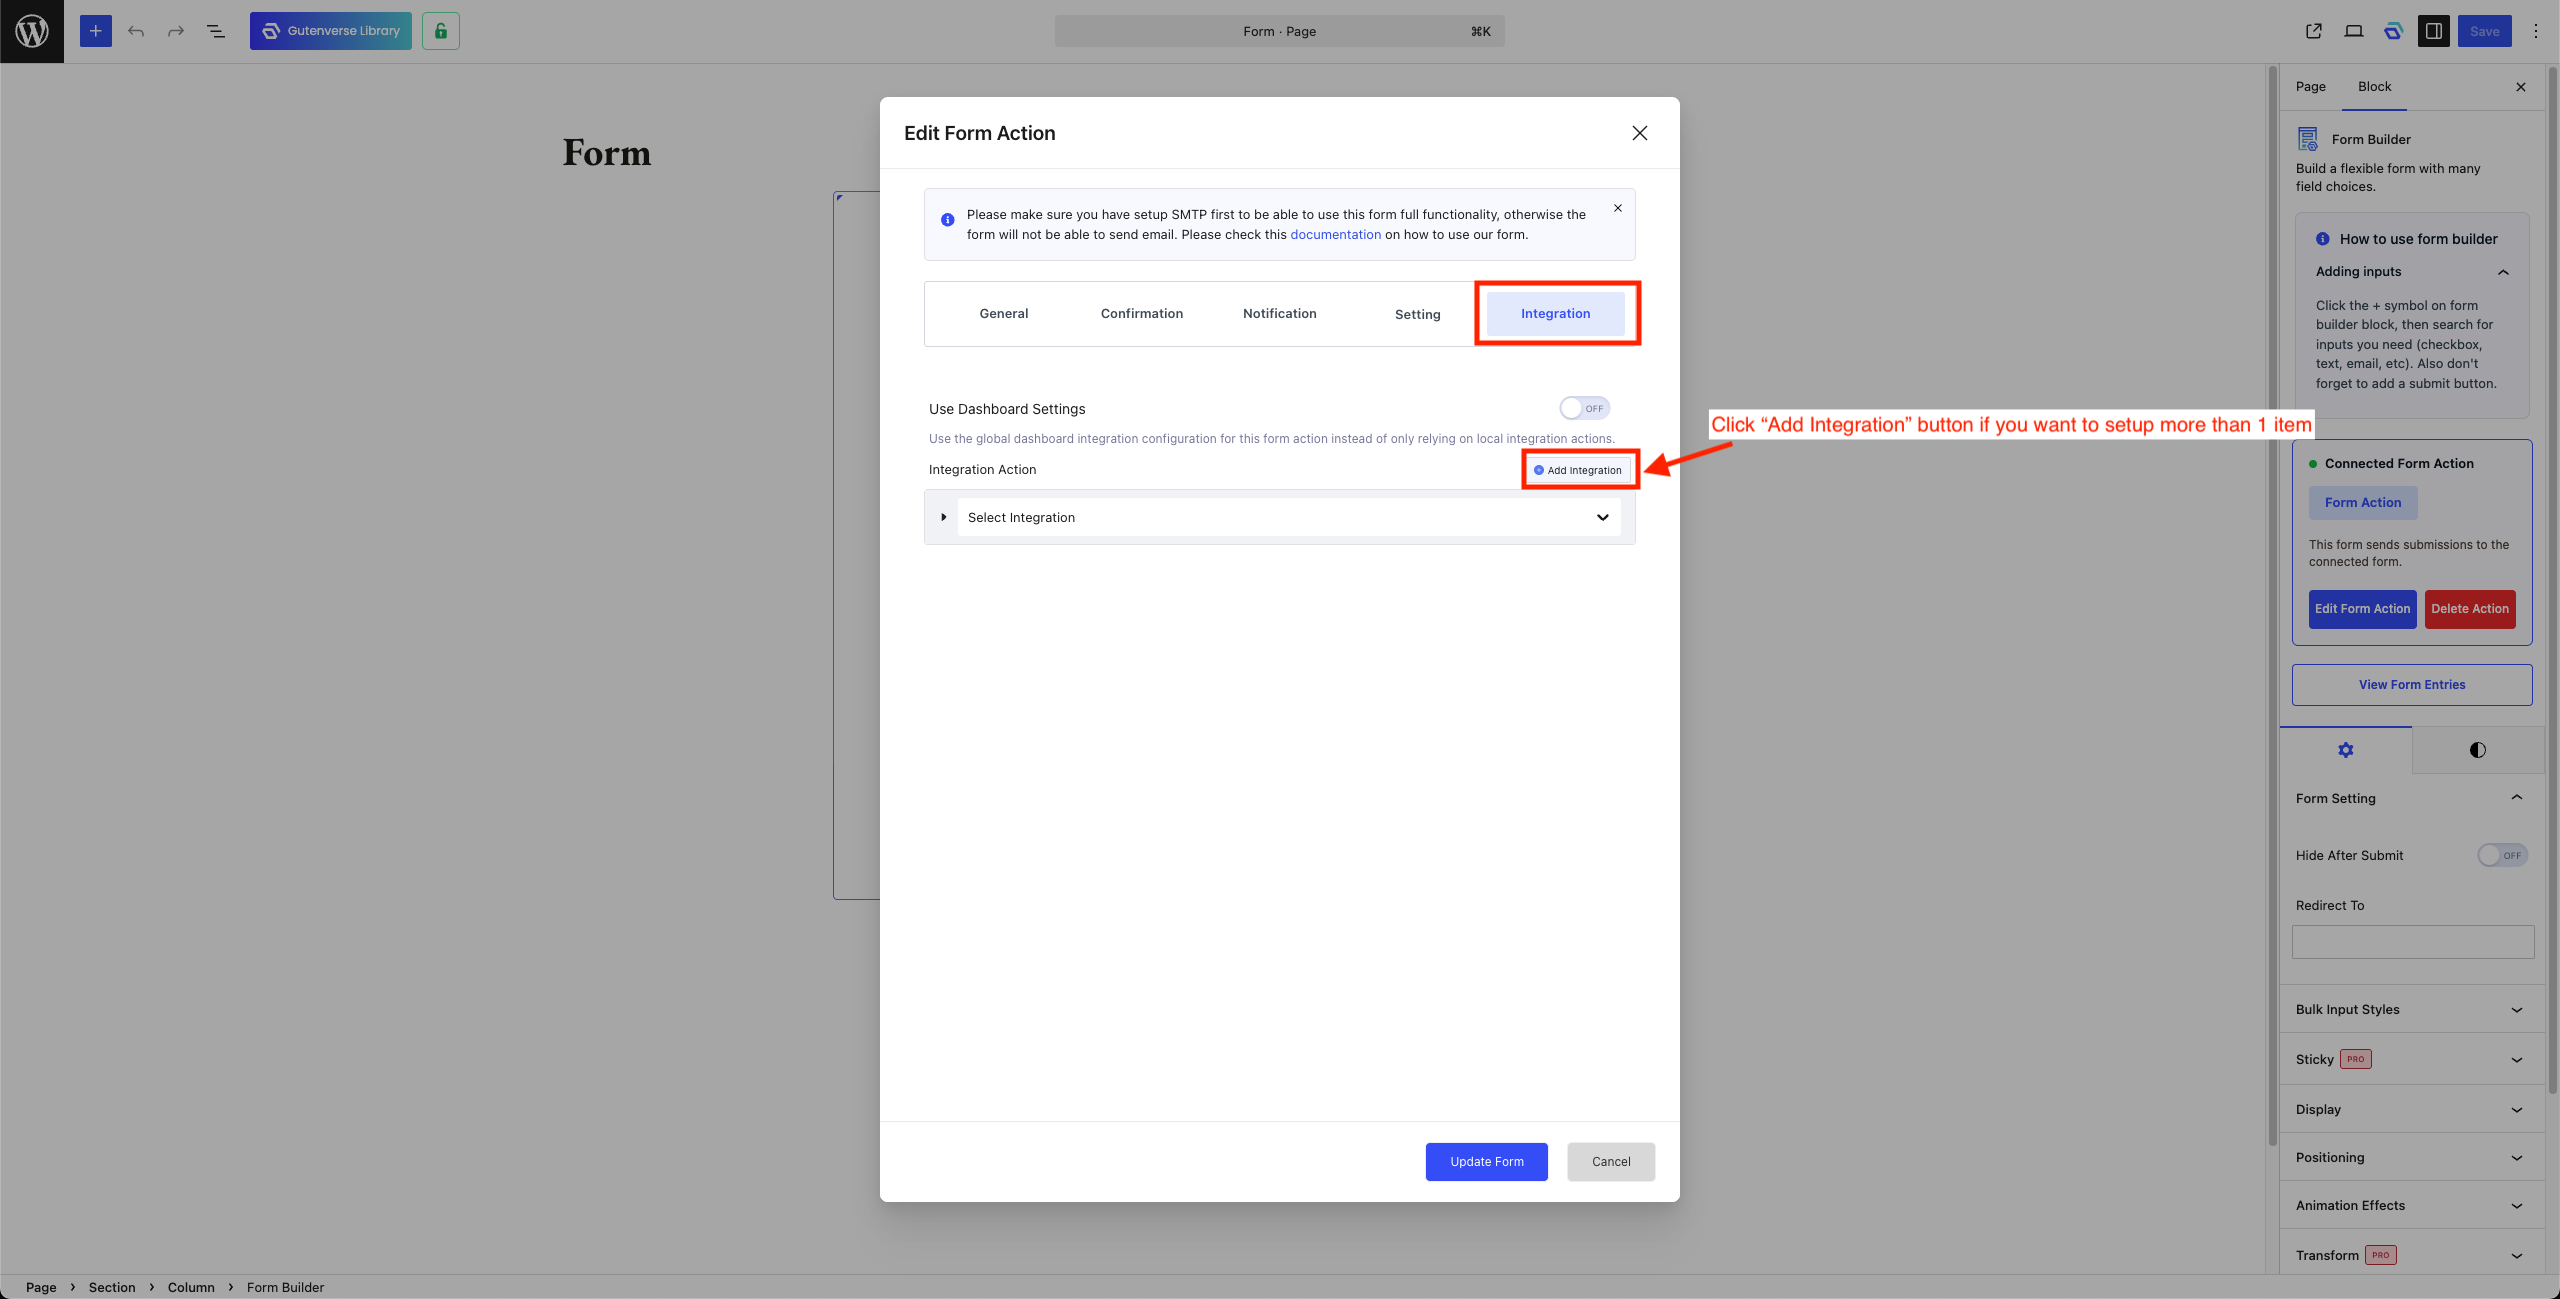
3. Select “Webhook” to setup Webhook integration.
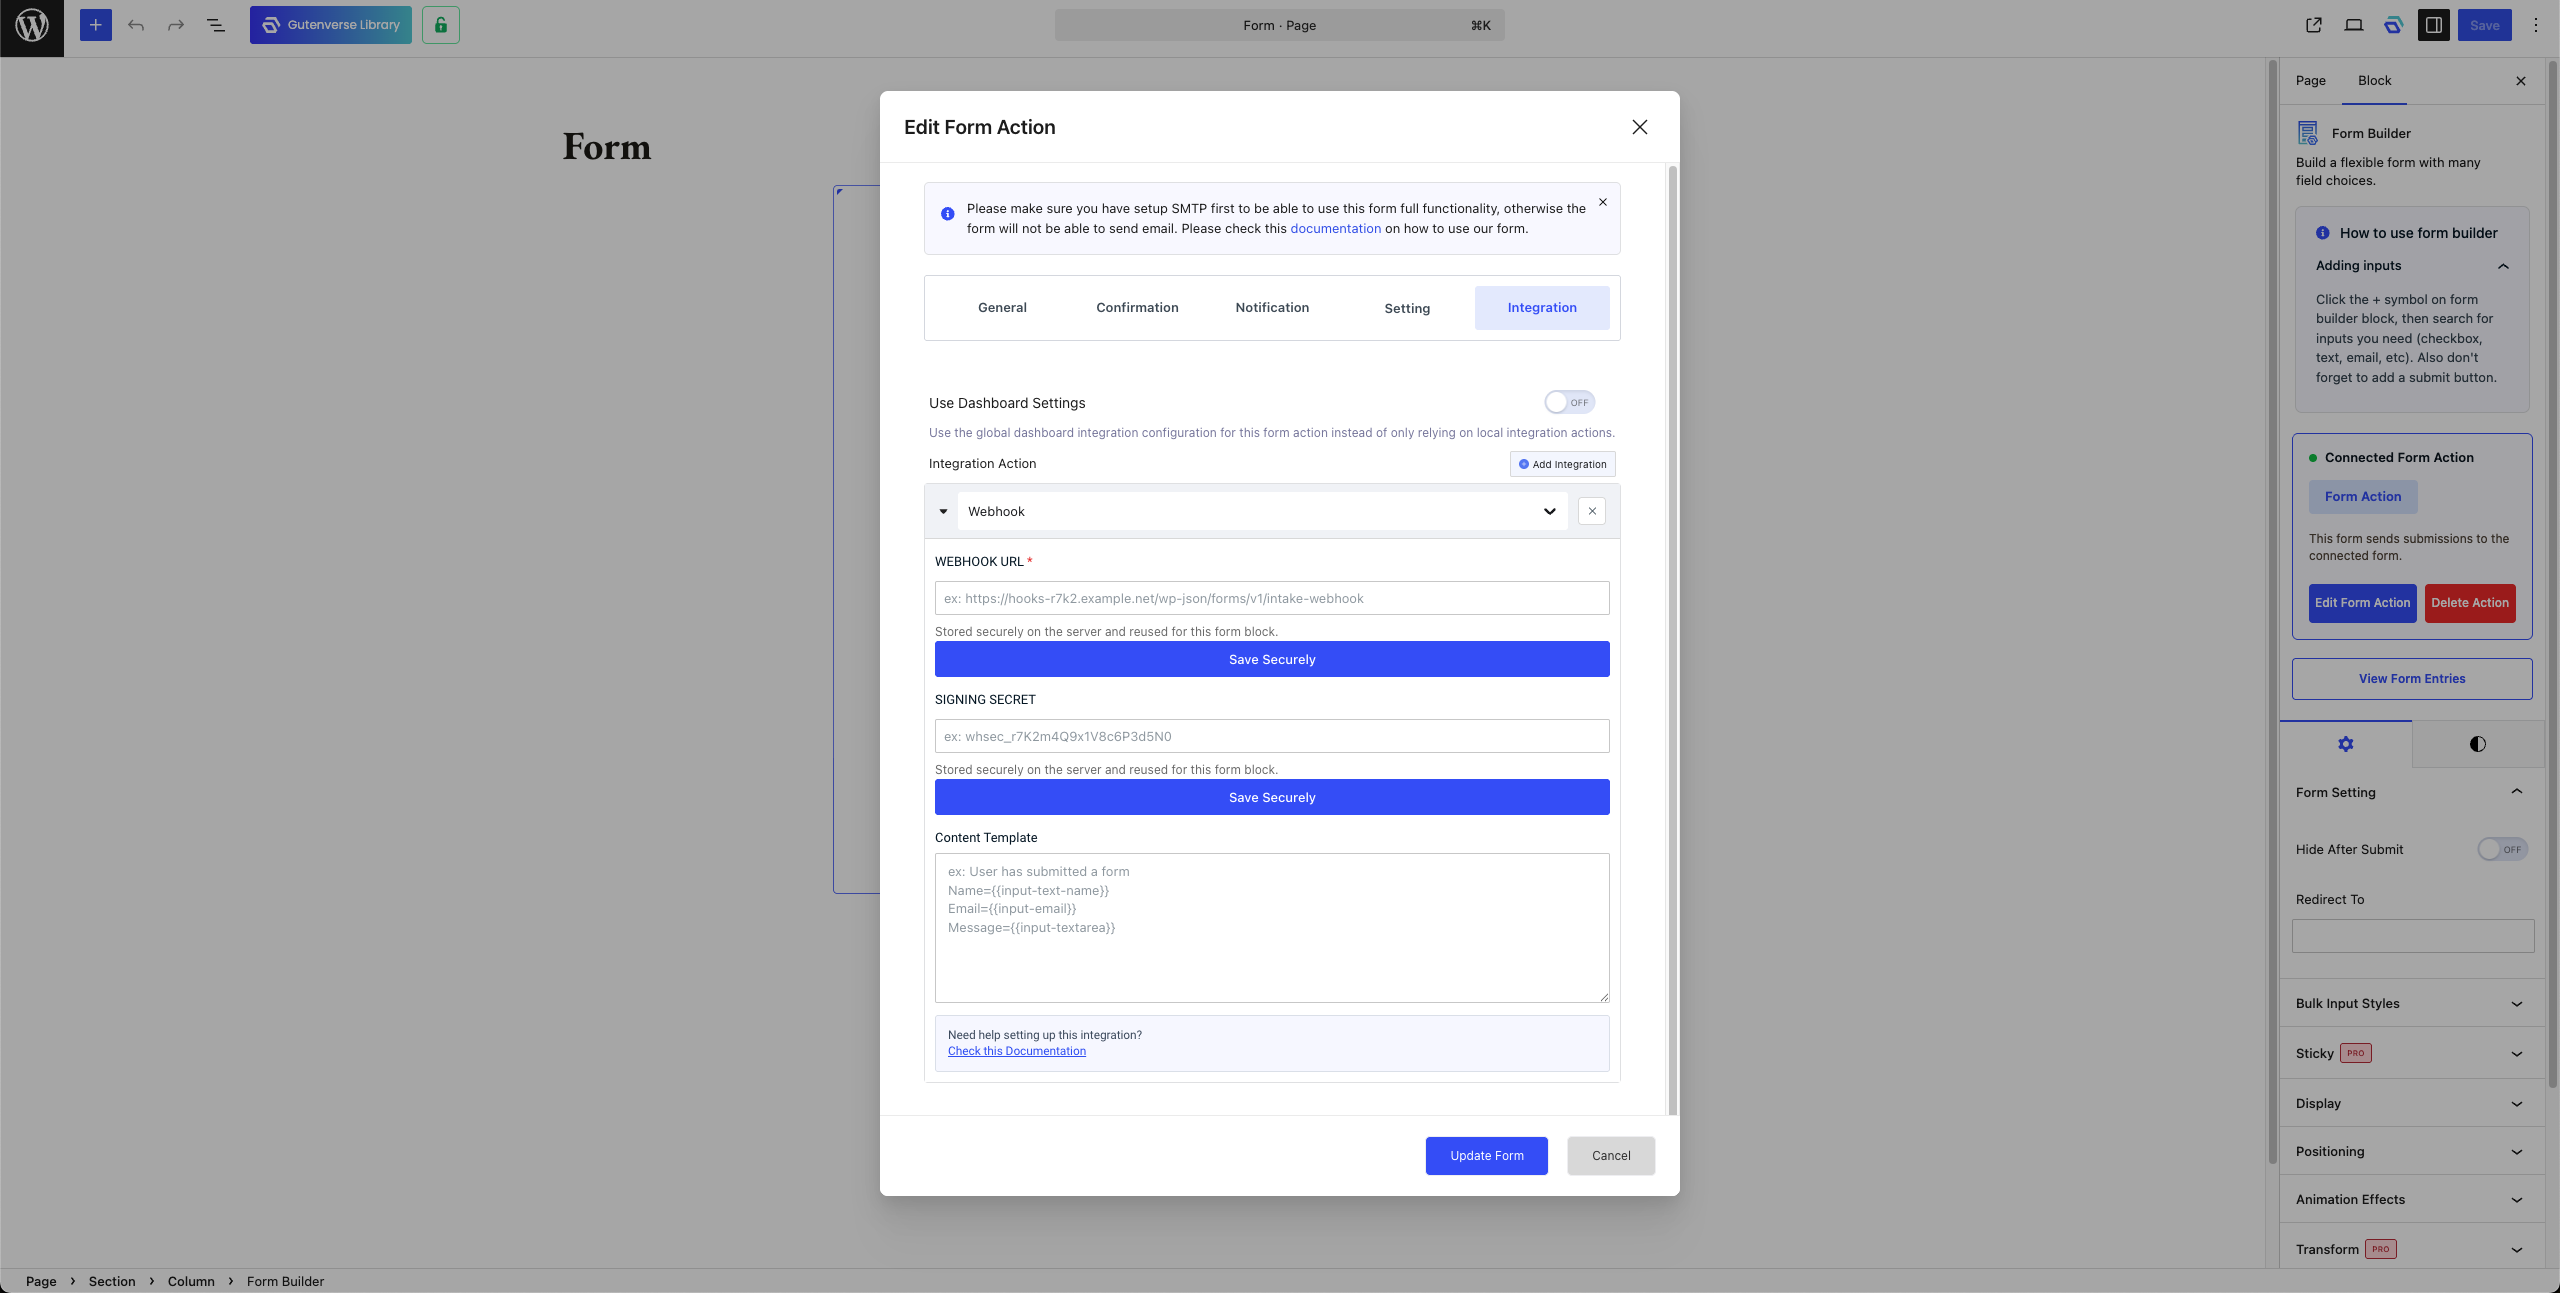
4. Configure the required settings.
Note: API Key need to be saved securely so after paste the API Key click on Save Securely
5. Click Update Form.