
















Last Update: August 31, 2026
This guide walks you through the steps required to connect Mailchimp Transactional with the plugin. You’ll learn how to create a Mailchimp Transactional account, generate an API key, find your Audience ID, and locate the merge fields and audience tags needed for configuration.
Mailchimp Essential
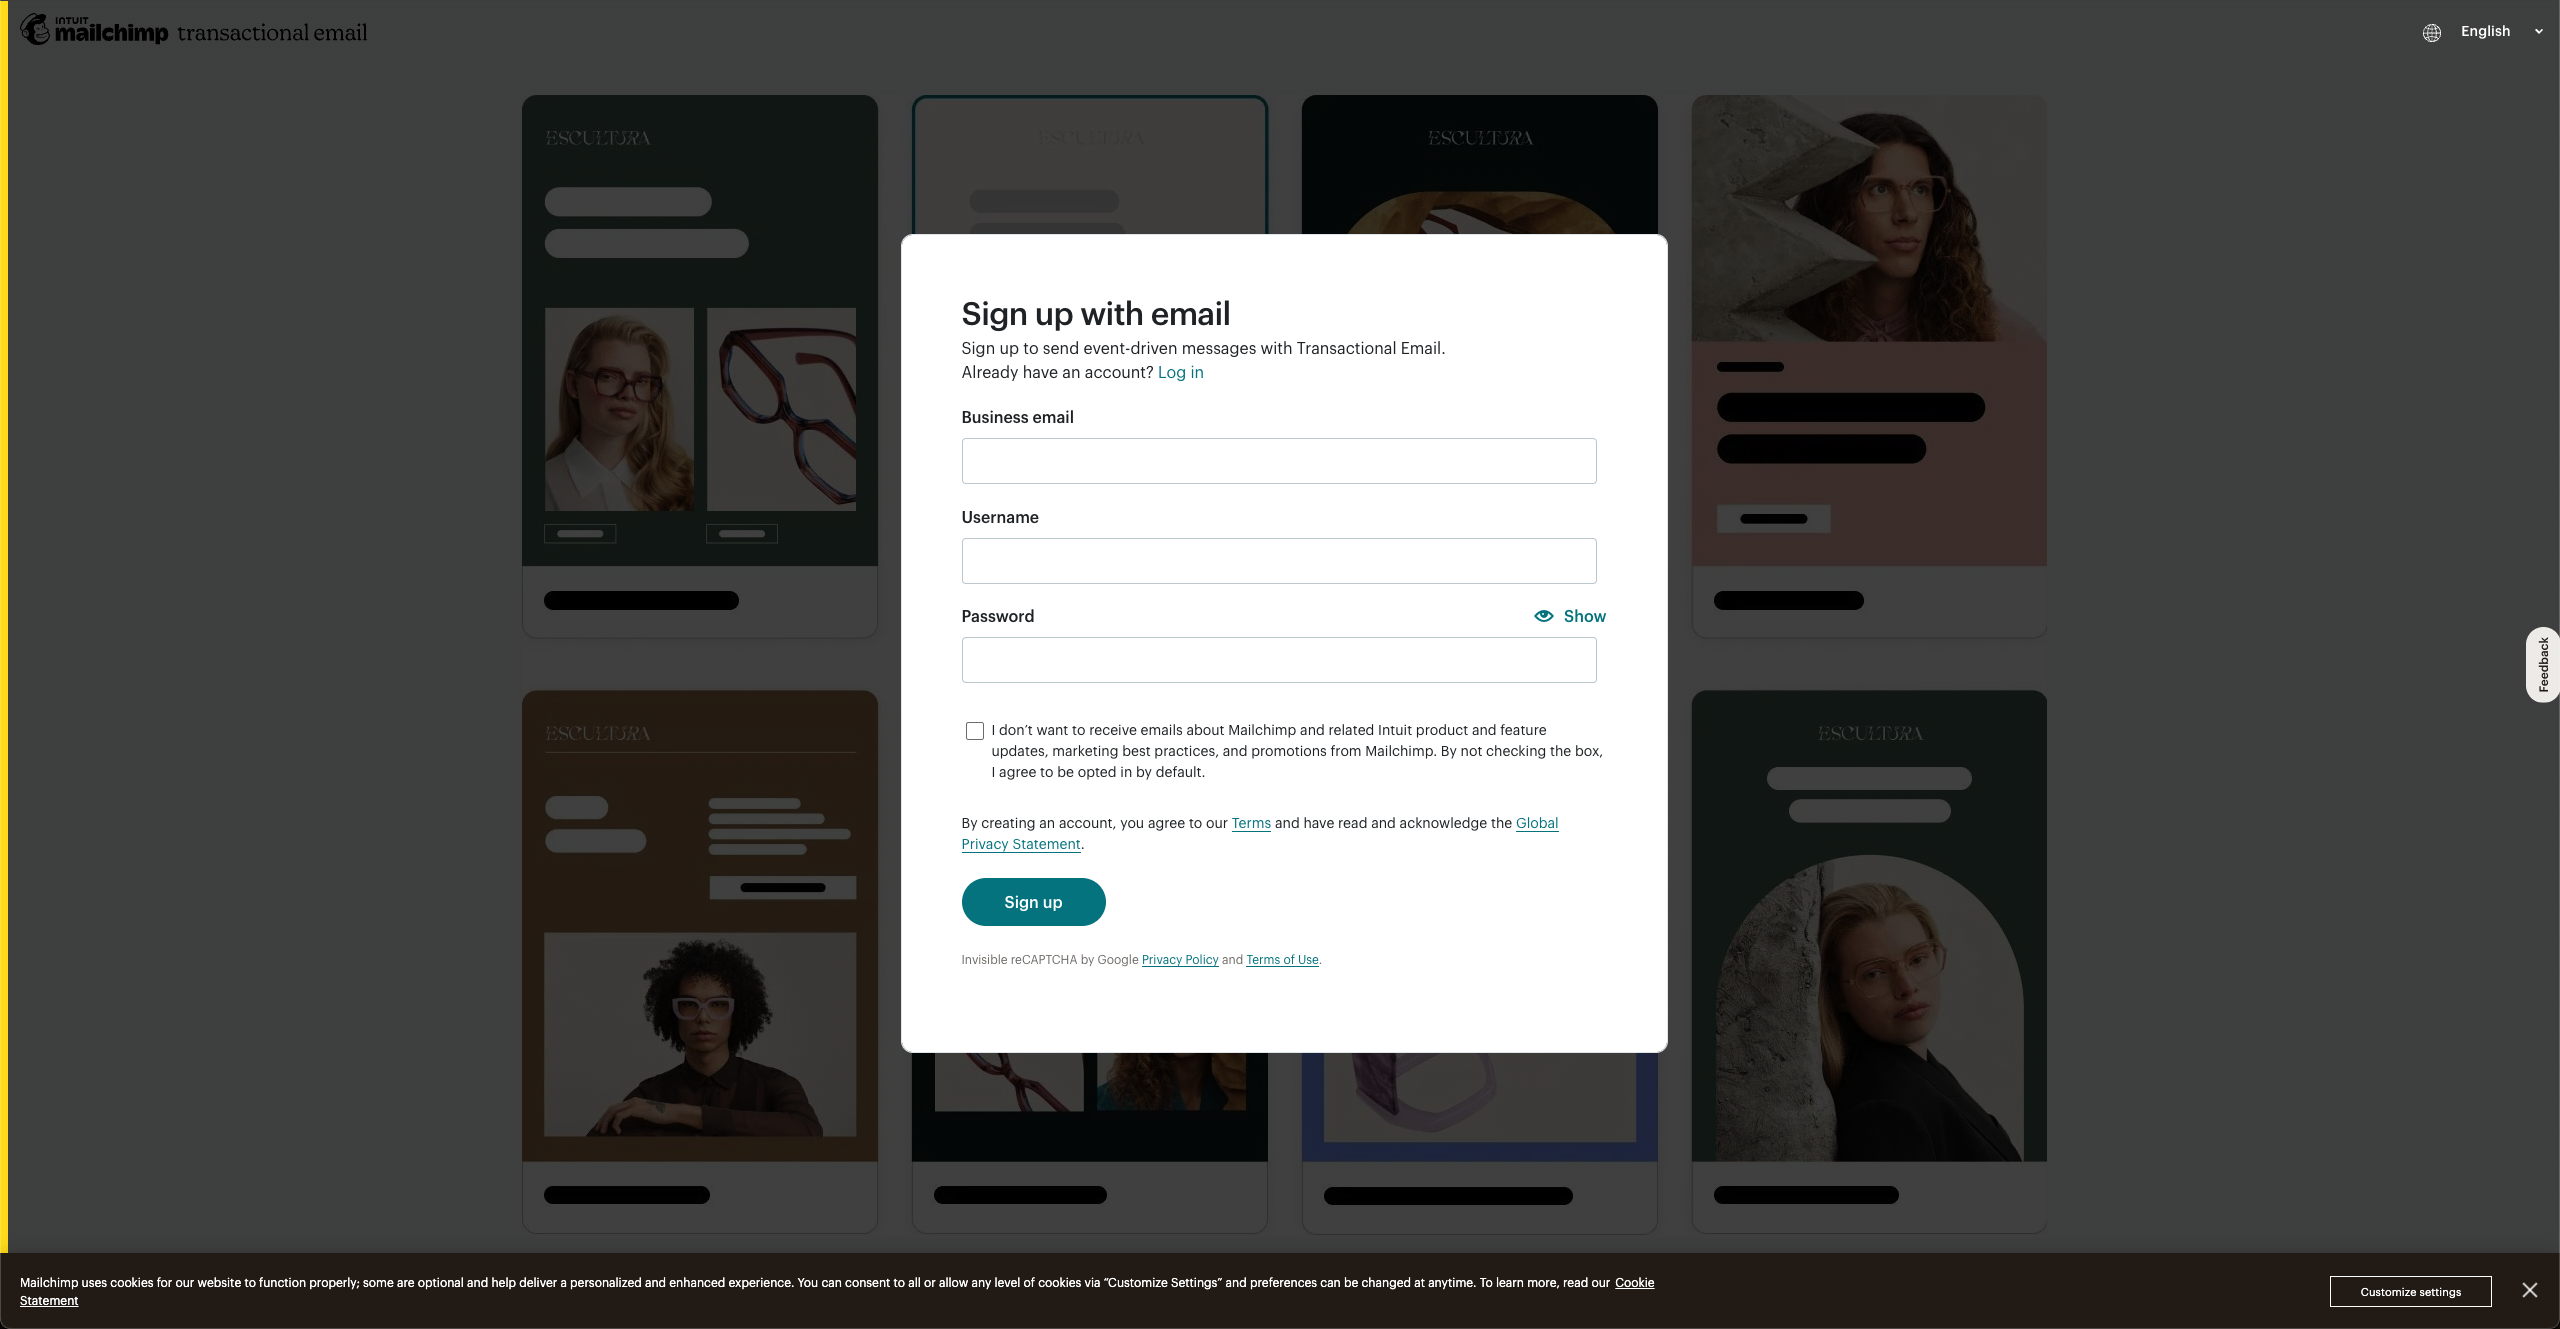
Create a Mailchimp Transactional Account
If you don’t already have a Mailchimp Transactional account, create one before using the API.
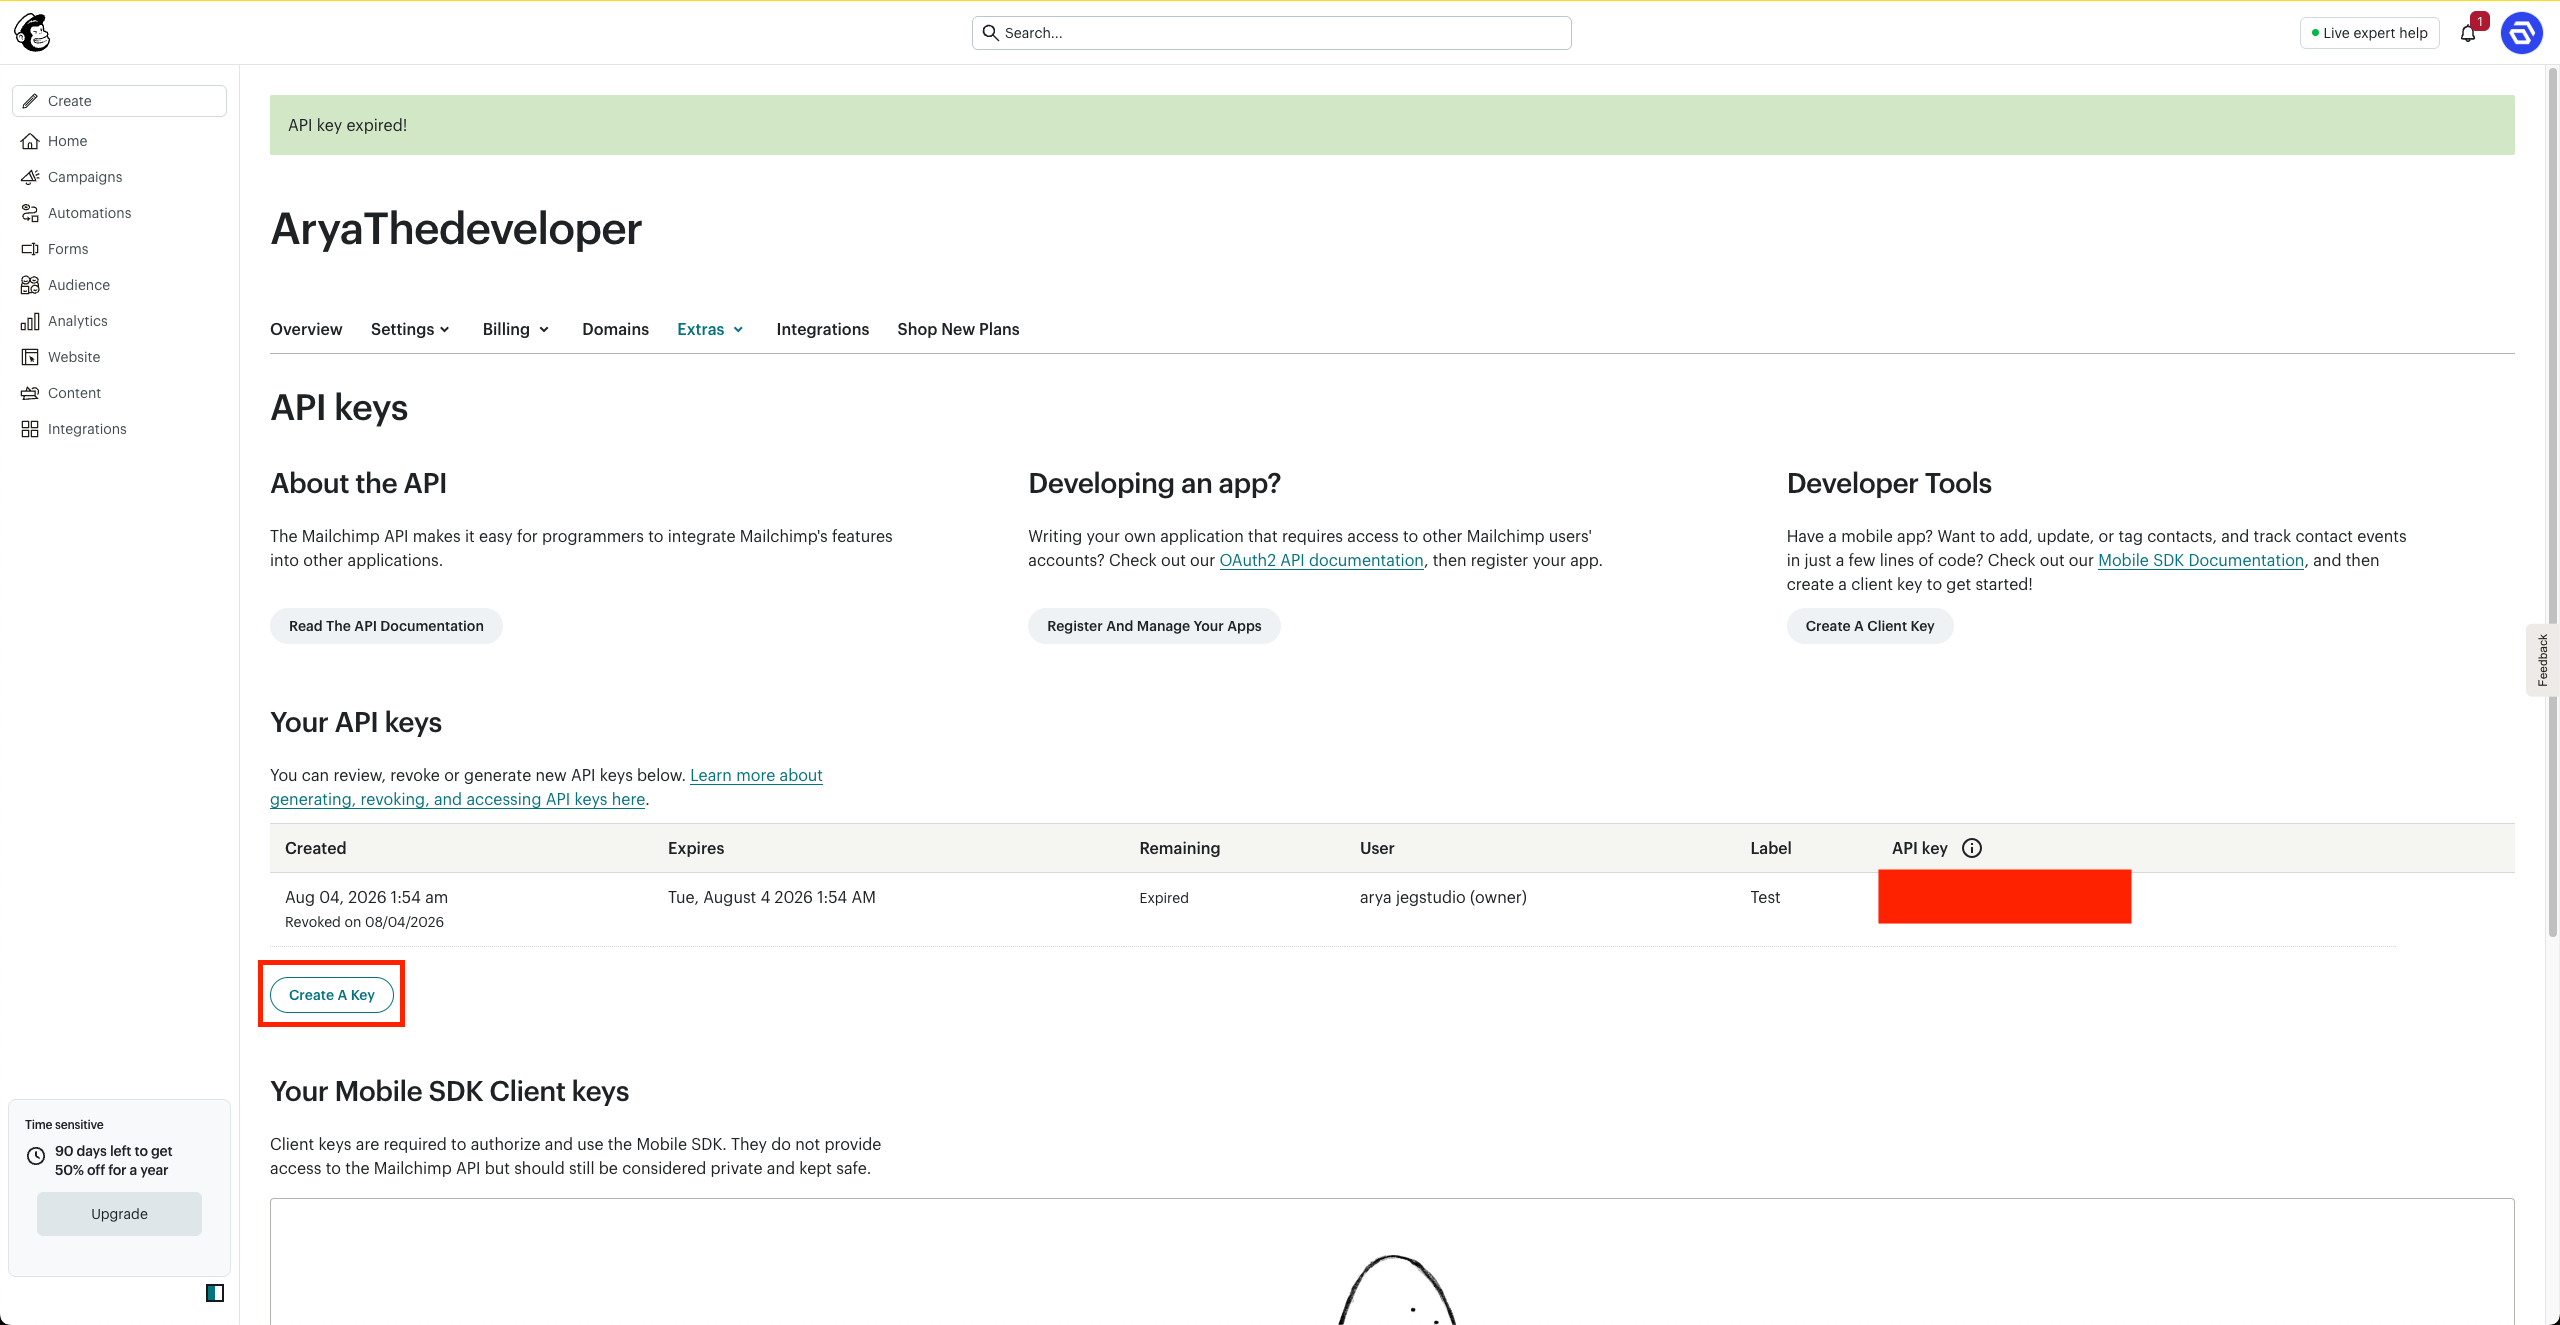
Generate an API Key
The Mailchimp Transactional API uses an API key to authenticate requests.
To generate an API key:
Note: The API key is displayed only once. After you leave the page, you won’t be able to view or copy it again.
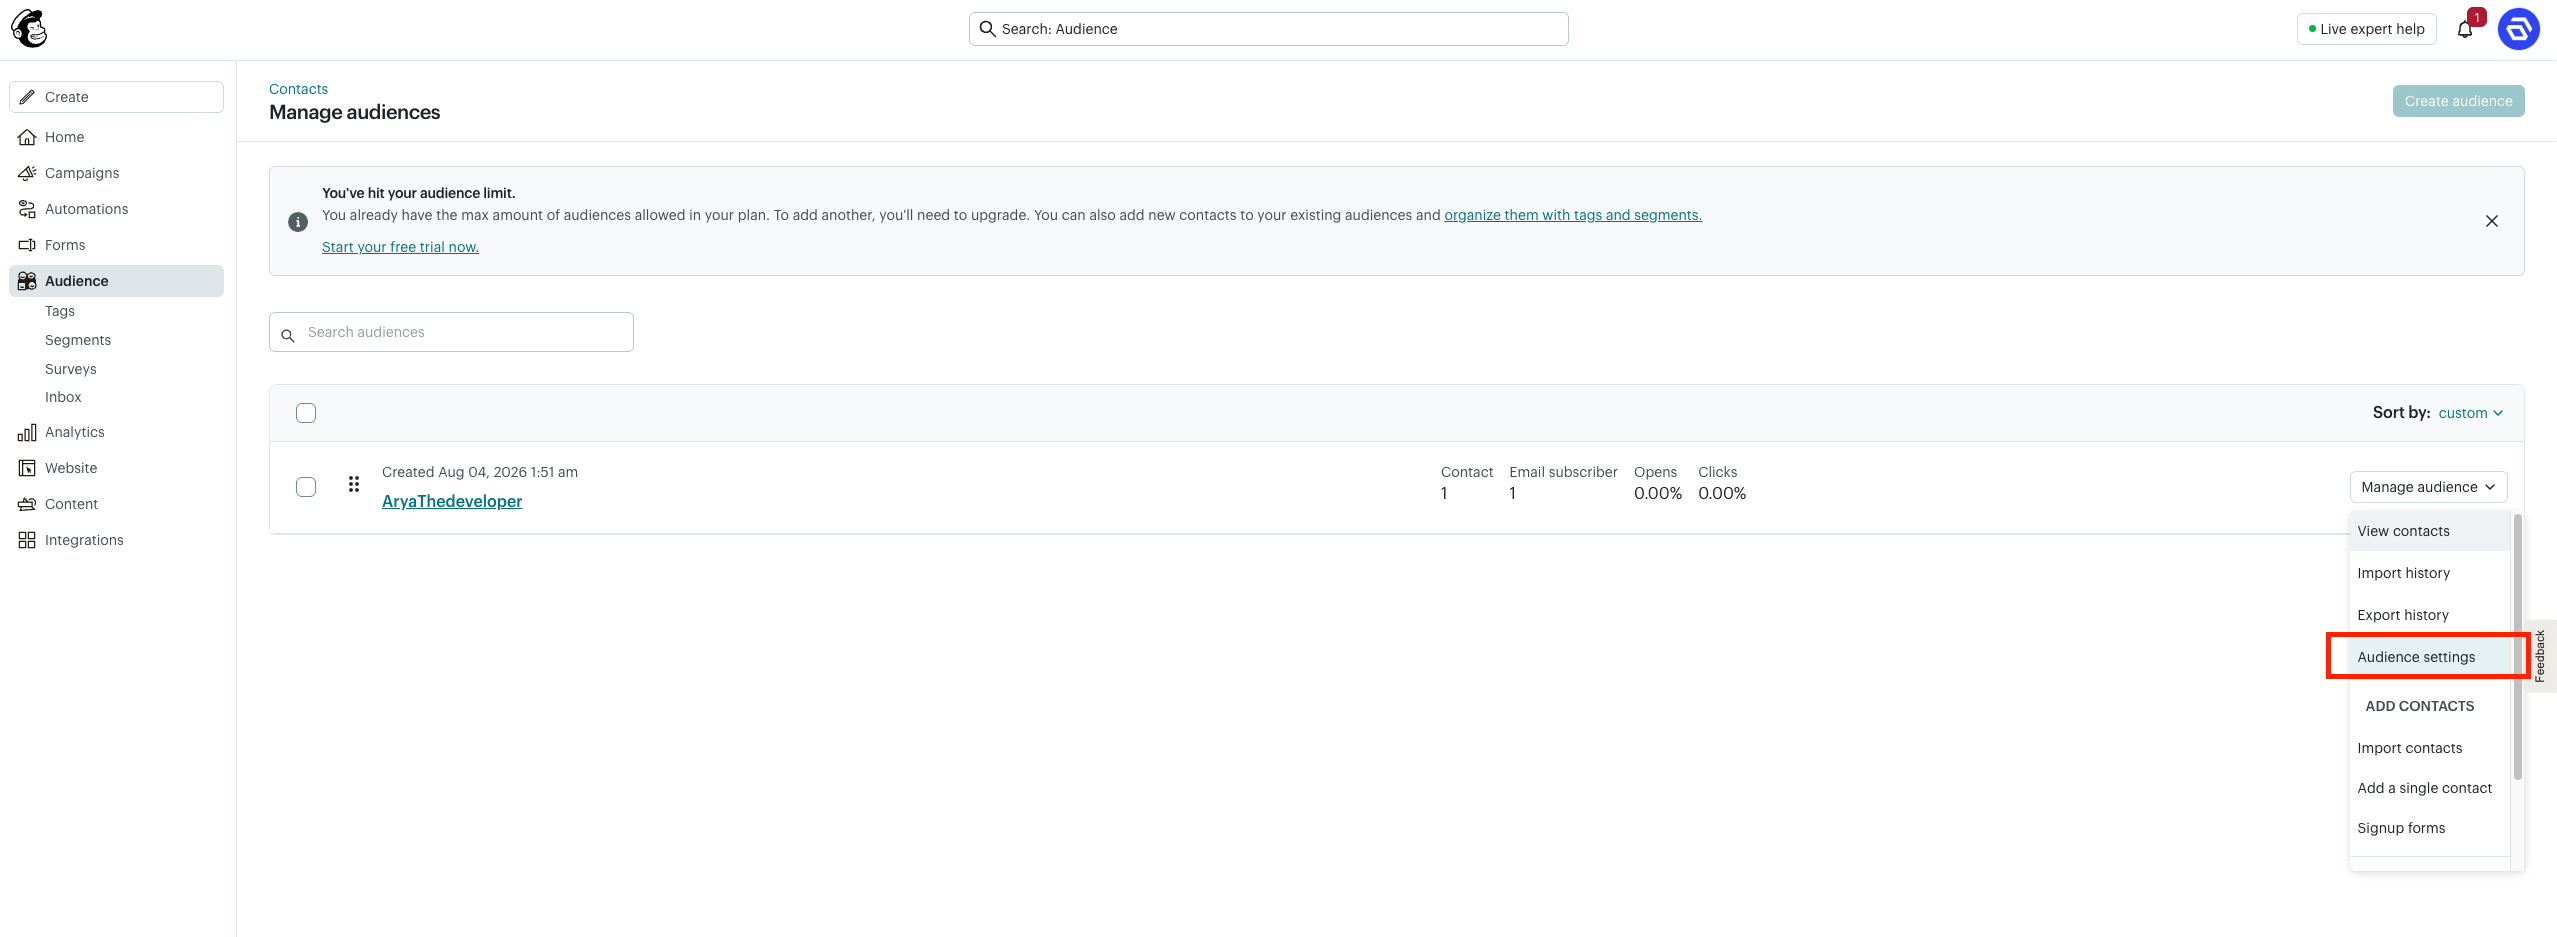
Find Your Audience ID
To locate your Audience ID:
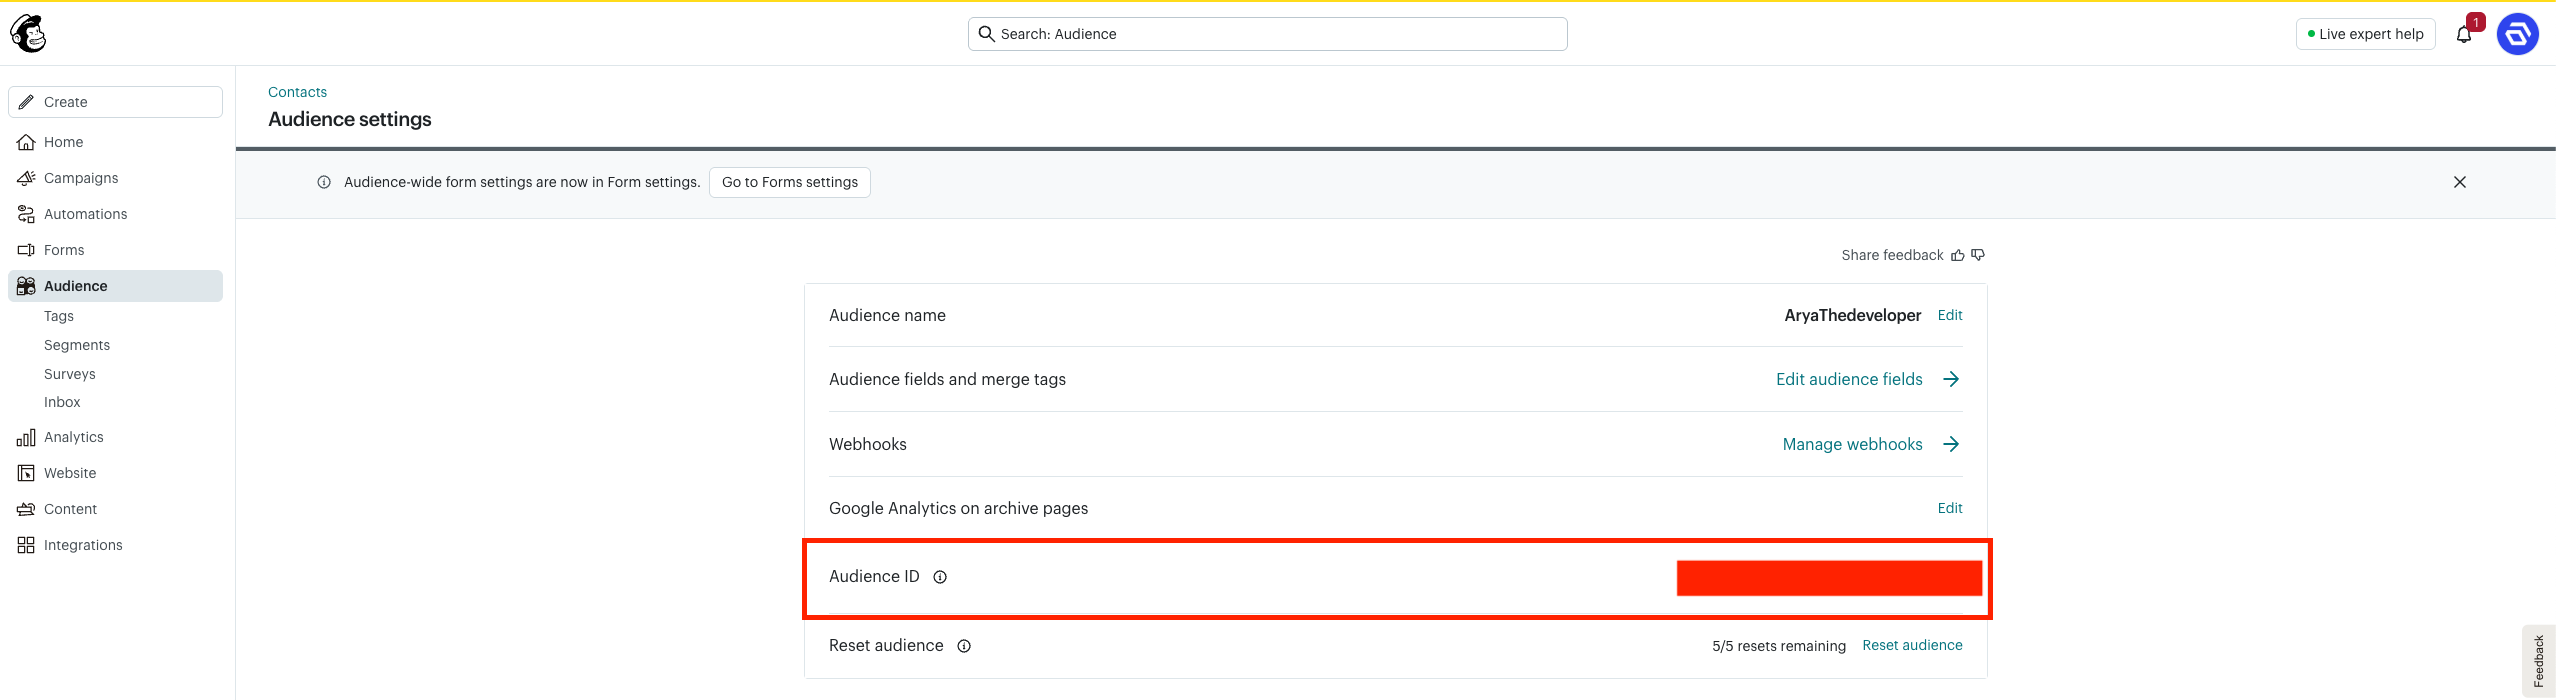
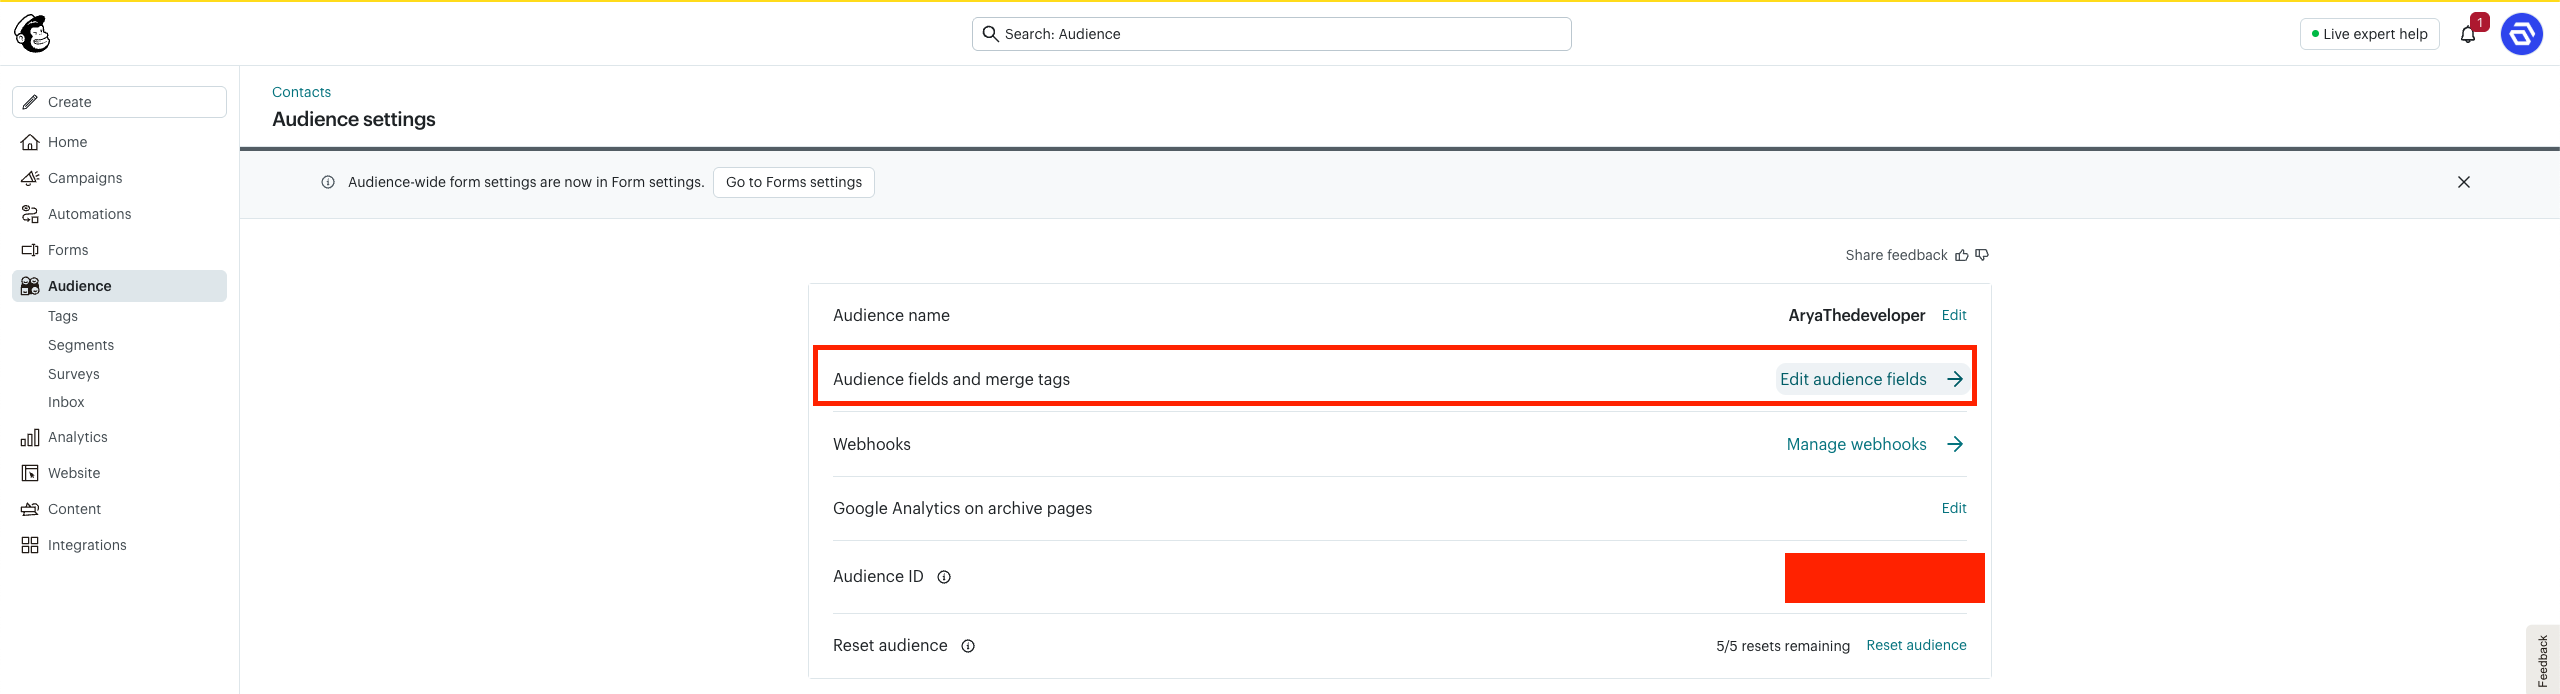
Find Merge Field Names
Go to: Audience → Settings → Audience fields and |MERGE|tags
Here you can view the merge field names (merge tags) for your audience, such as FNAME, LNAME, and any custom fields.
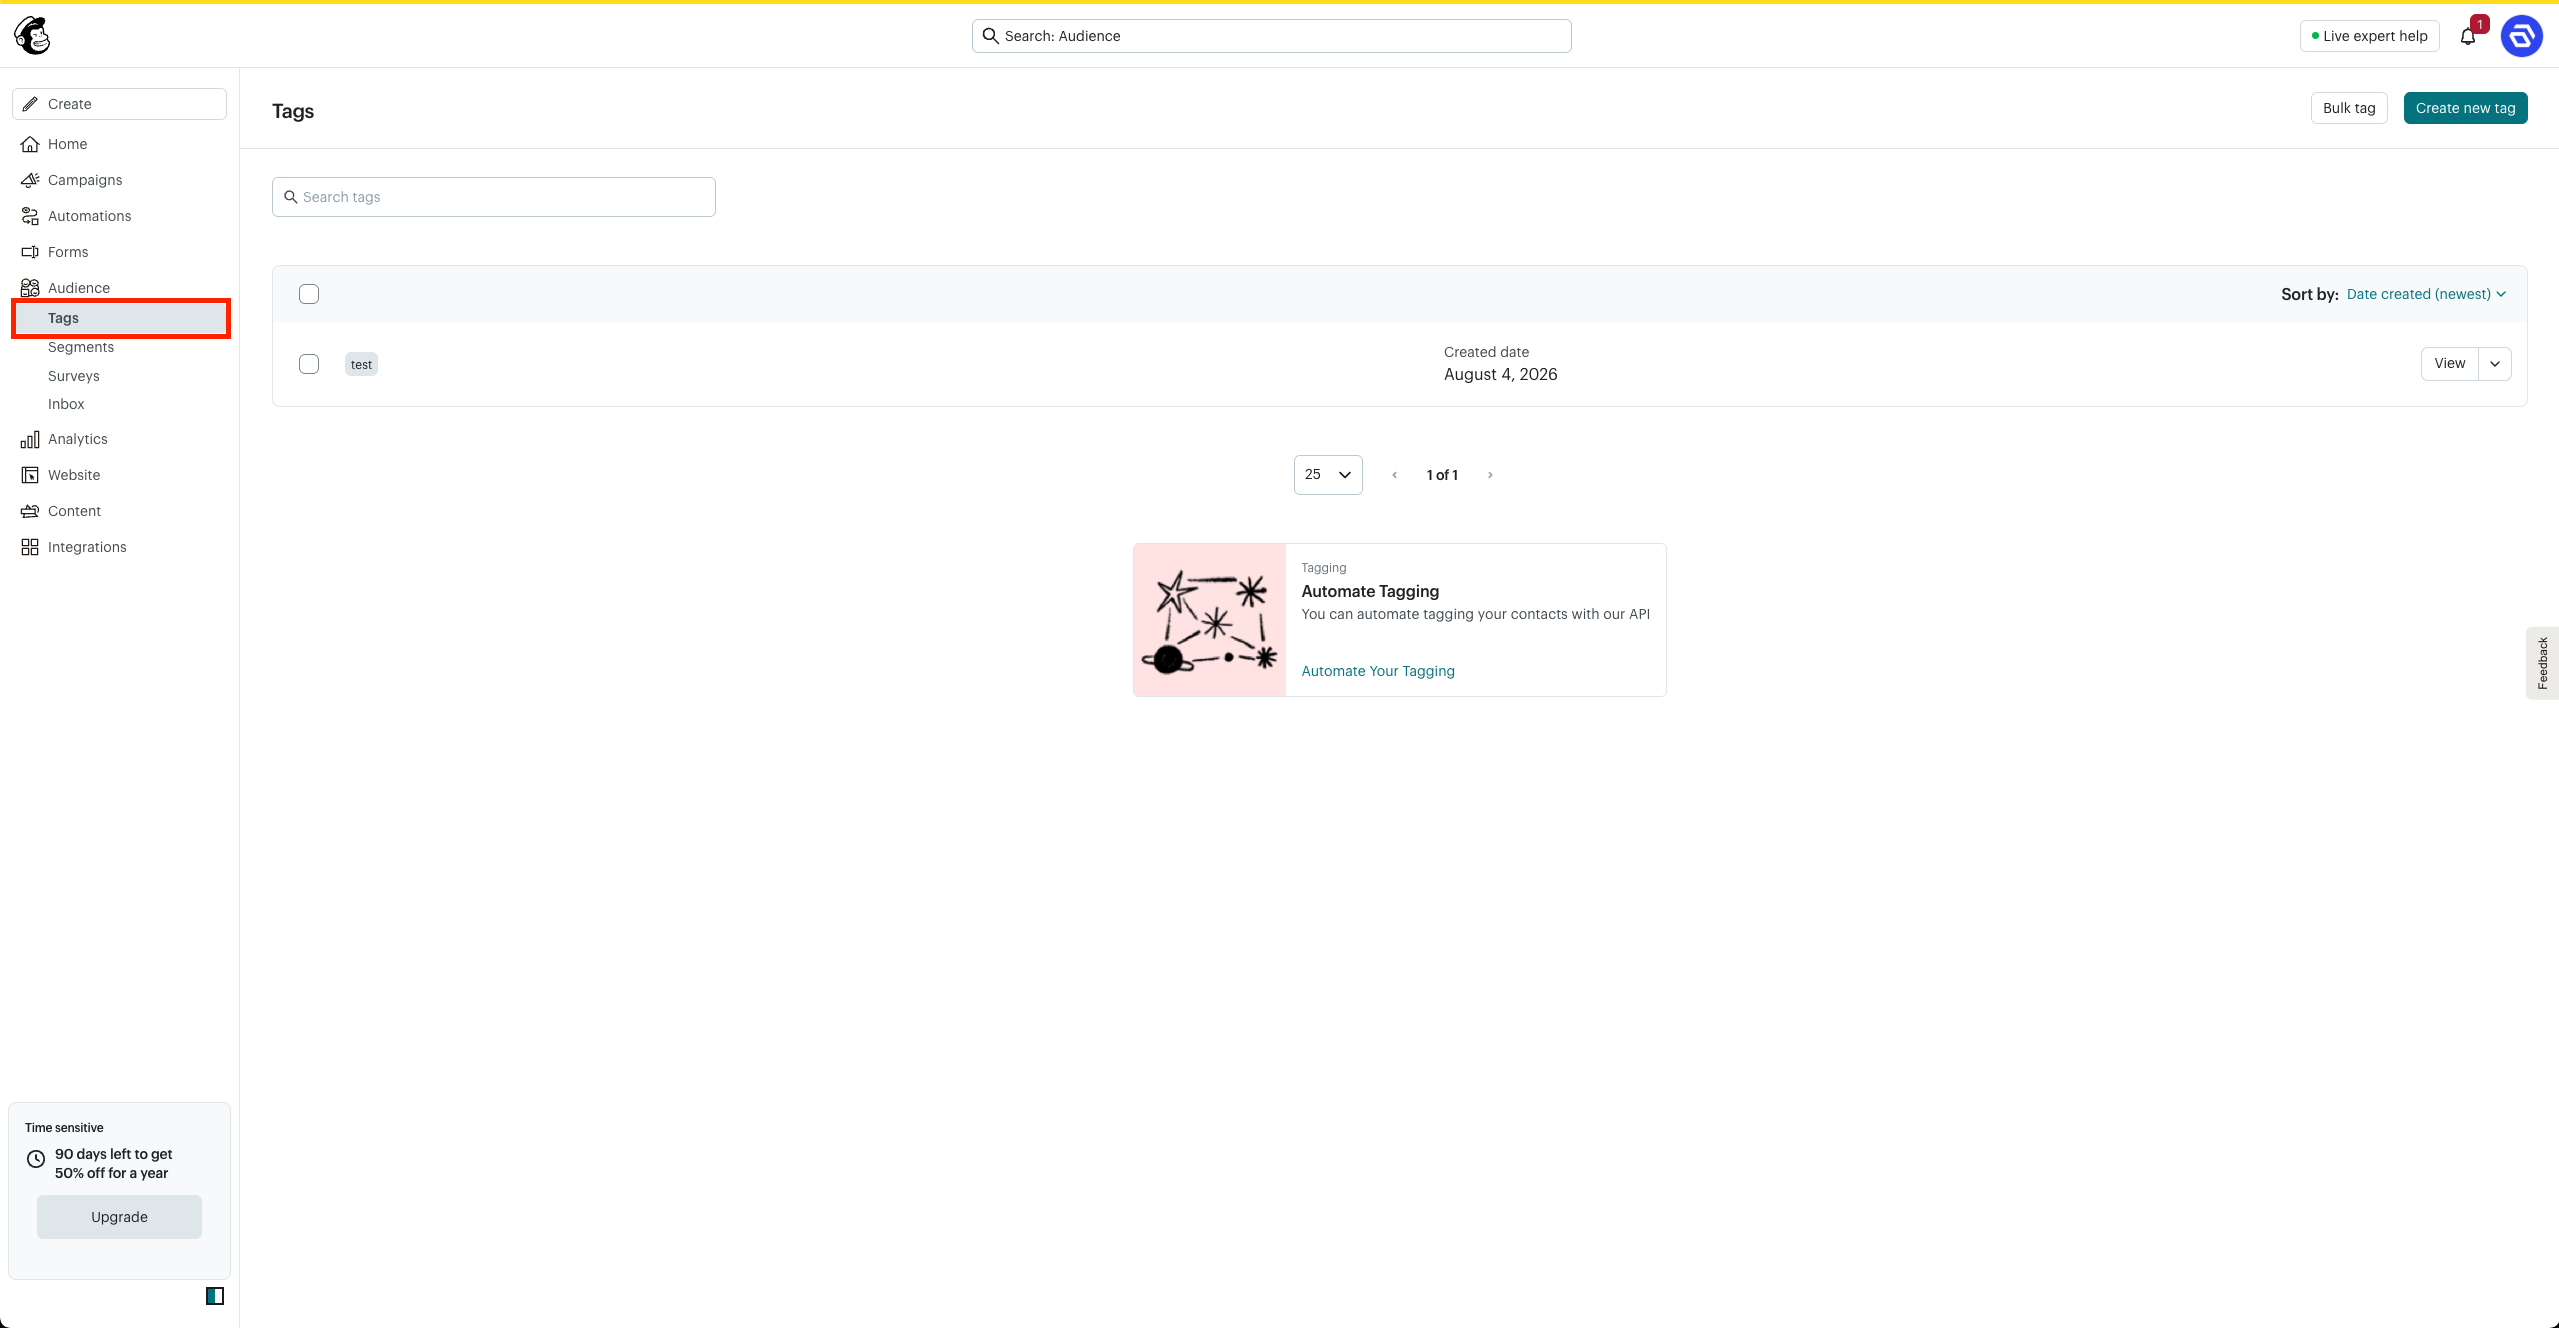
View Audience Tags
Go to:
Audience → All contacts → Tags
This page displays all tags associated with your audience and allows you to create and manage them.
Gutenverse Form Mailchimp Setup
You can configure these settings either in the Form Action or globally in the integration settings.
The global settings serve as a fallback and are used only when the integration settings are not configured in the Form Action.
Note: If any Integration settings are configured in the Form Action, the form will use only the Form Action settings. It will not combine or merge them with the global settings.
Setup Globally
1. Navigate to Gutenverse → Form Integrations.
2. Enable the Mailchimp integration.
3. Then Click “Continue Setup”
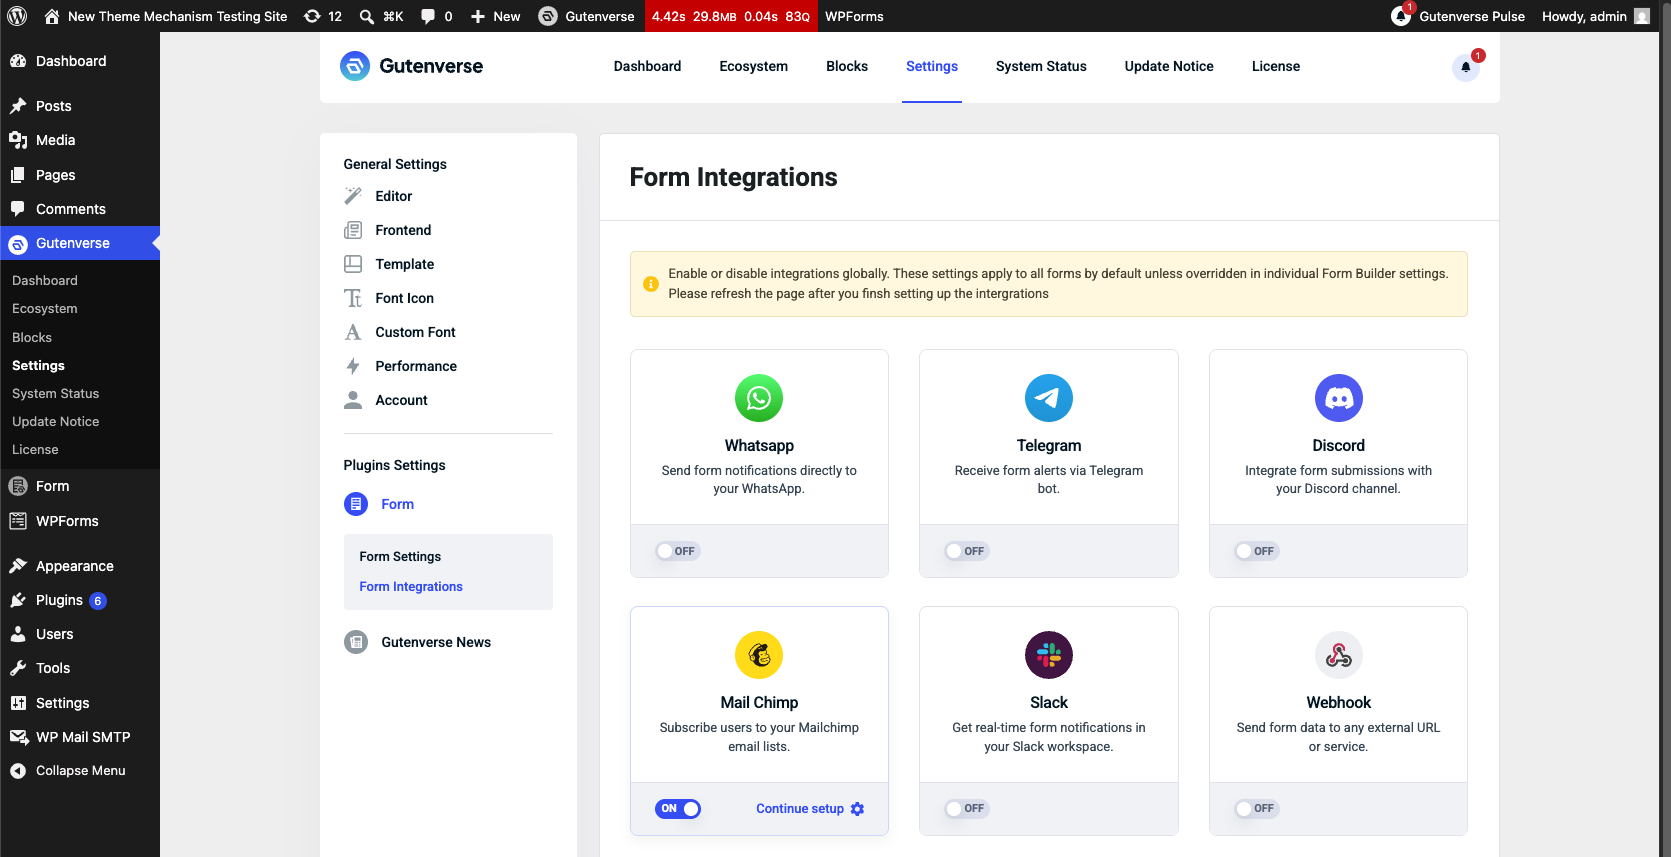
4. Configure the required settings:
5. (Optional) Configure additional settings:
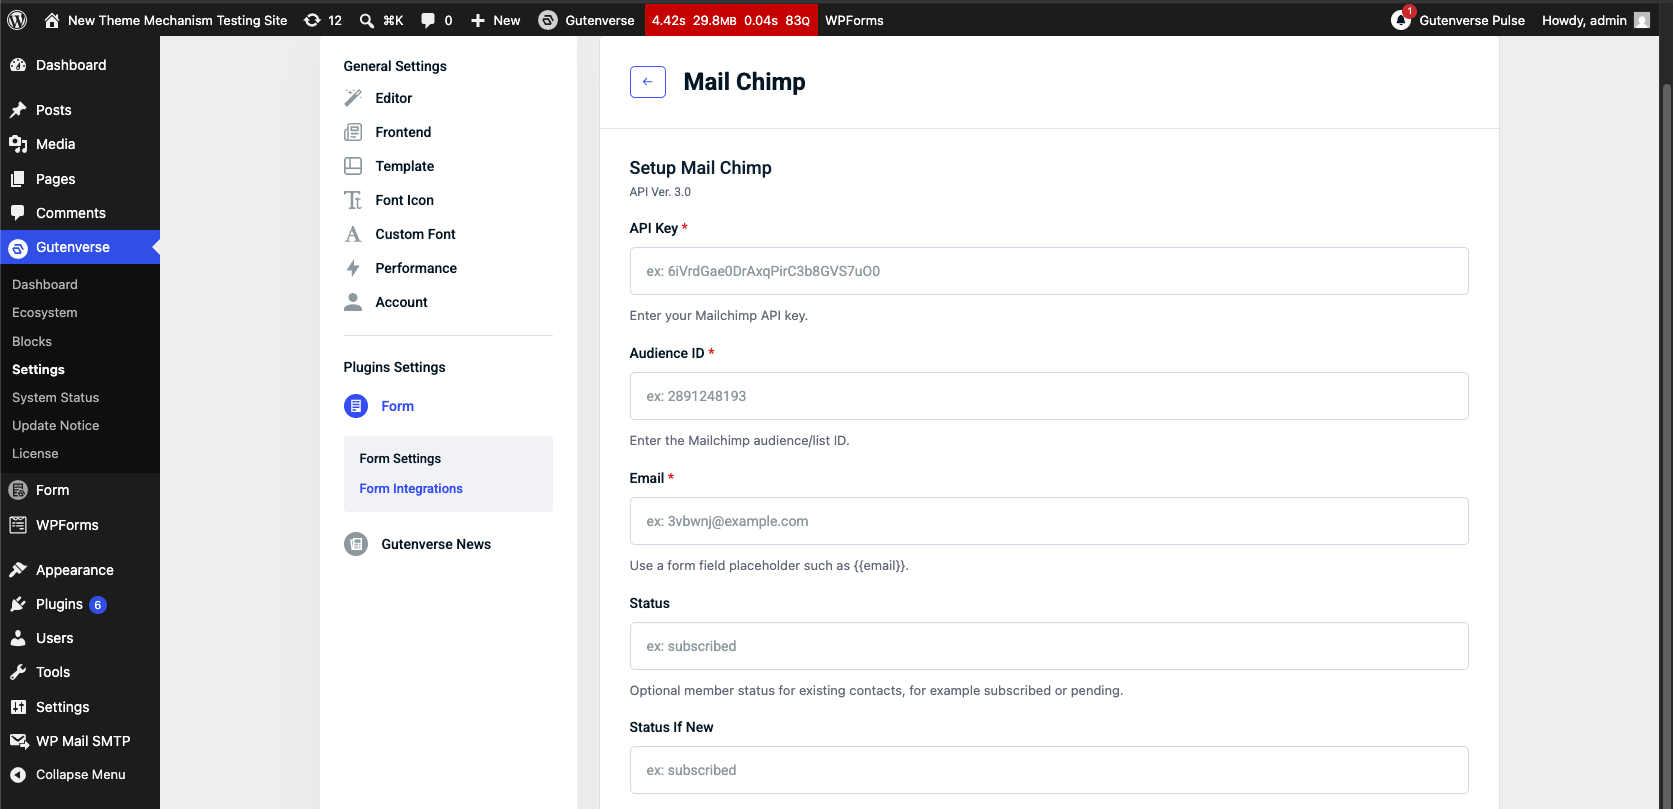
6. Click Save Changes.
Setup in Form Action
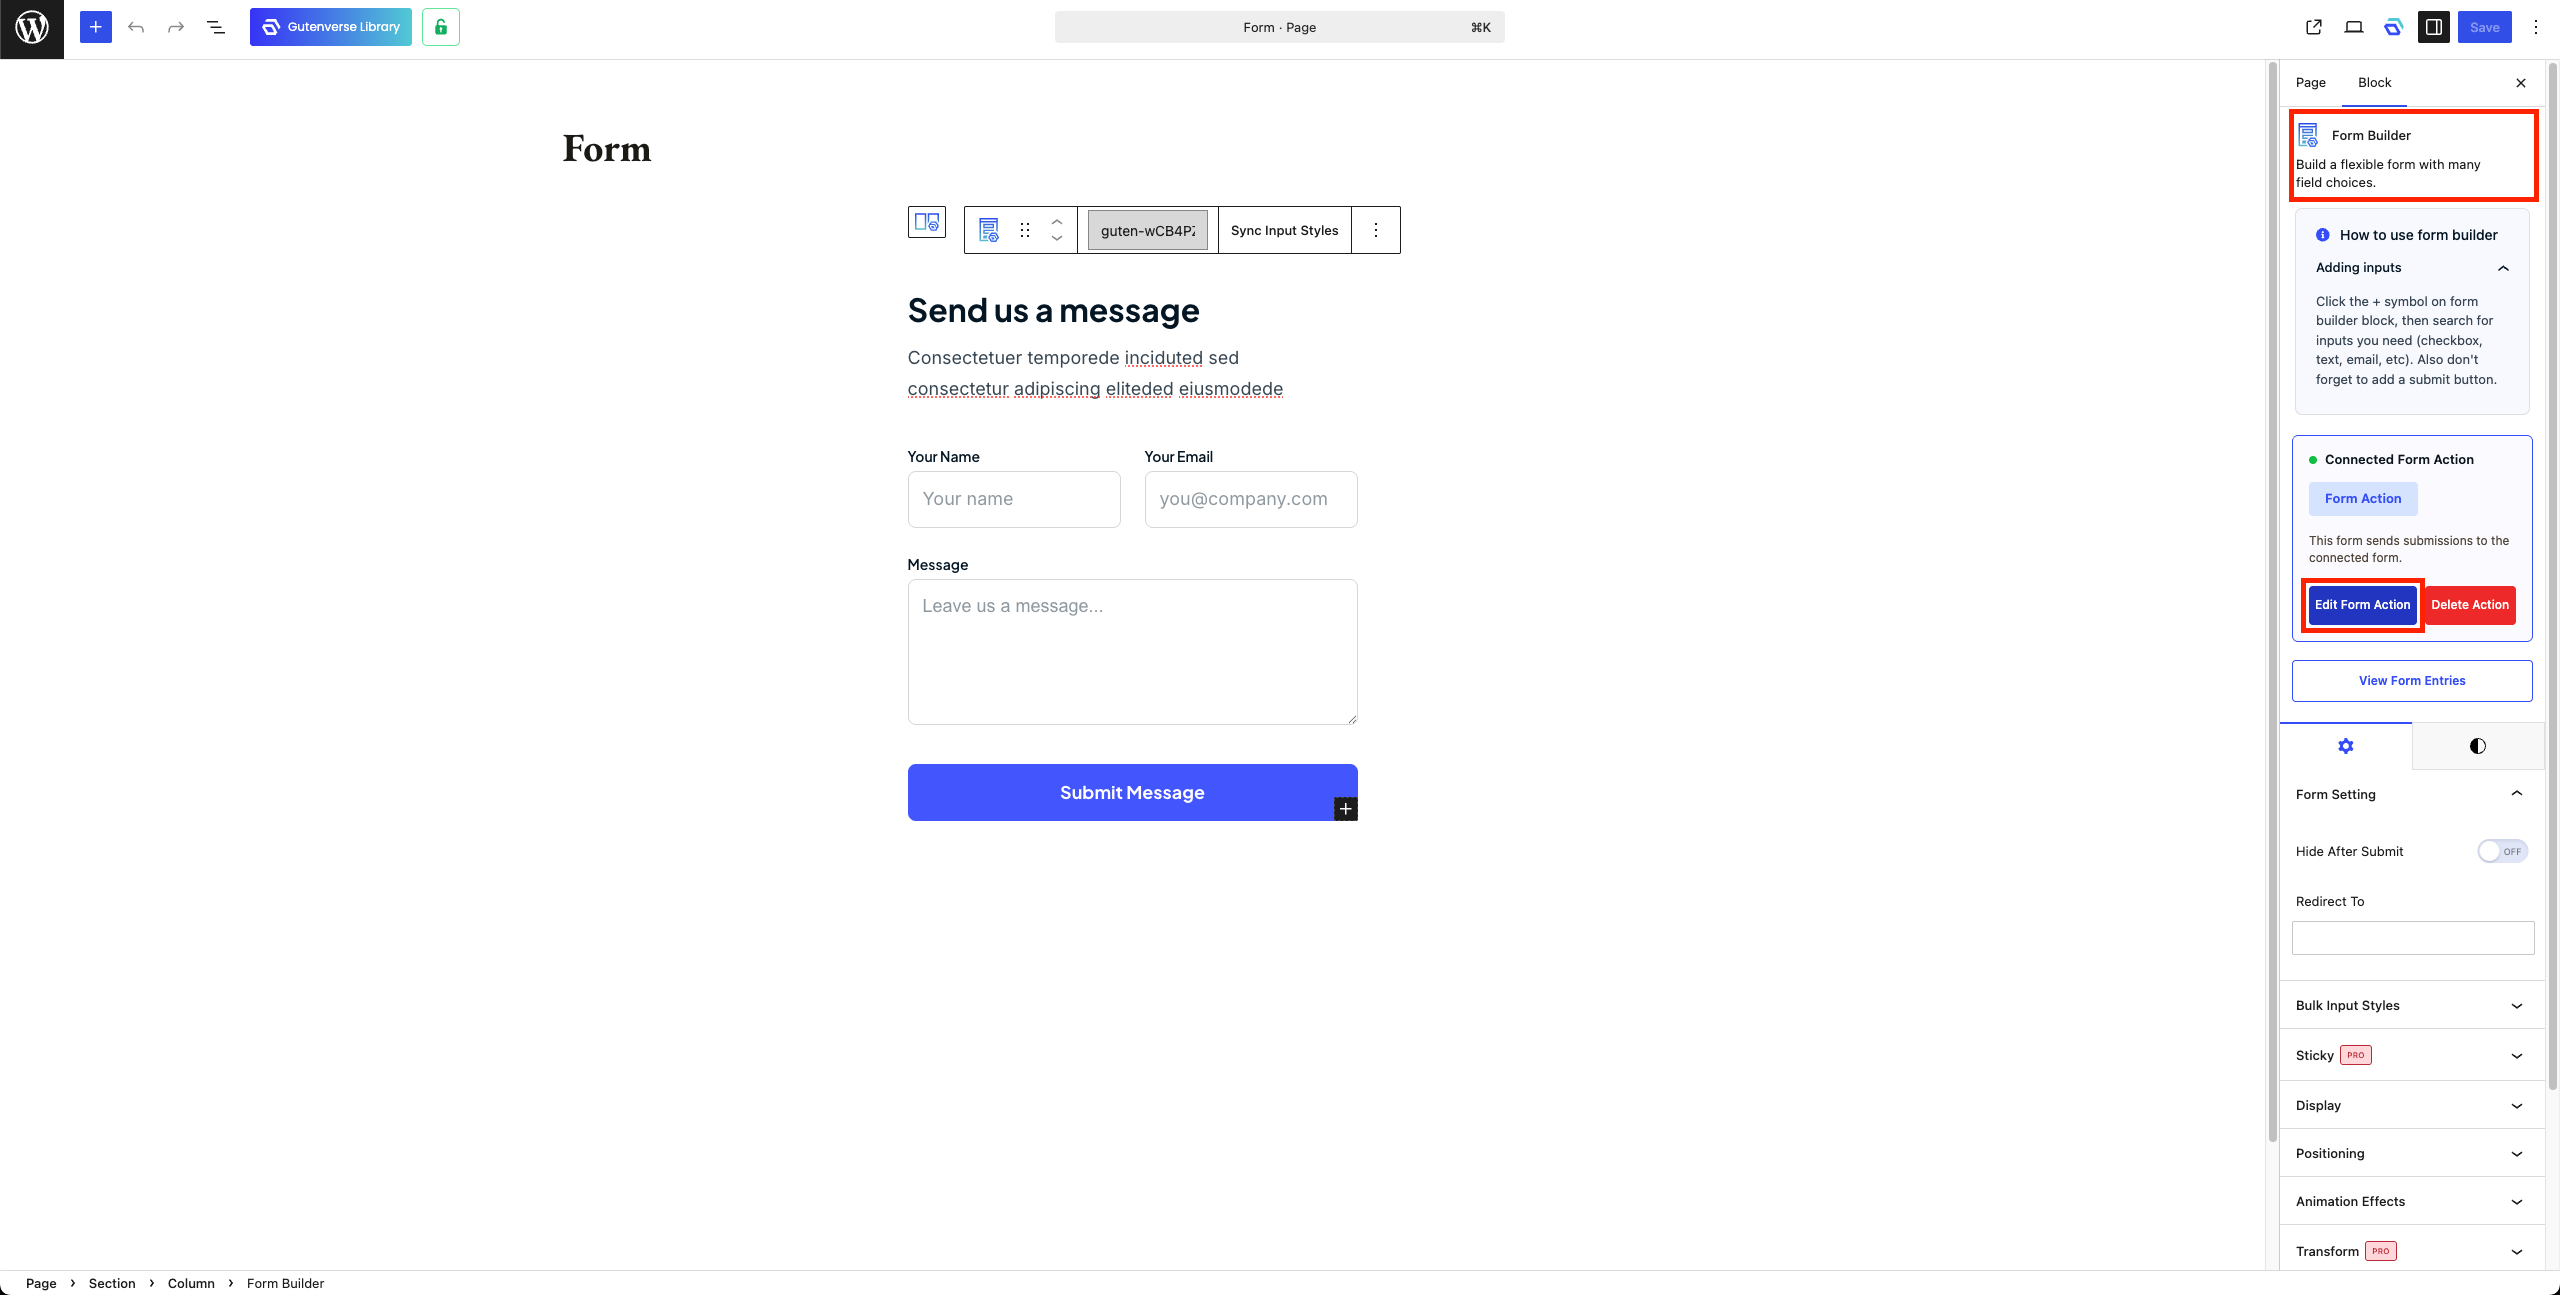
1. In Editor, Select Form Builder then open Form Action.
2. Open Integration Tab.
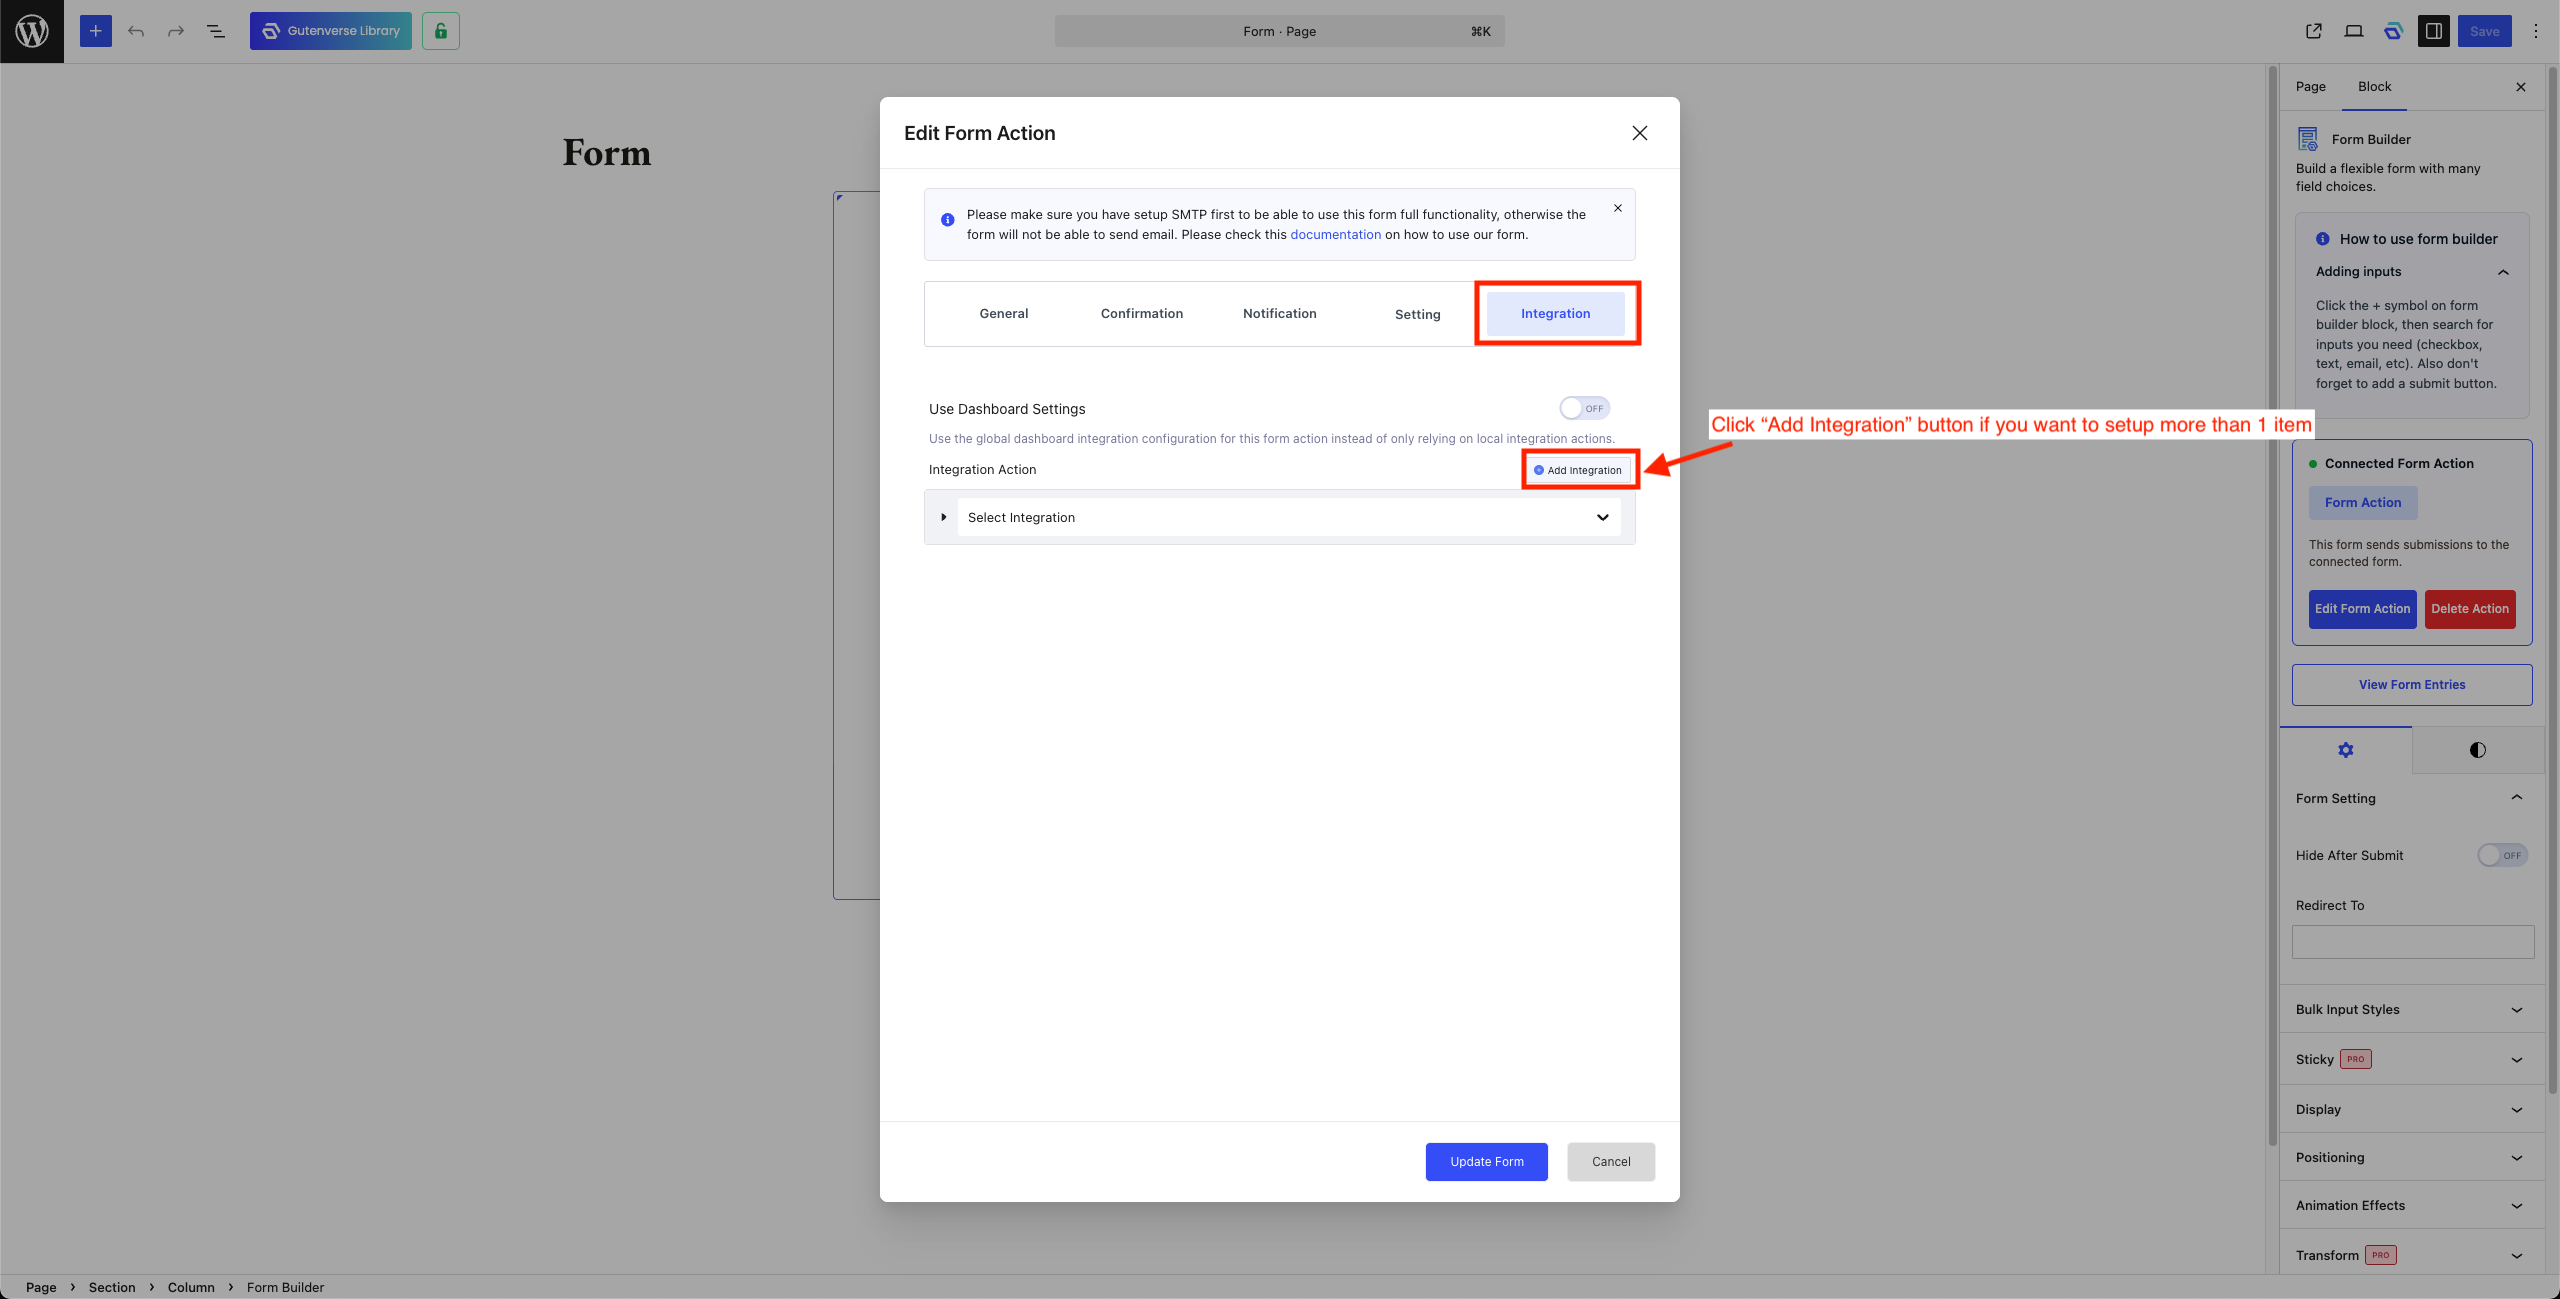
3. Select “MailChimp” to setup Mailchimp integration.
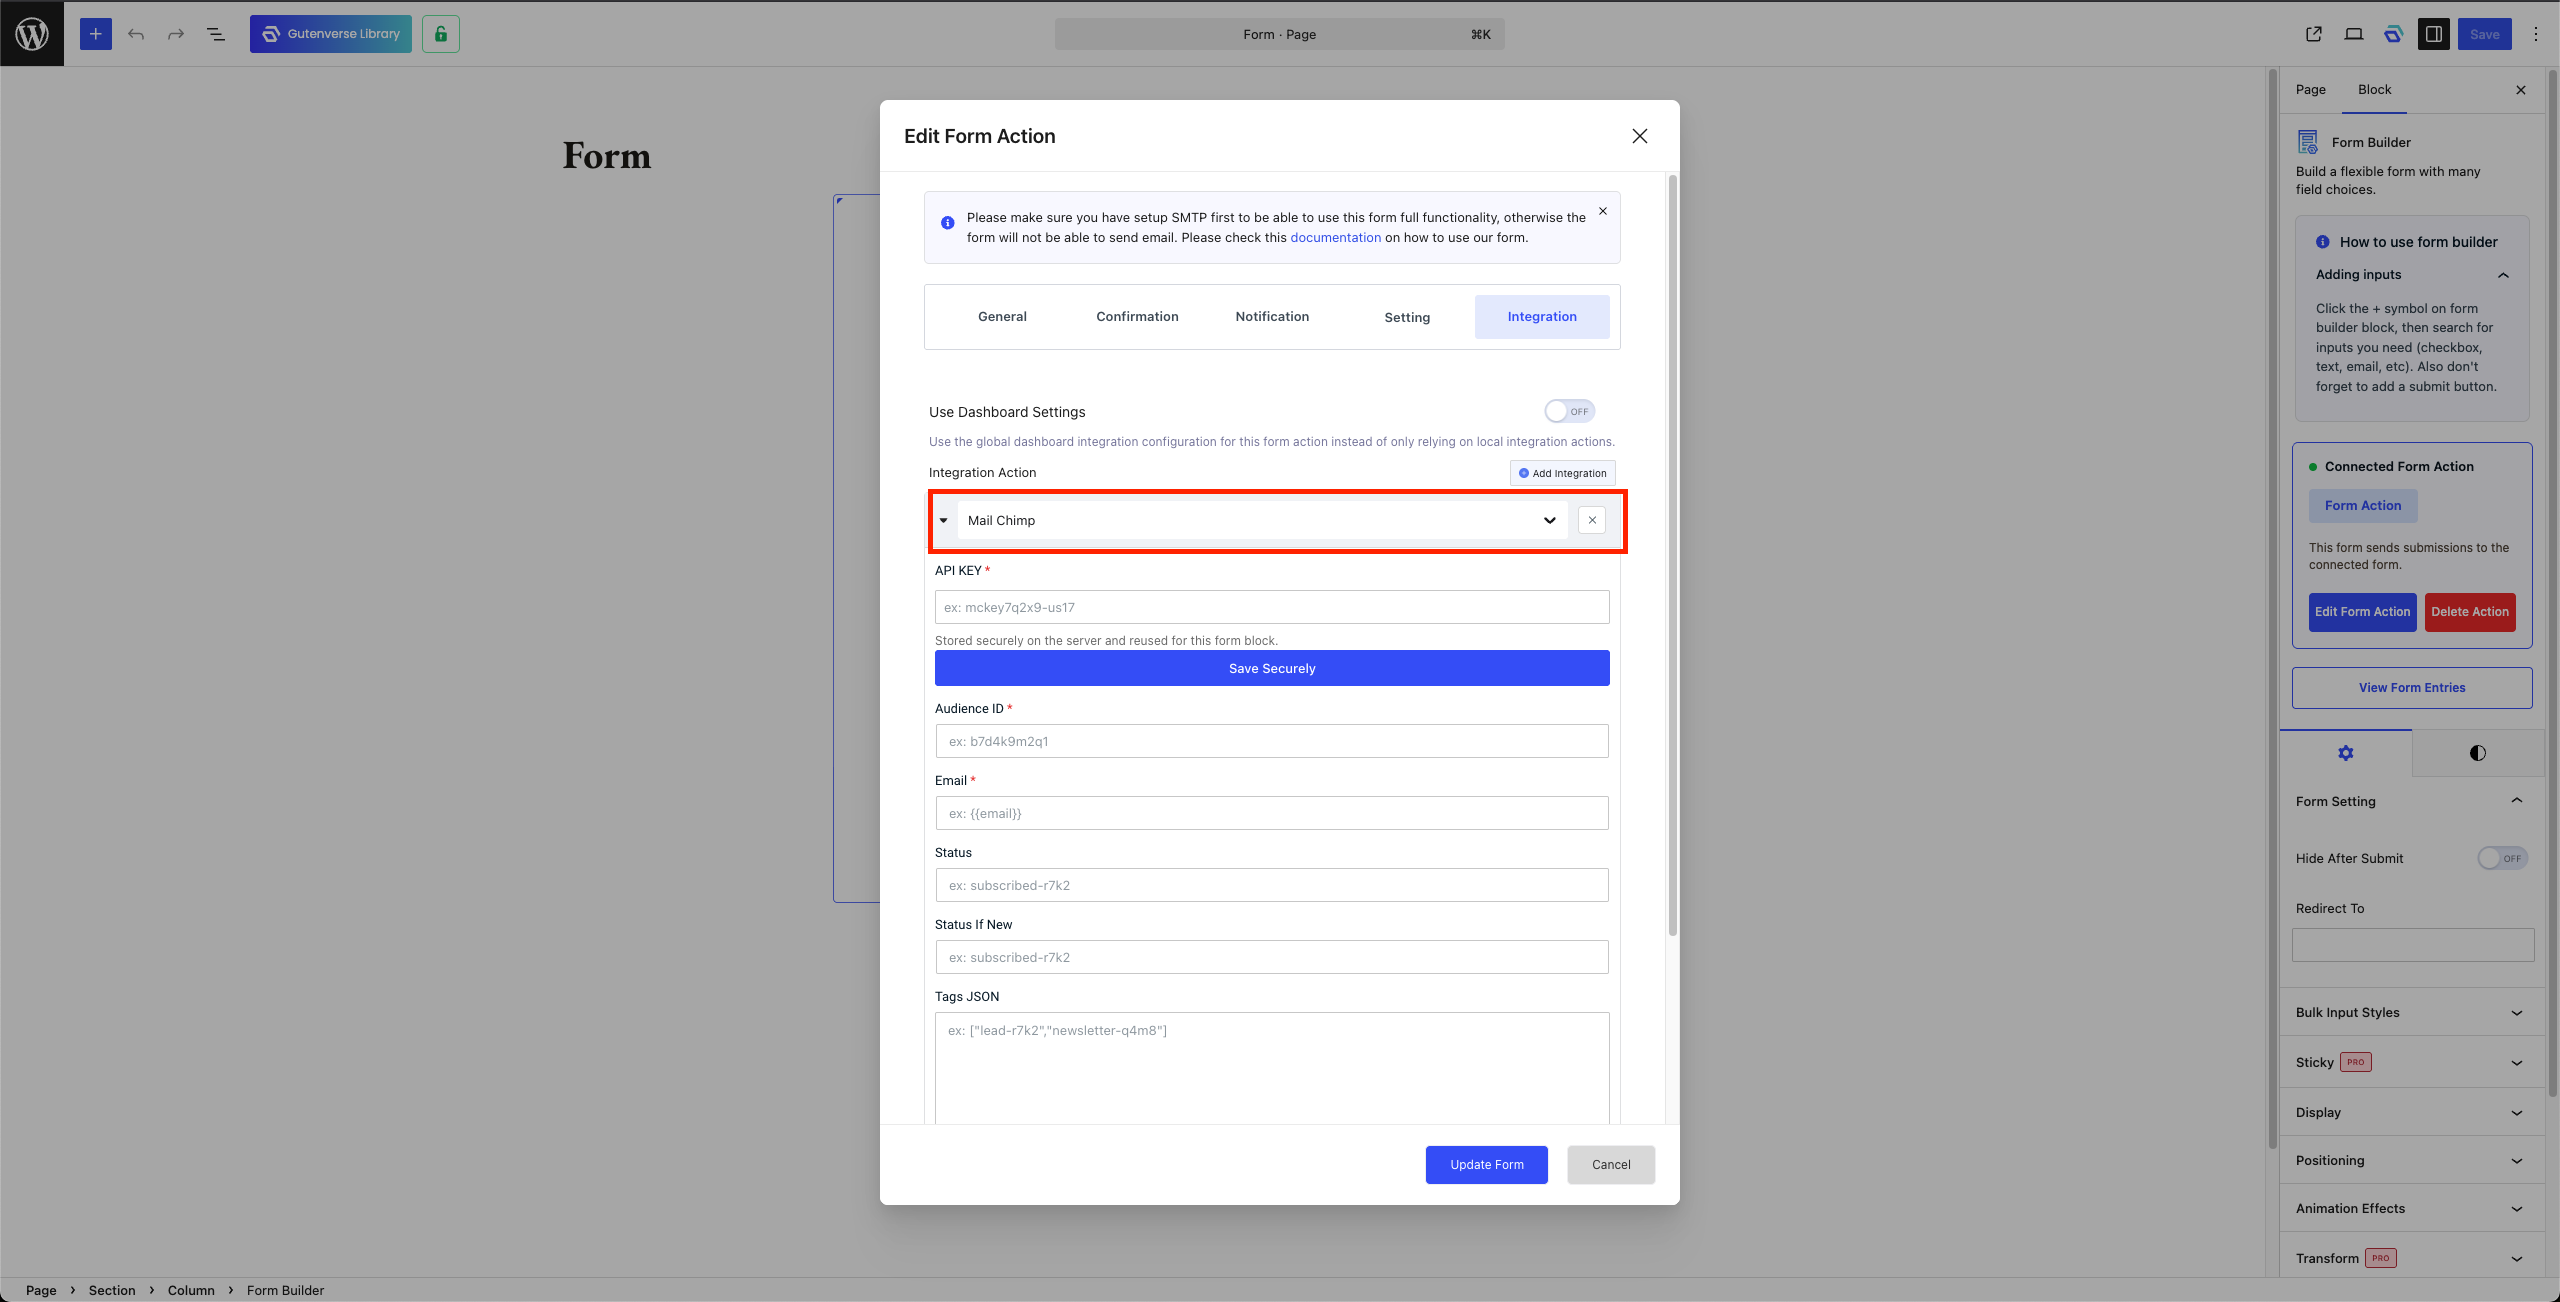
4. Configure the required settings:
Note: API Key need to be saved securely so after paste the API Key click on Save Securely
5. (Optional) Configure additional settings:
6. Click Update Form.