











Last Update: November 4, 2026
Gutenverse Optimizer
Gutenverse Optimizer helps you find image, performance, SEO, and accessibility issues, apply supported fixes, and review the results from one dashboard.
The scanner checks your rendered content in desktop and mobile layouts. Scanning alone does not change your content; you choose which fixes to apply.
Before You Start
Before applying changes: Back up your website and try the settings on a staging website first. Clear page, server, and CDN caches after applying changes and before checking the results.
Install and Open Optimizer
1. Go to Plugins > Add New Plugin > Upload Plugin in WordPress.
2. Upload the Gutenverse Optimizer ZIP, click Install Now, then Activate Plugin.
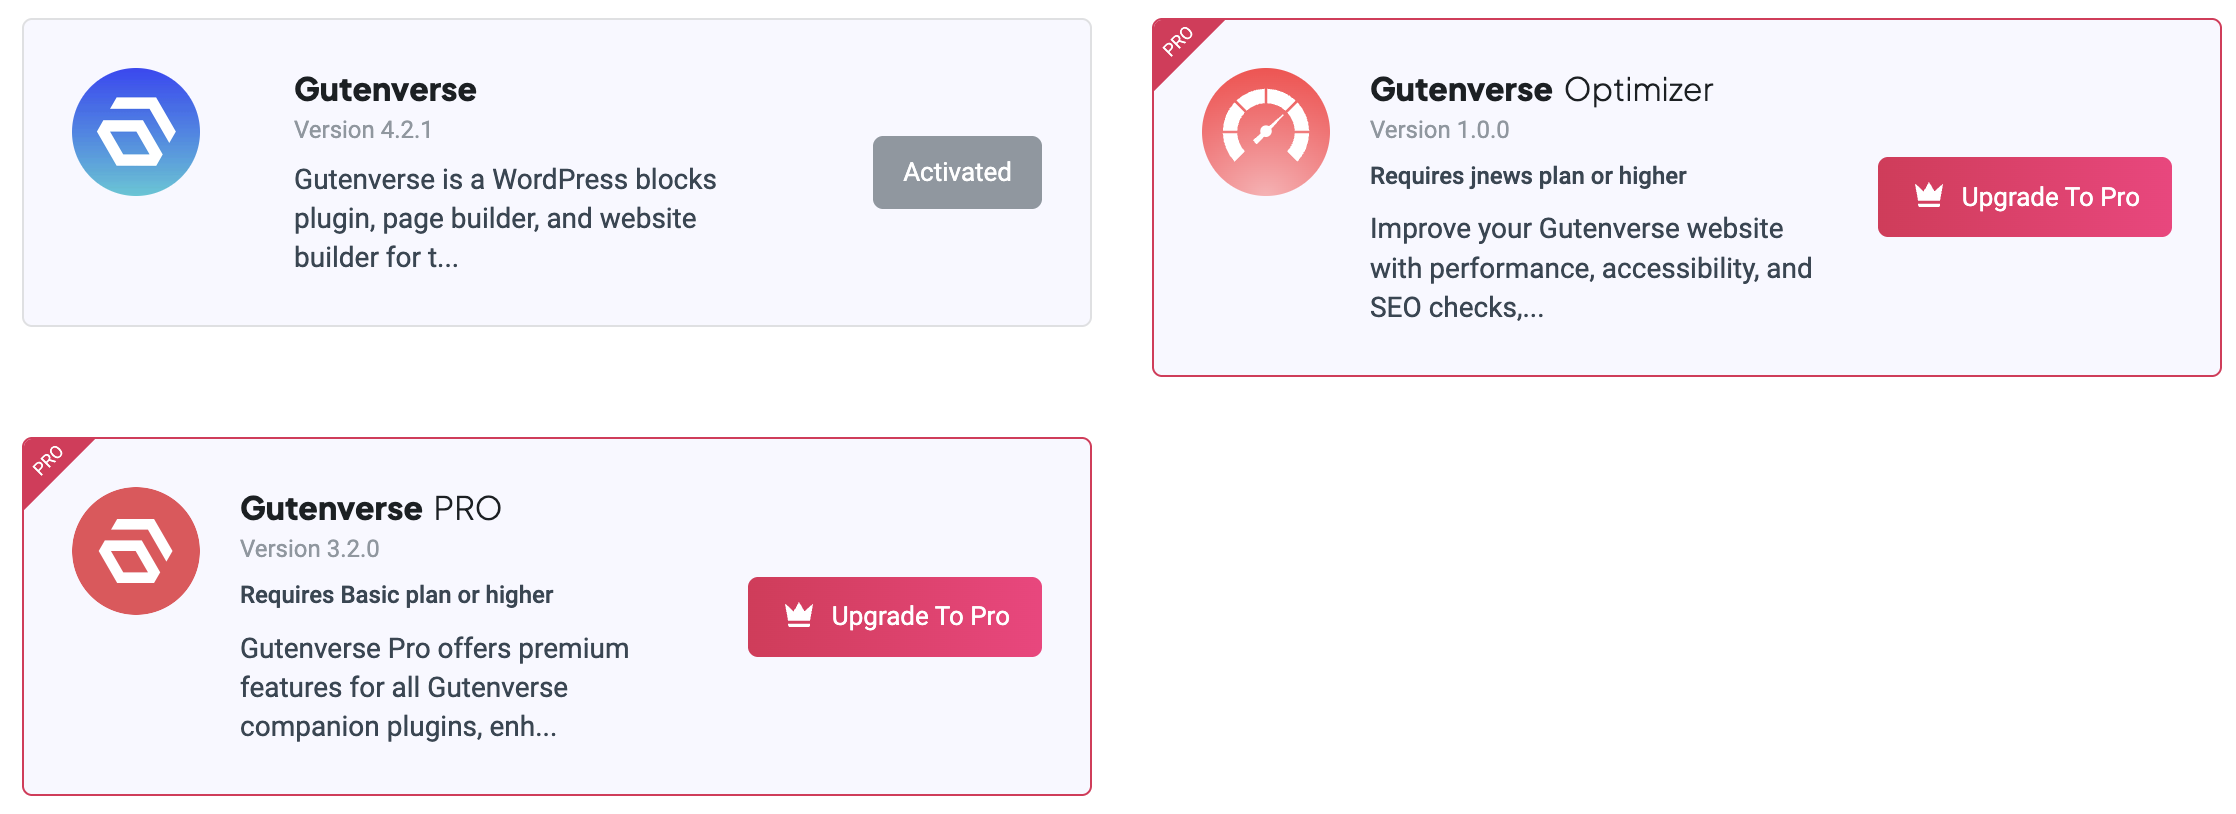
3. Activate your eligible Gutenverse Pro license under Gutenverse > License.
4. Open Gutenverse > Optimizer.
Scan Your Website
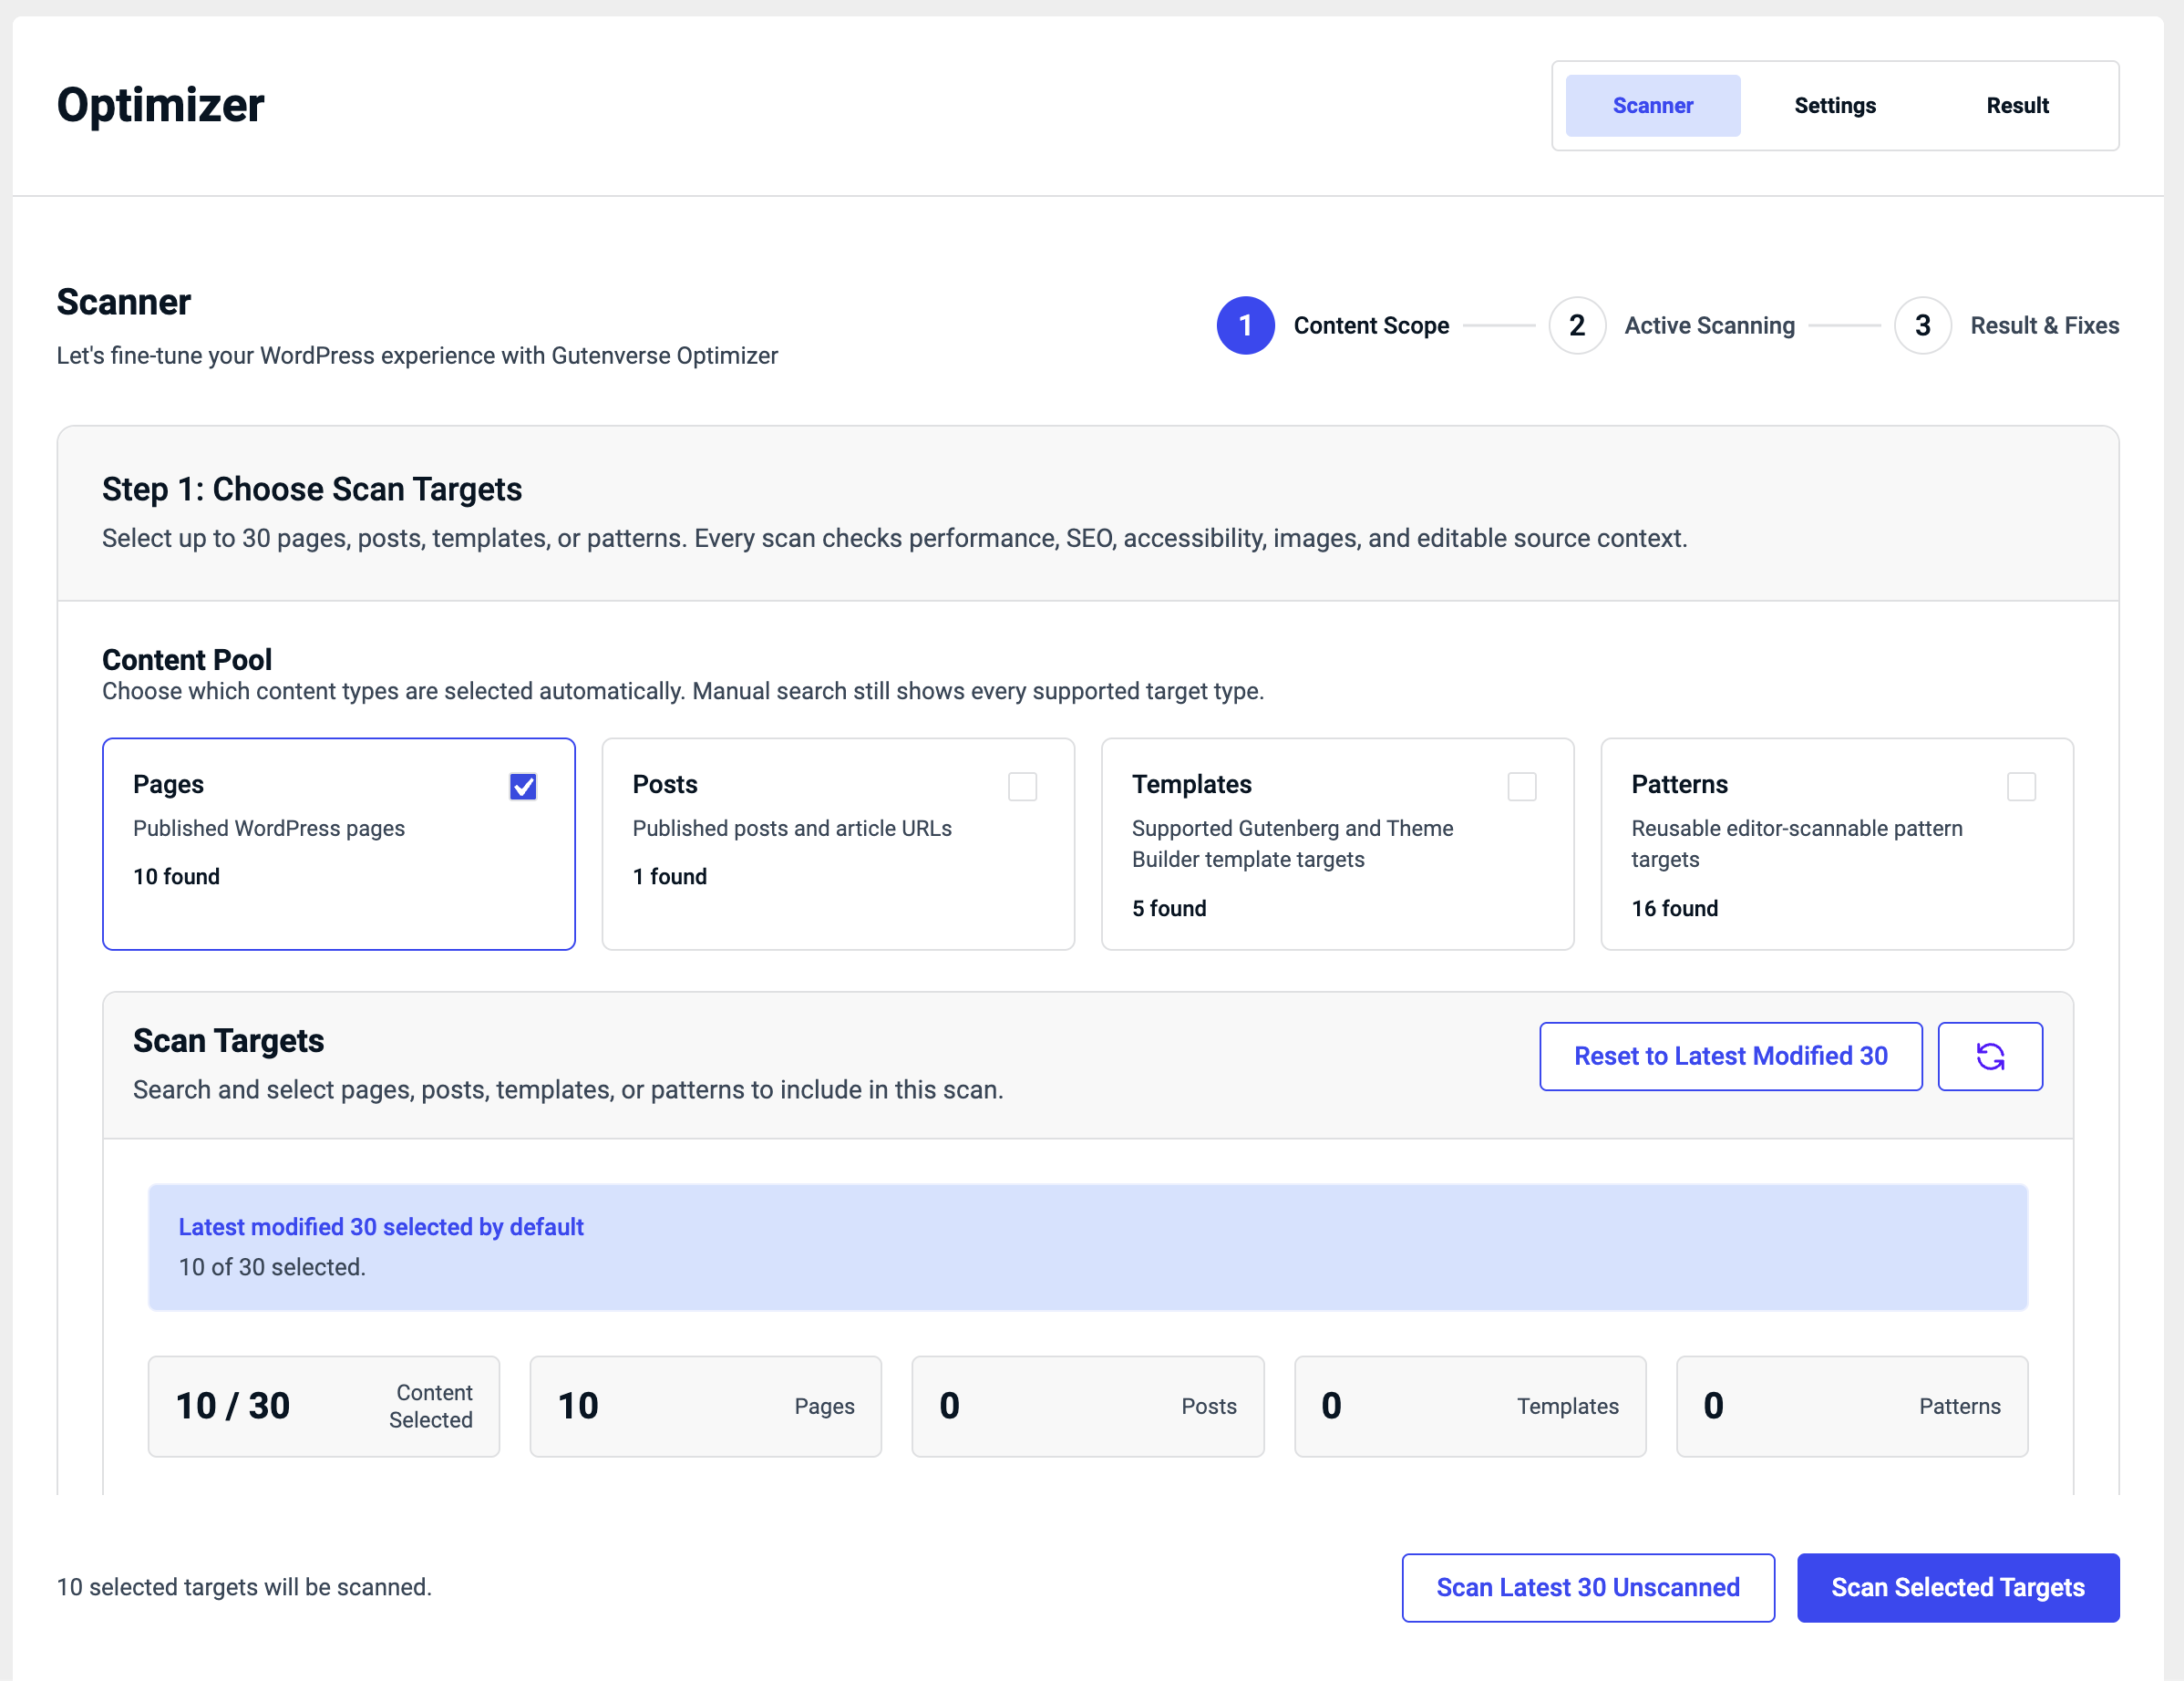
1. Open the Scanner tab and choose the content types to include. Pages, Posts, Templates, and Patterns are available when supported by your site.
2. Select a small group of important targets. Use search and the content-type filter to find them.
3. Click Scan Selected Targets, or use Scan Latest 30 Unscanned for a starting batch.
4. Keep the browser tab open until the scan finishes, then review Result & Fixes.
Findings can include JPEG/PNG images, missing image dimensions or alternative text, heading issues, missing accessible labels, icon-font usage, and an image-priority recommendation.
Some findings need manual editing. For example, update headings, alternative text, or accessible labels in the editor or template that owns the content.
Apply Supported Fixes
Review the recommendations, select the fixes you want, then click Apply Selected Fixes. Available actions depend on the detected content and your permissions.
WebP changes the Media Library item: Future uses of the same attachment receive WebP. Confirm this change when prompted. Original files are retained for rollback; some older saved image references may still need manual updating.
If a fix affects a shared pattern or template part, review the shared-source notice because other pages may use it too. Unsupported or uncertain sources are left for manual review.
After applying fixes, clear caches and re-scan the affected content. A successful change still needs verification.
Configure Optimization Settings
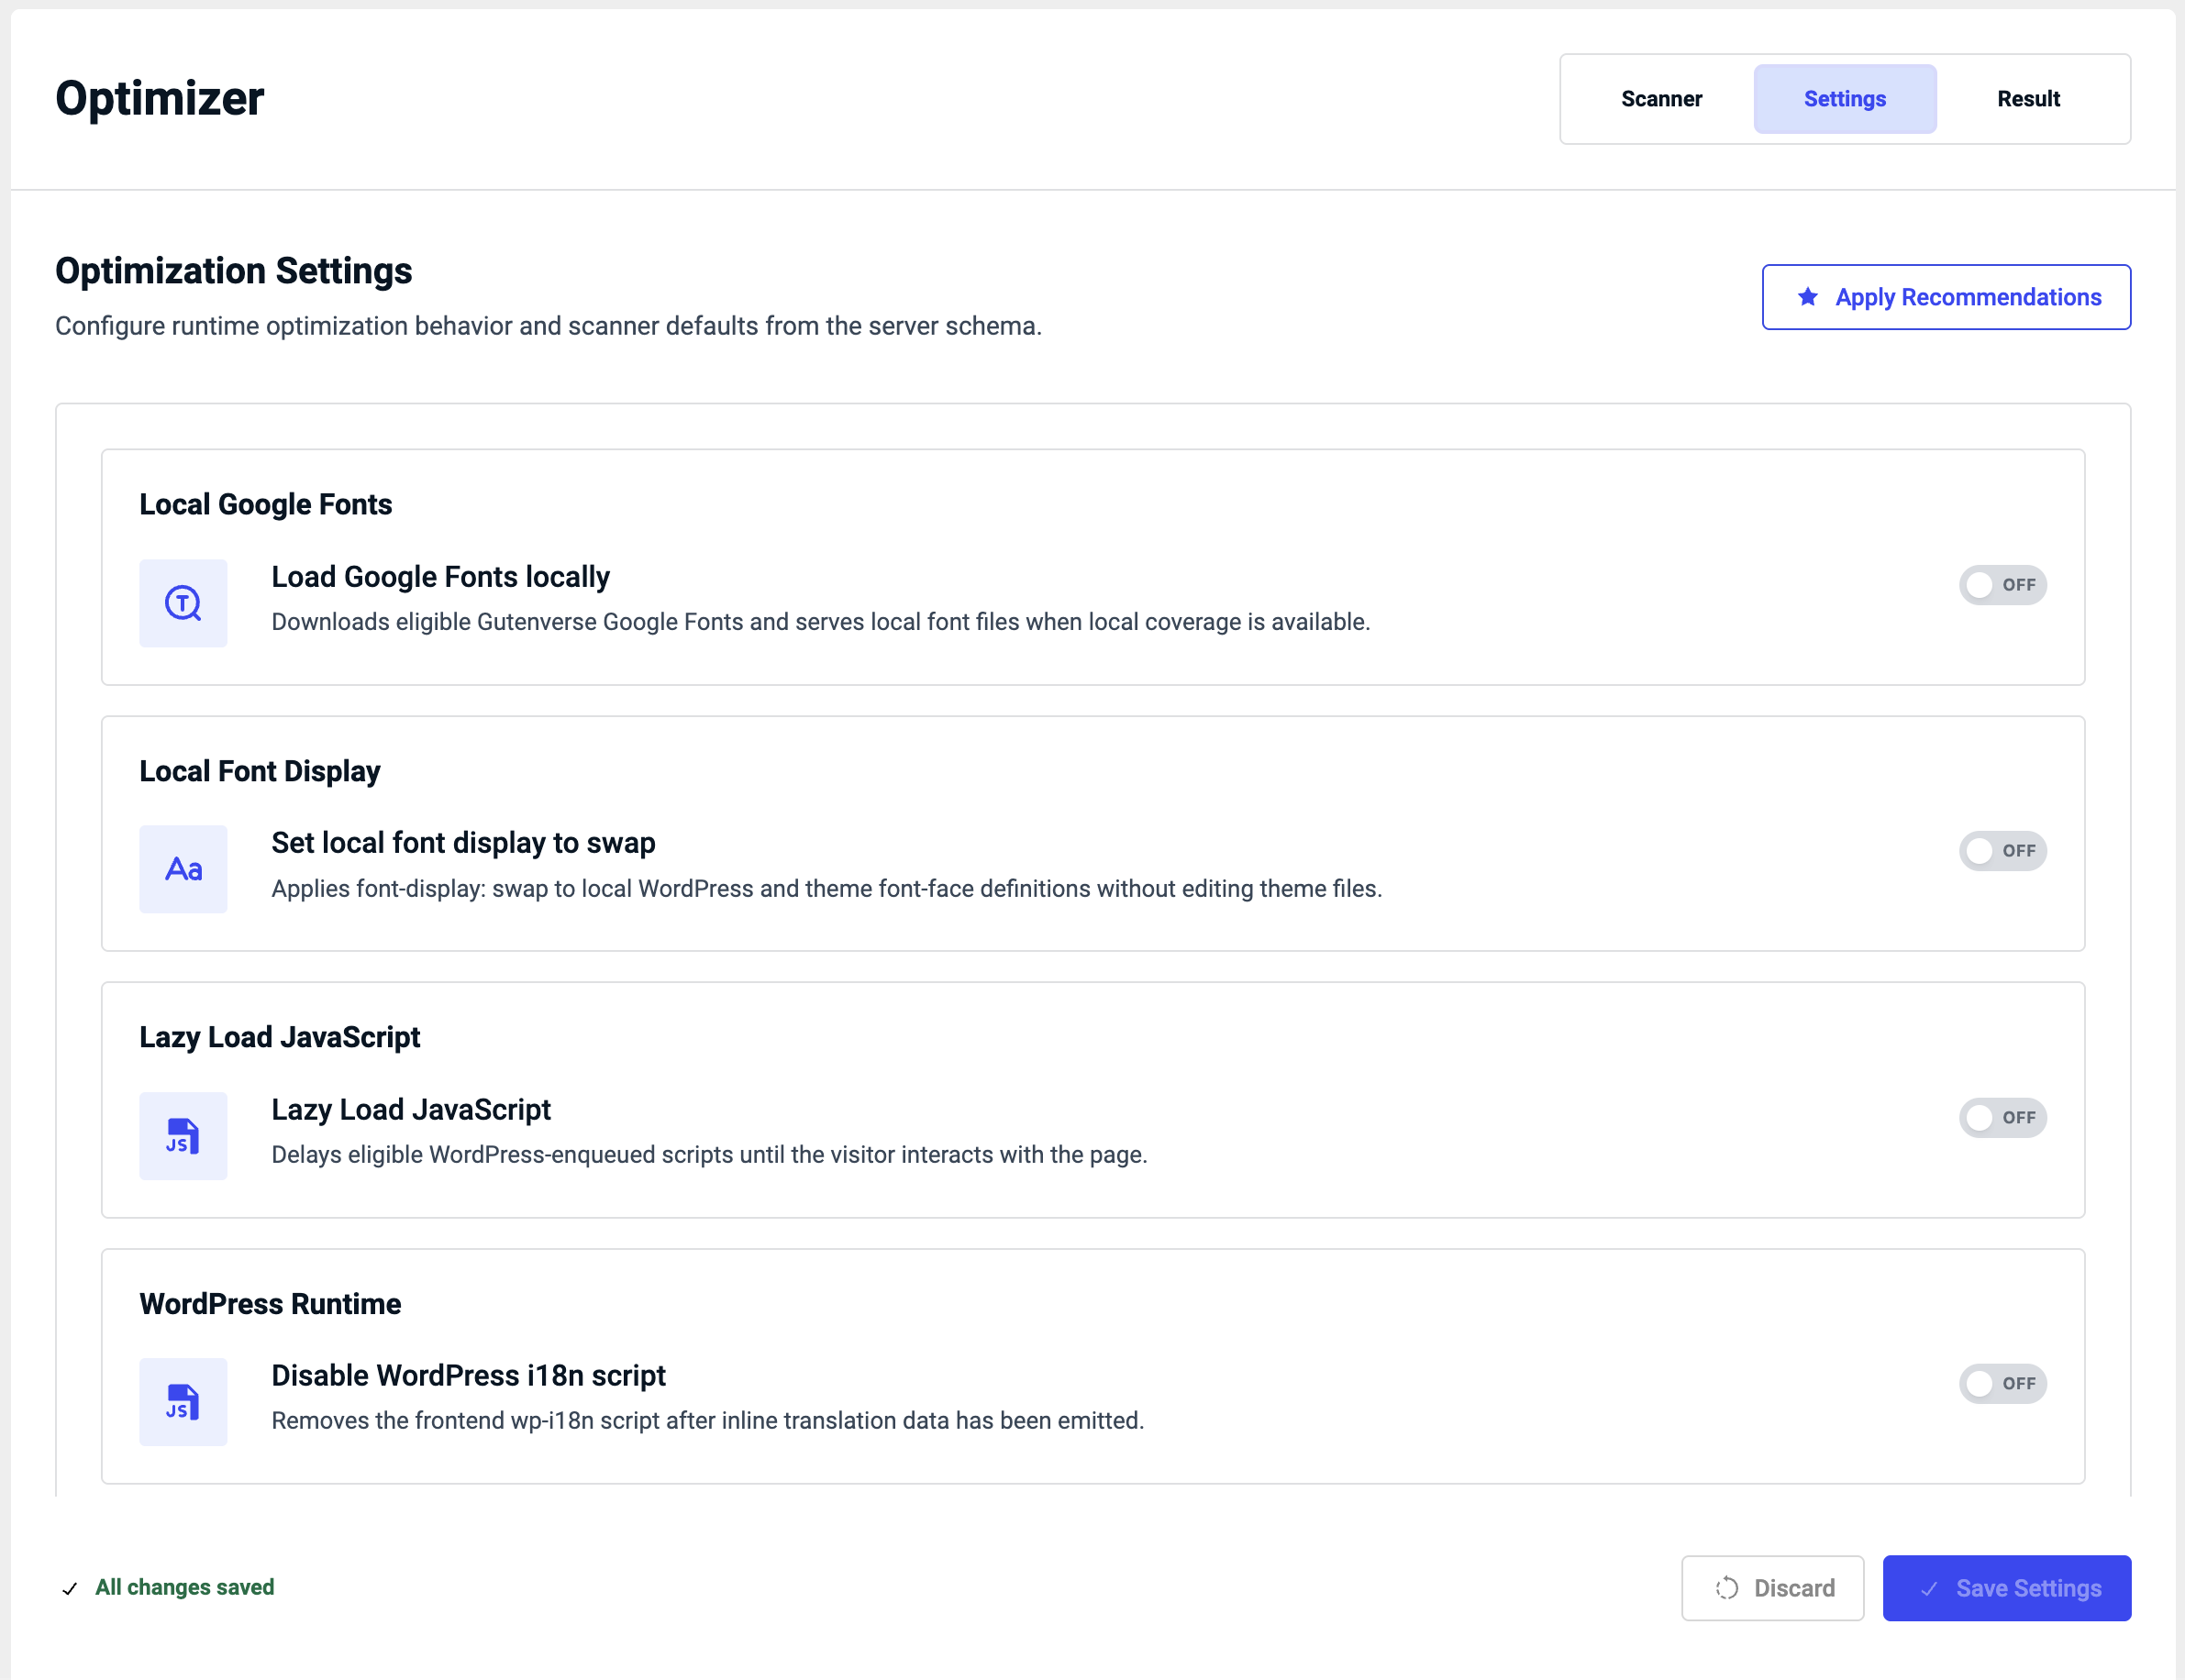
Open Gutenverse > Optimizer > Settings. Start with the options you need rather than enabling everything at once.
You can click Apply Recommendations for a starting configuration. Review the changed controls, then click Save Settings; applying recommendations alone does not save them.
Clear caches and test menus, forms, sliders, videos, and shop pages while signed out. If something stops working, disable the related option, save, clear caches, and test again.
Optimize One Page from the Toolbar
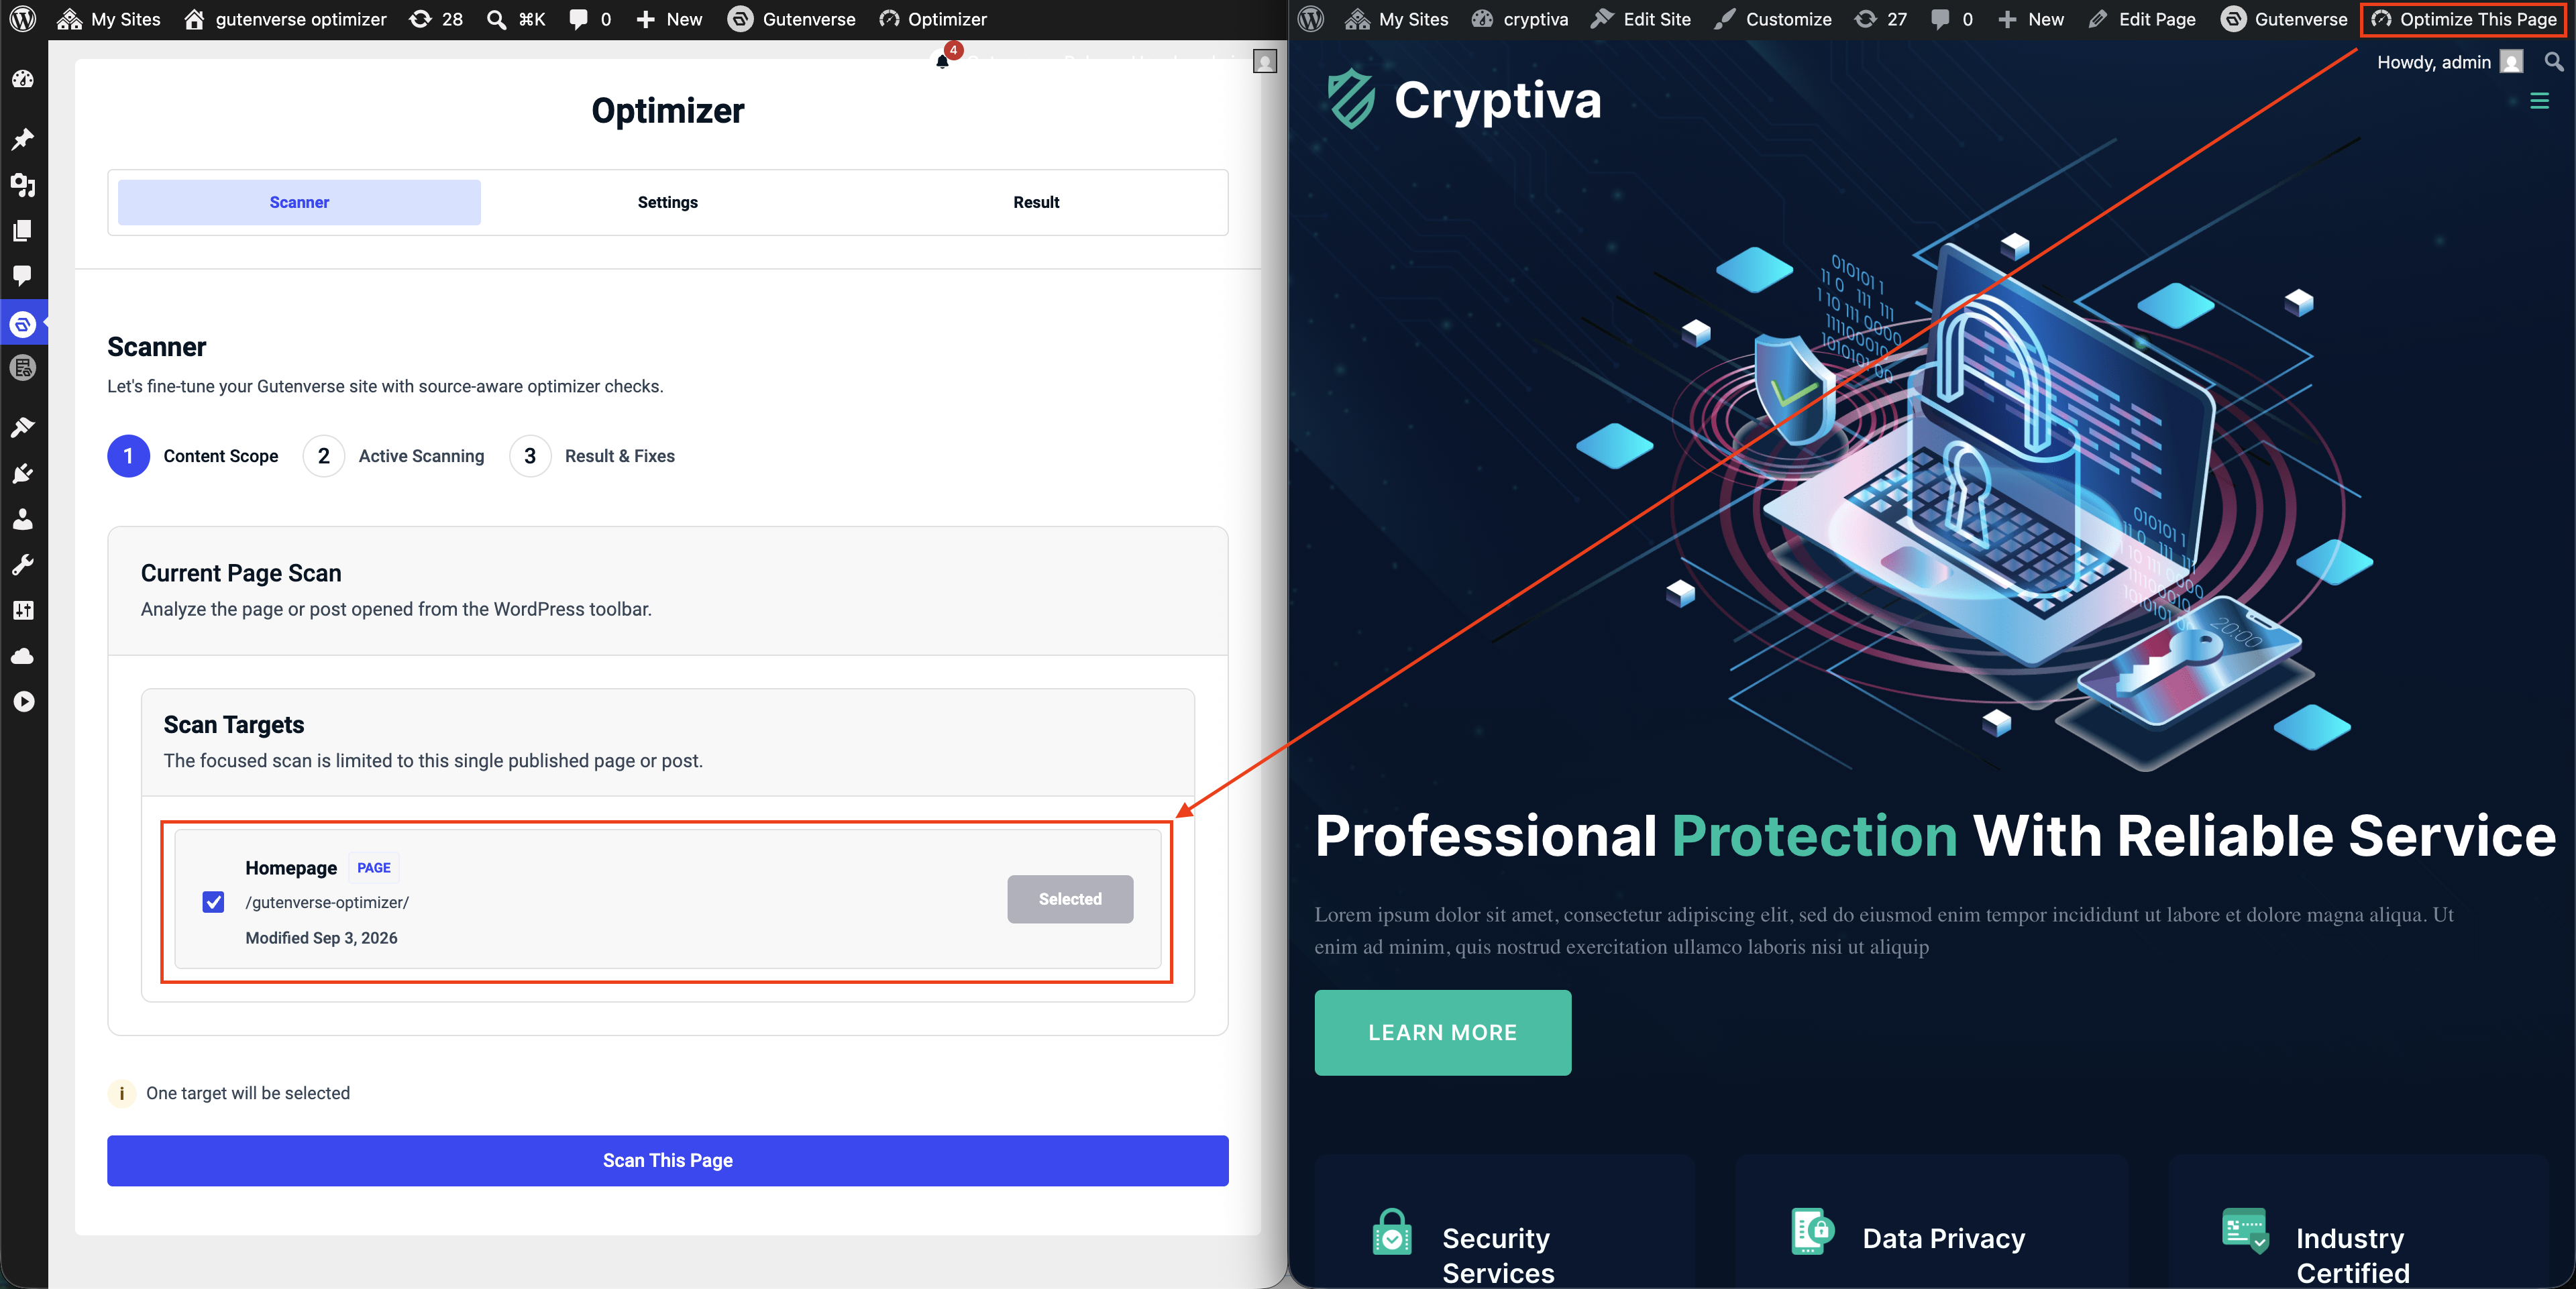
While viewing an editable published page or post, click Optimize This Page in the WordPress toolbar. The Optimizer dashboard opens with that page selected. Click Scan This Page to begin.
A static homepage works the same way. On a posts index, archive, or search-results page, the button shows Open Optimizer and opens the general dashboard without selecting that view as a target.
Review Results and Troubleshoot
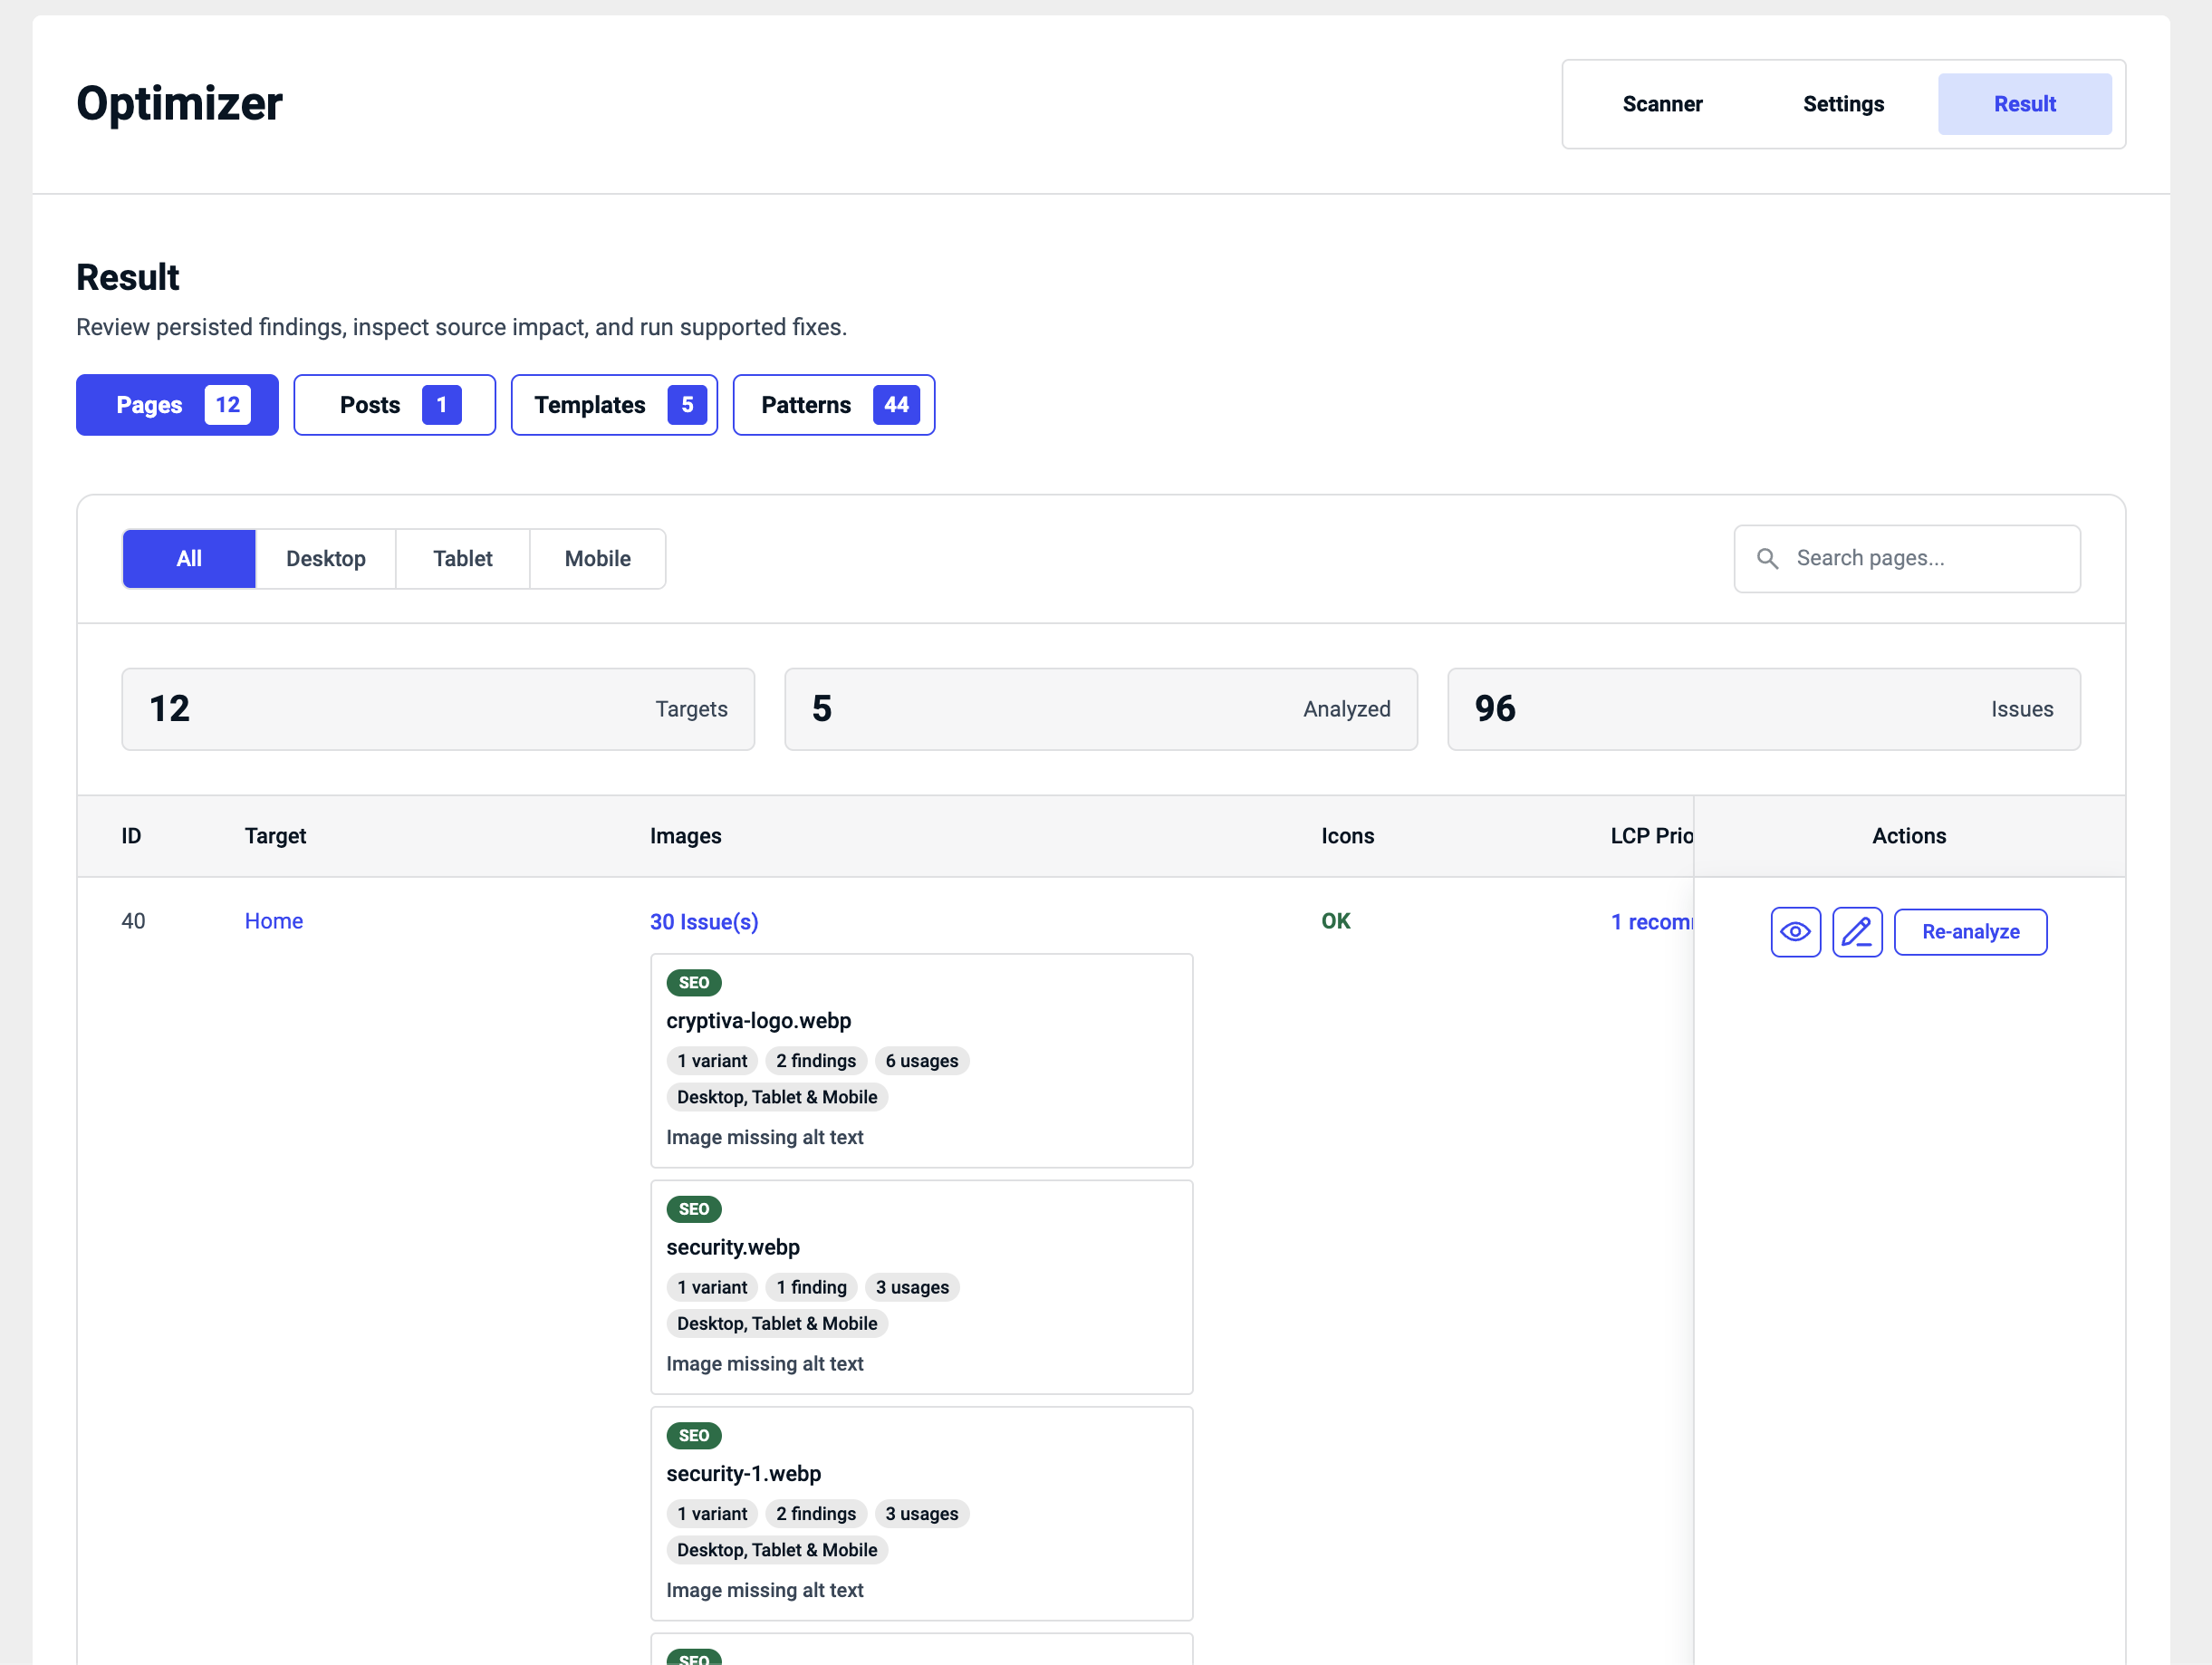
Open the Result tab, select a content type, and expand an issue count to see its details. Use the viewport controls to compare desktop and mobile findings. Click Re-analyze after a fix or manual edit.
A fresh scan means the results are current; it does not necessarily mean the page has no issues.