














When you first start using WordPress, the block editor may feel unfamiliar. Unlike the old classic editor, which uses one large editing area, the block editor separates each piece of content into its own block.
You can use blocks to add paragraphs, images, buttons, galleries, columns, and complete page sections. You can also move, customize, duplicate, or remove each block without affecting the rest of the page.
This WordPress blocks guide explains what blocks are, how they work, and which ones you will use most often. It also shares simple tips to help you use the editor more easily. By the end, you will feel more confident creating pages and posts with the WordPress block editor.
What Are WordPress Blocks?
WordPress blocks are individual content elements that you use to build posts, pages, templates, and website layouts. WordPress treats each paragraph, heading, image, video, button, list, quote, spacer, column, and group as a separate block.
WordPress’s official guide to the Block Editor explains that blocks are the main tools for adding and organizing content. Instead of creating everything inside one large editing area, you build your page with smaller elements. You can move, style, duplicate, reuse, and combine each block as needed.
This approach makes page building easier for beginners. You can add a heading, place an image below it, insert some text, and add a button without writing code. You can also move or edit each block without affecting the rest of the page.
Common Types of WordPress Blocks
WordPress includes many core blocks by default. You can use them to write a blog post or create a basic page without installing another plugin.
The beginners will often use these block types first:
Block type
Examples
What you can use them for
Text blocks
Paragraph, Heading, List, Quote
Writing and organizing content
Media blocks
Image, Gallery, Video, Audio
Adding visuals and media
Design blocks
Buttons, Separator, Spacer
Adding calls to action and spacing between content
Layout blocks
Group, Columns, Row, Stack
Arranging content into sections and layouts
Theme blocks
Site Logo, Navigation, Post Title
Editing templates in a block theme
Embed blocks
YouTube, Vimeo, social embeds
Displaying content from other platforms
The official WordPress blocks page also explains how blocks help you add and organize content visually. You don’t need to memorize every available block. You only need to choose the block that matches the content you want to add.
How to Use WordPress Blocks
Using WordPress blocks involves four main actions: adding, placing, customizing, and moving them. Once you understand these steps, the block editor becomes much easier to use.
1. Add a Block
Open the page or post you want to edit, then click the + icon. You can use the inserter in the top-left corner to browse all available blocks. You can also click the smaller + button that appears inside the content area.
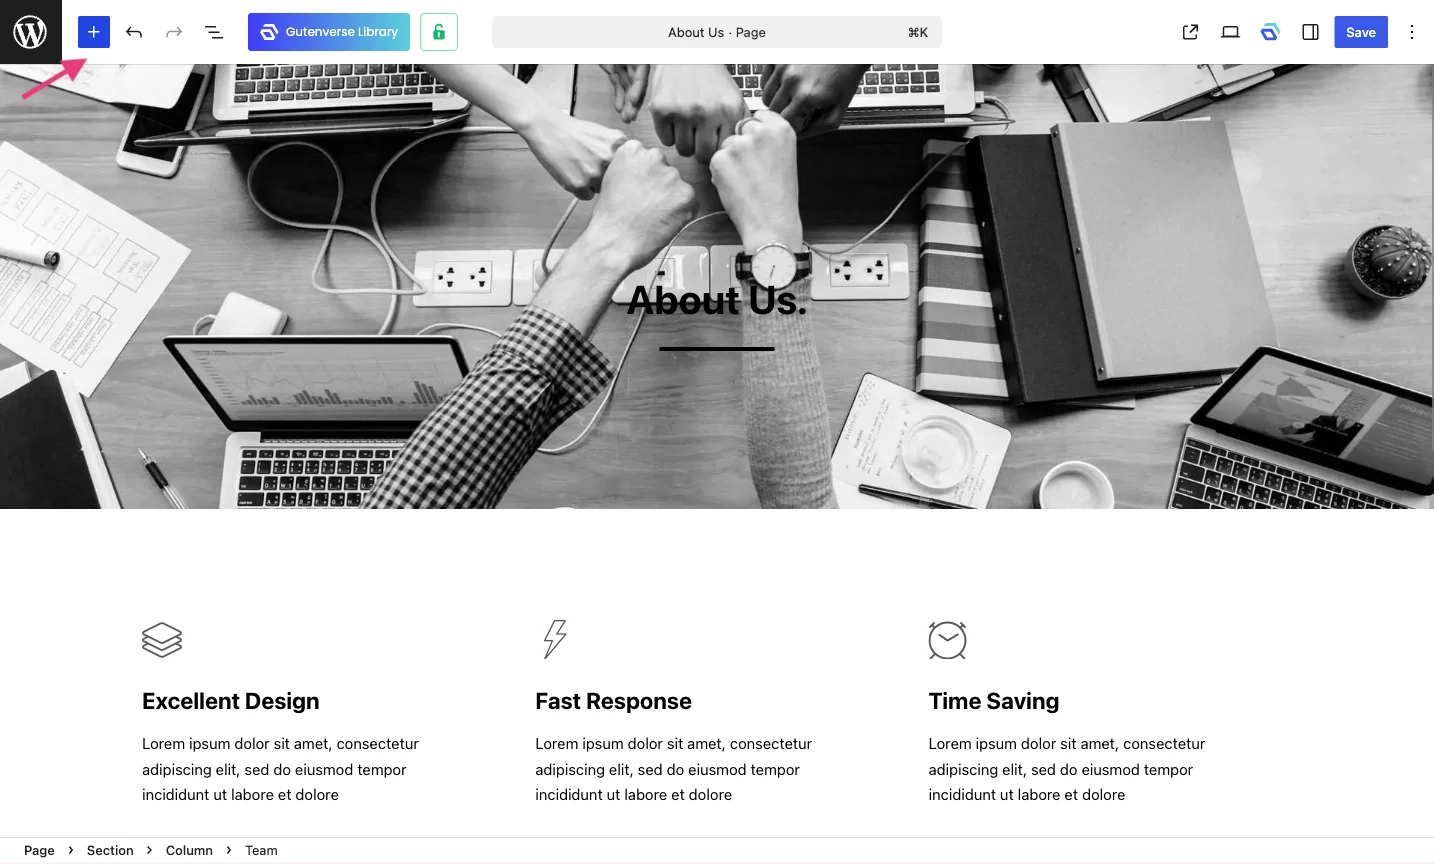
Another quick option is the slash command. Click inside the editor, type /, and enter the name of the block you want to add. For example:
Gutenverse uses the same approach as the WordPress block editor. After installing Gutenverse, you can choose its blocks from the inserter or add them quickly by typing the block name in the editor. For more step-by-step instructions, you can visit the How To Add/Edit Block? guide.
2. Place the Block Where It Belongs
After adding a block, place it where it fits best on the page. You can insert it above, below, or between existing blocks. You can also move it later when you change the layout.
Block placement affects how visitors read and understand your content. For example, a button placed directly below a heading can create a clear call to action. Visitors may overlook the same button when it appears too far down the page.
3. Customize the Block
Once a block is selected, use the toolbar and right sidebar to customize it.
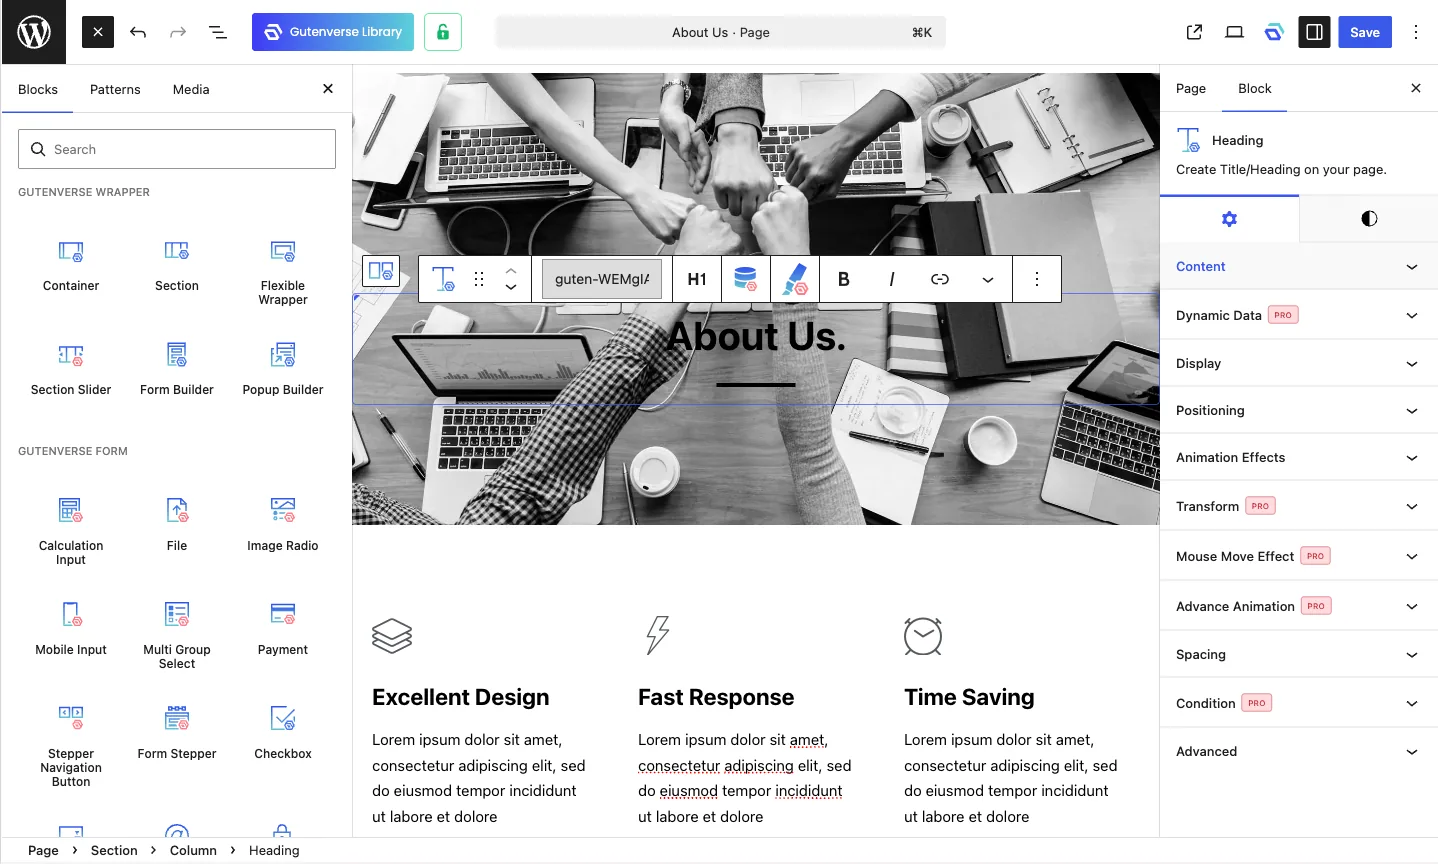
For example:
You don’t need to style the entire page at once. Select one block, adjust its settings, and then move to the next block.
4. Move or Reorder Blocks
You don’t need to get everything perfect on the first try. Blocks can be moved after you add them.
The easiest options are:
WordPress lets you select, move, group, customize, hide, and organize blocks in several ways. List View is especially helpful for beginners because it shows the entire page structure and makes each block easier to find and arrange.
Why List View Makes Blocks Easier
List View displays your page as a clear outline. Instead of clicking around to find a specific block, you can see every block in order. It also shows blocks placed inside groups, columns, rows, and other sections.
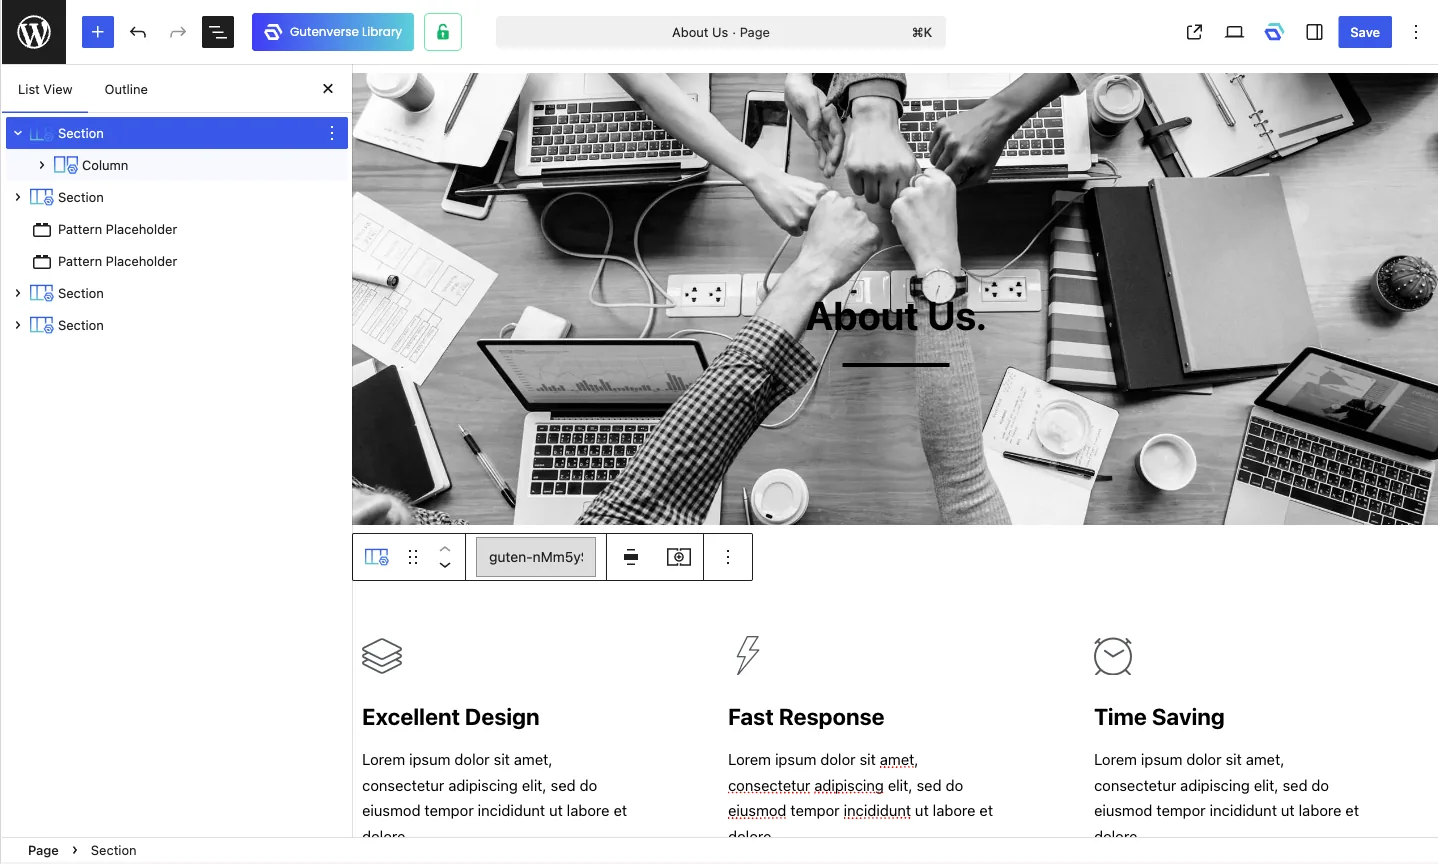
This feature becomes especially useful when your page includes several layers, such as:
When the editor starts to feel difficult to manage, you can open List View. It helps you understand the page structure and makes blocks easier to find, select, and move.
When You Need More Than Default Blocks
The default WordPress blocks give you the basic tools to create posts and simple pages. However, many websites need more design options as they grow. A business homepage, agency landing page, portfolio, event page, or product page often needs more than text and images.
You may need additional blocks and features to:
Gutenverse adds these options to the WordPress block editor. It includes more than 45 free blocks and over 600 template sections while letting you continue working inside Gutenberg and the Site Editor.
How to Disable or Hide Blocks You Don’t Use
As you install more block plugins, the block inserter may become crowded. This often happens when a plugin adds many new blocks.
You may want to disable certain blocks to:
Gutenverse lets you manage blocks from Gutenverse > Blocks. From this page, you can enable the blocks you need and disable the ones you don’t use. The How to Enable/Disable Blocks? guide explains for each step.
Before disabling a block, check whether you already use it on your website. A disabled block may no longer display correctly on existing pages. For this reason, it is best to disable unnecessary blocks before you start building many pages.
Disabling individual blocks is different from turning off the entire WordPress block editor. Most users should continue using the block editor, especially when working with modern block themes and Full Site Editing.
FAQ
Blocks are individual elements you use to create content and page layouts in the WordPress block editor. Common examples include paragraphs, headings, images, buttons, videos, columns, and groups.
You can click the + button in the editor, then select the block you want to add. You can also type / followed by the block name, such as /image or /heading.
Yes. Gutenverse works with WordPress block themes and the Site Editor. Gutenverse also offers its own block themes, which you can use with Gutenverse blocks to build and customize pages, templates, headers, footers, and other website sections.
Yes. You can combine Gutenverse blocks with default WordPress blocks on the same page. For example, you can place a WordPress Paragraph block inside a section built with Gutenverse.
Final Thoughts
WordPress becomes easier when you treat each part of the page as a separate block instead of one large document. You can add, move, customize, reuse, or replace each block without changing the rest of the page.
Start by learning the core WordPress blocks. Then, become familiar with the block inserter, toolbar, settings sidebar, and List View. These tools will help you build and organize your content more confidently.
To continue learning, explore Gutenverse and see how it can help you build complete WordPress pages faster without leaving the block editor.