













Last Update: September 2, 2026
The new Form Builder makes it easier to create and manage forms in Gutenverse Form.
Think of it this way:
With the new workflow, you can create and manage the Form Action directly from the Form Builder. You no longer need to create or manage it from a separate dashboard.
Let’s walk through the process step by step.
Before You Start
Before creating your form, make sure you have:
Add the Form Builder
First, add the Form Builder to your page.
1. Open your page, post, or template in the WordPress Editor.
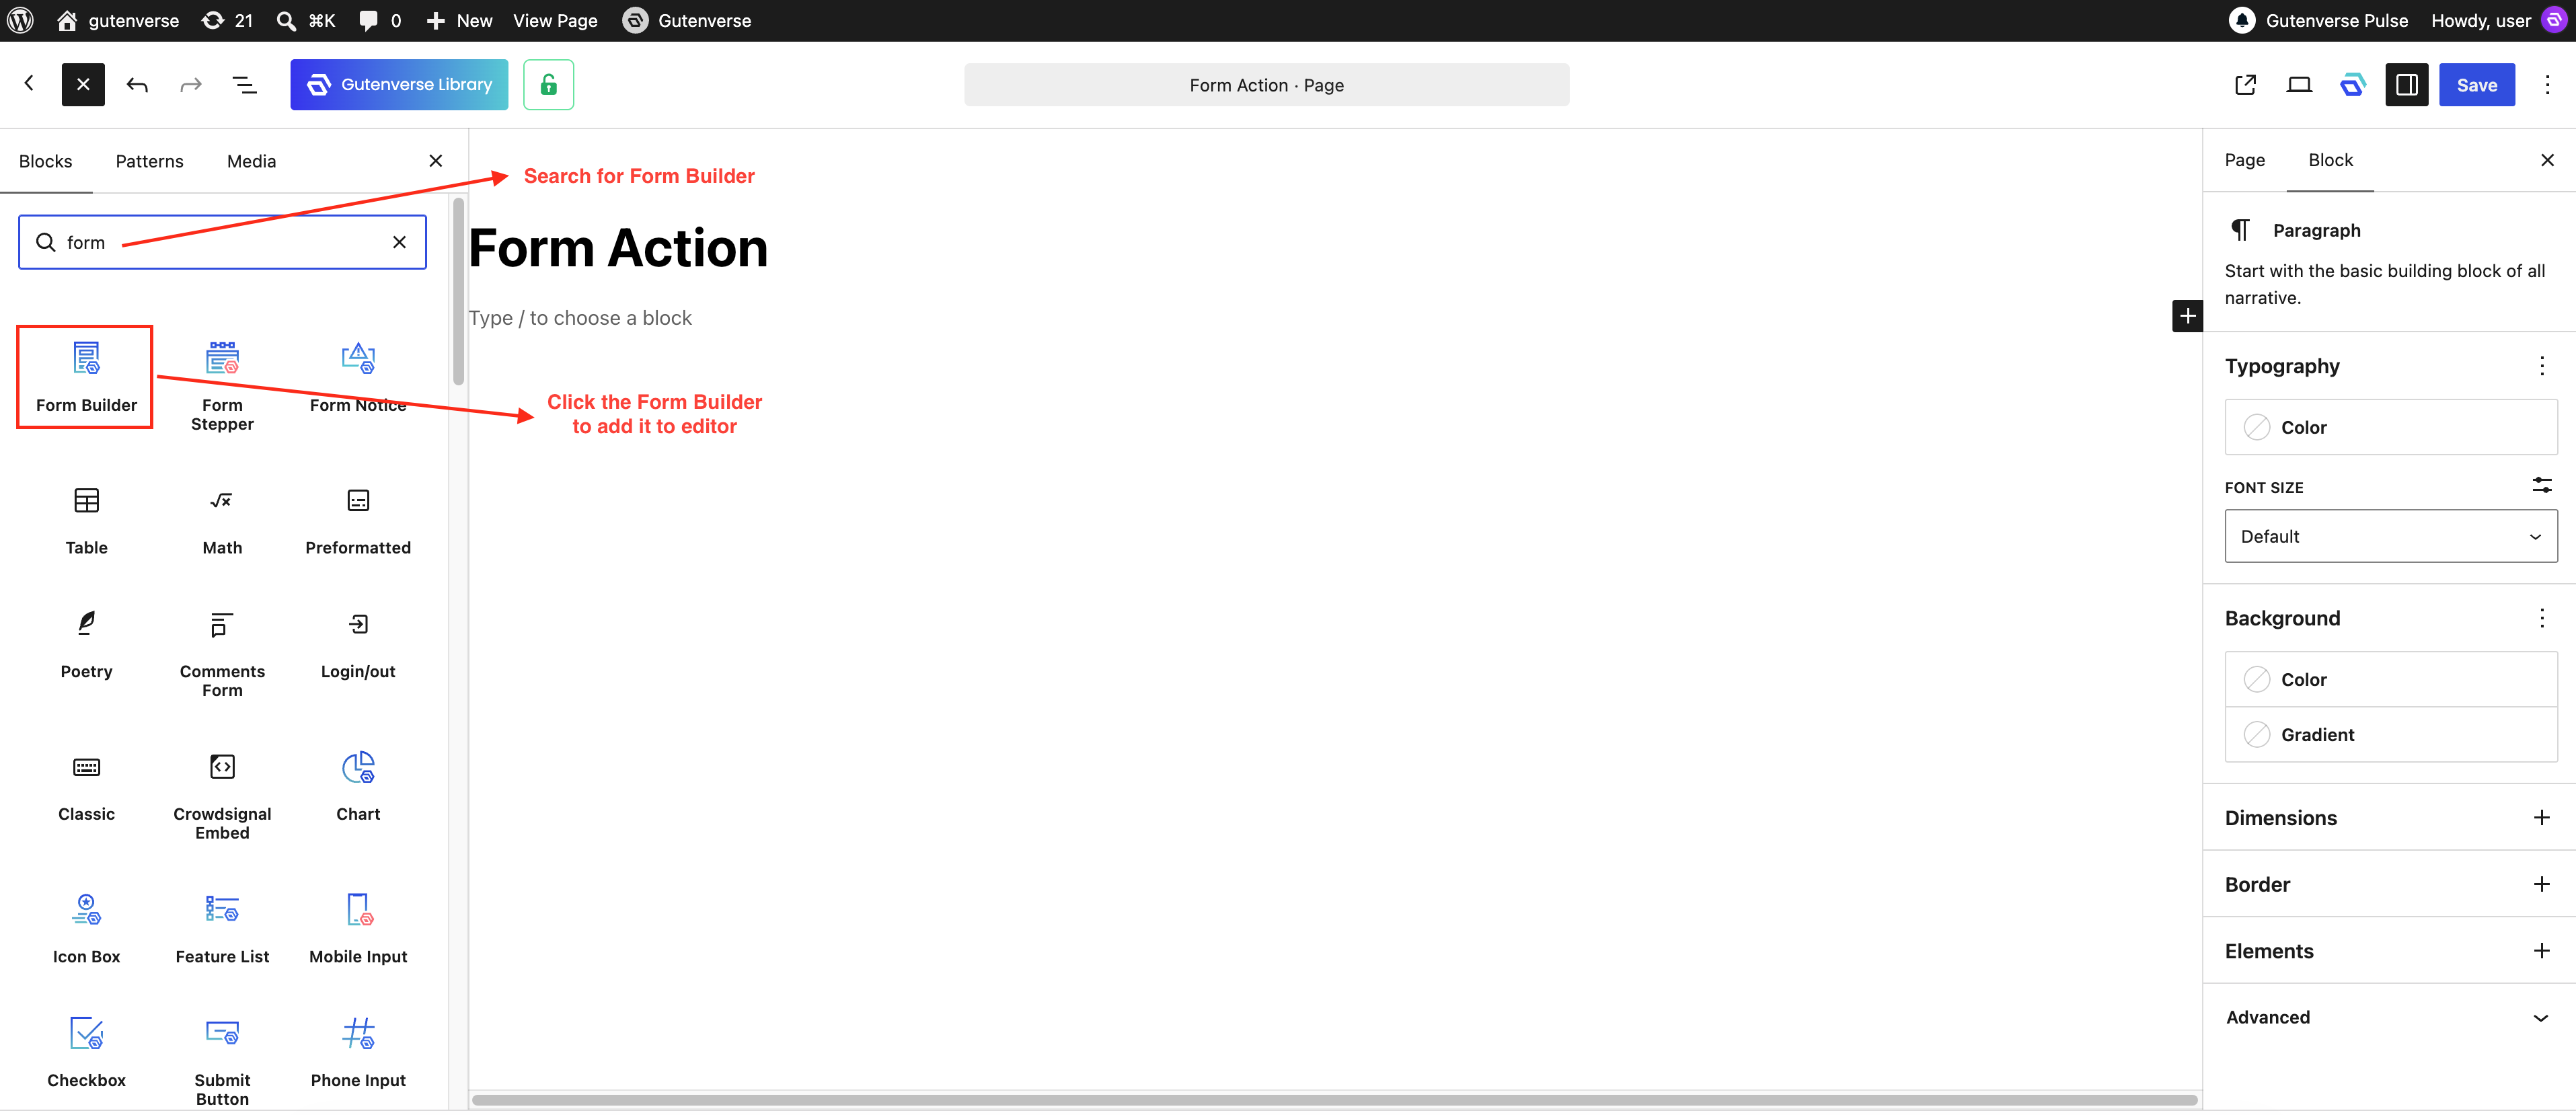
2. Click the + button to open the block inserter.
3. Search for Form Builder.
4. Add the Form Builder block to your page.
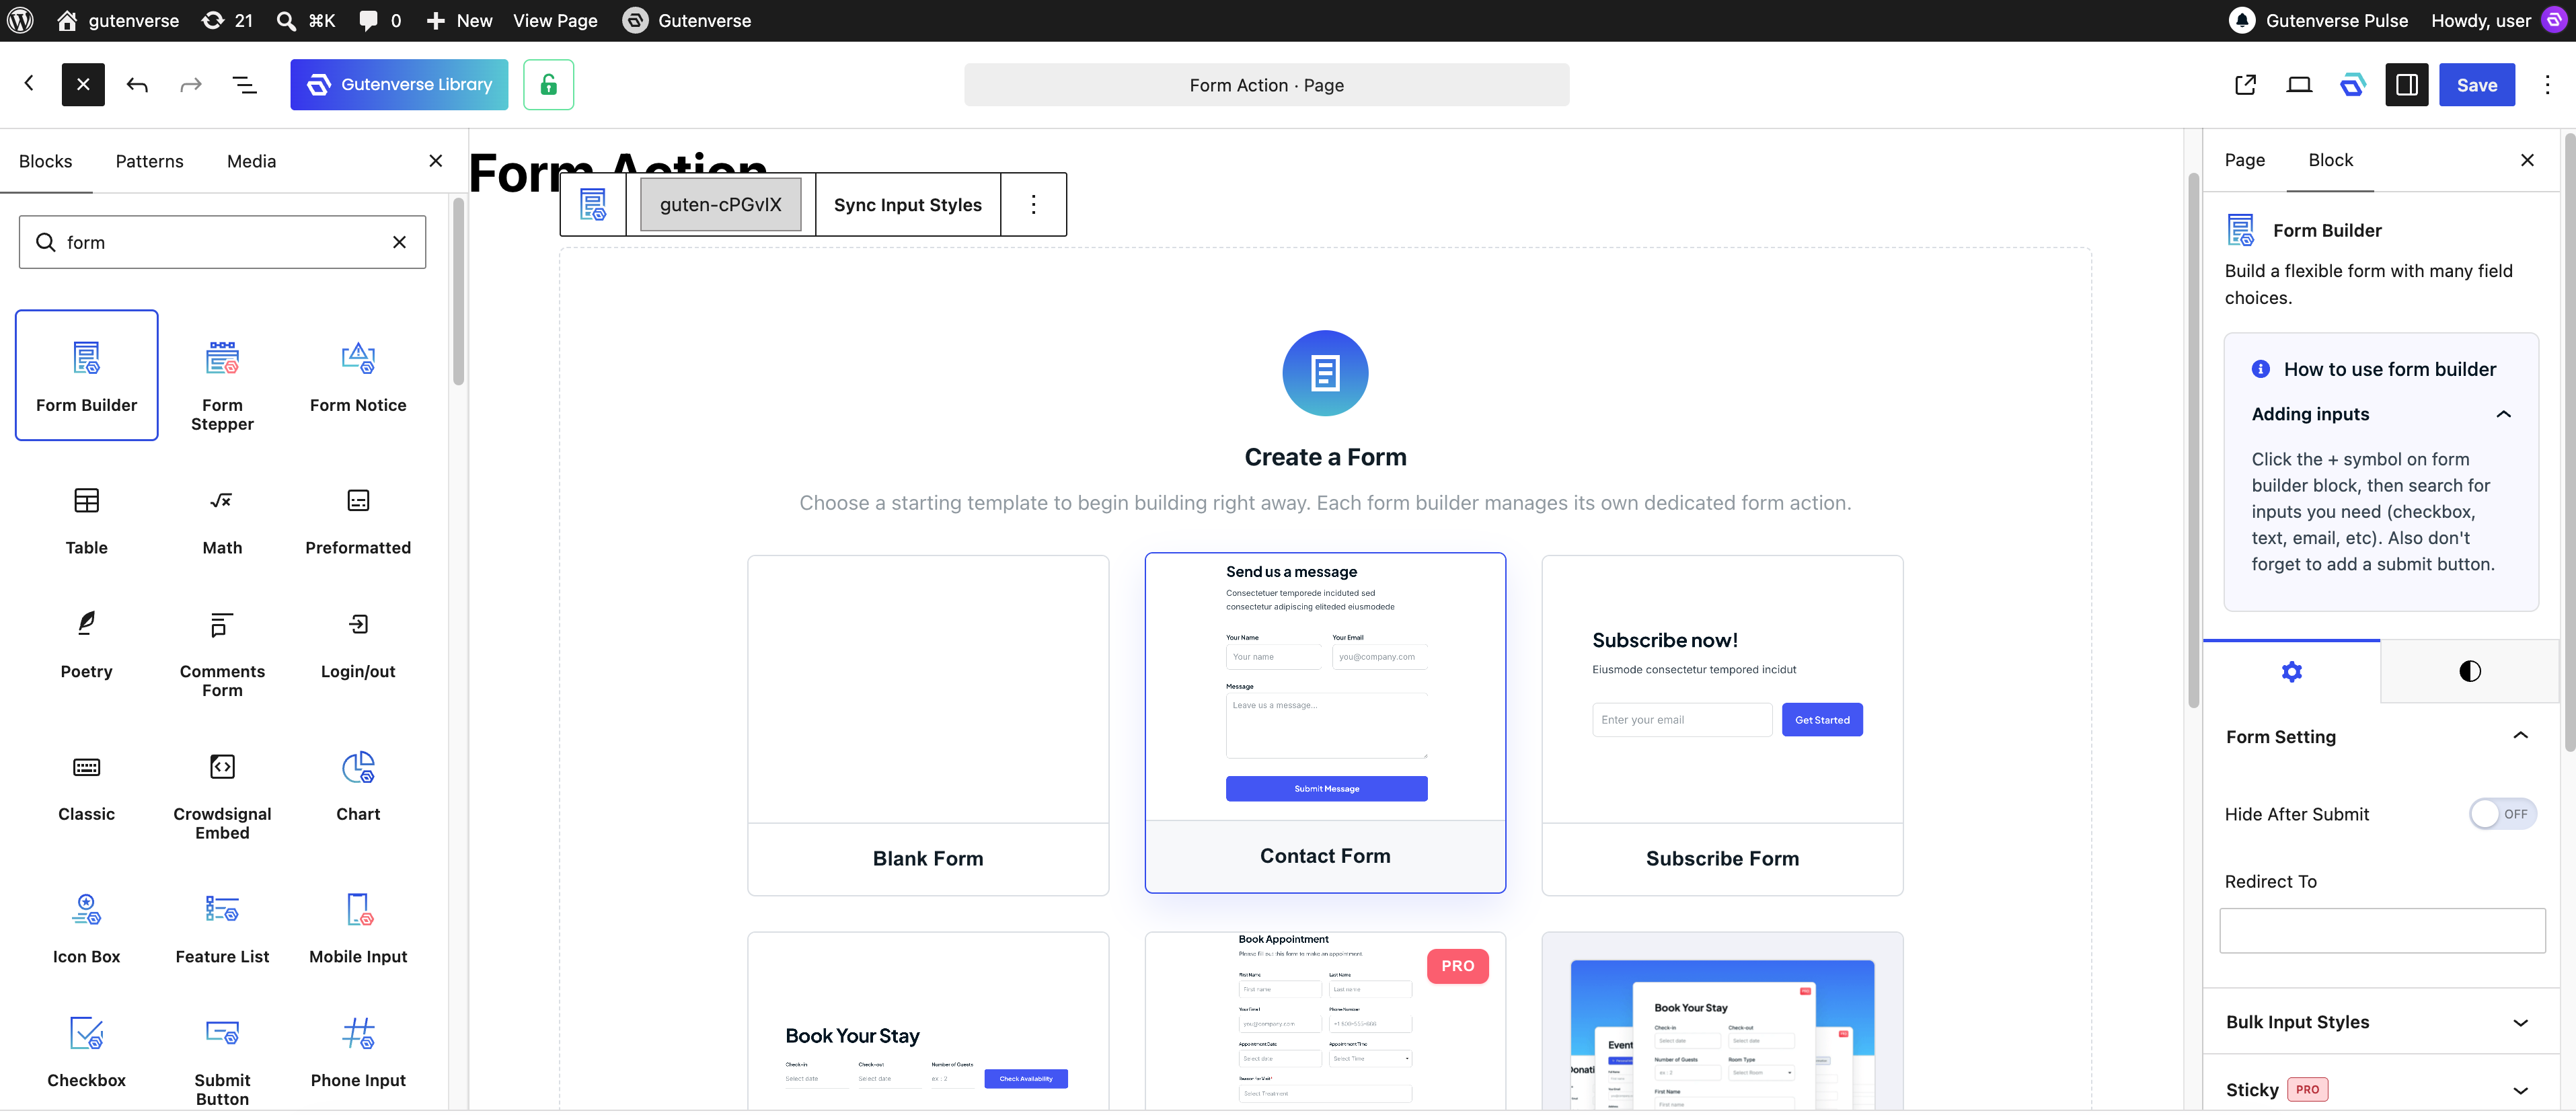
5. When you add the Form Builder for the first time, you’ll see a ready-to-use form template. You can use this template to quickly get started, or skip it and continue to the next step if you want to build the form yourself.
The Form Builder acts as the main container for your form.
Important: Make sure all of your form fields and the Submit Button are placed inside the Form Builder. Fields placed outside it will not be included when the form is submitted.
Add Your Form Fields
Now you can add the fields that visitors will use to enter their information.
For example, a simple contact form could have:
| Field | Label | Input ID |
| Text Input | Name | input-name |
| Email Input | input-email | |
| Textarea | Message | input-message |
| Submit Button | Submit | — |
You can add other fields, such as Phone, Subject, or Address, depending on what information you need.
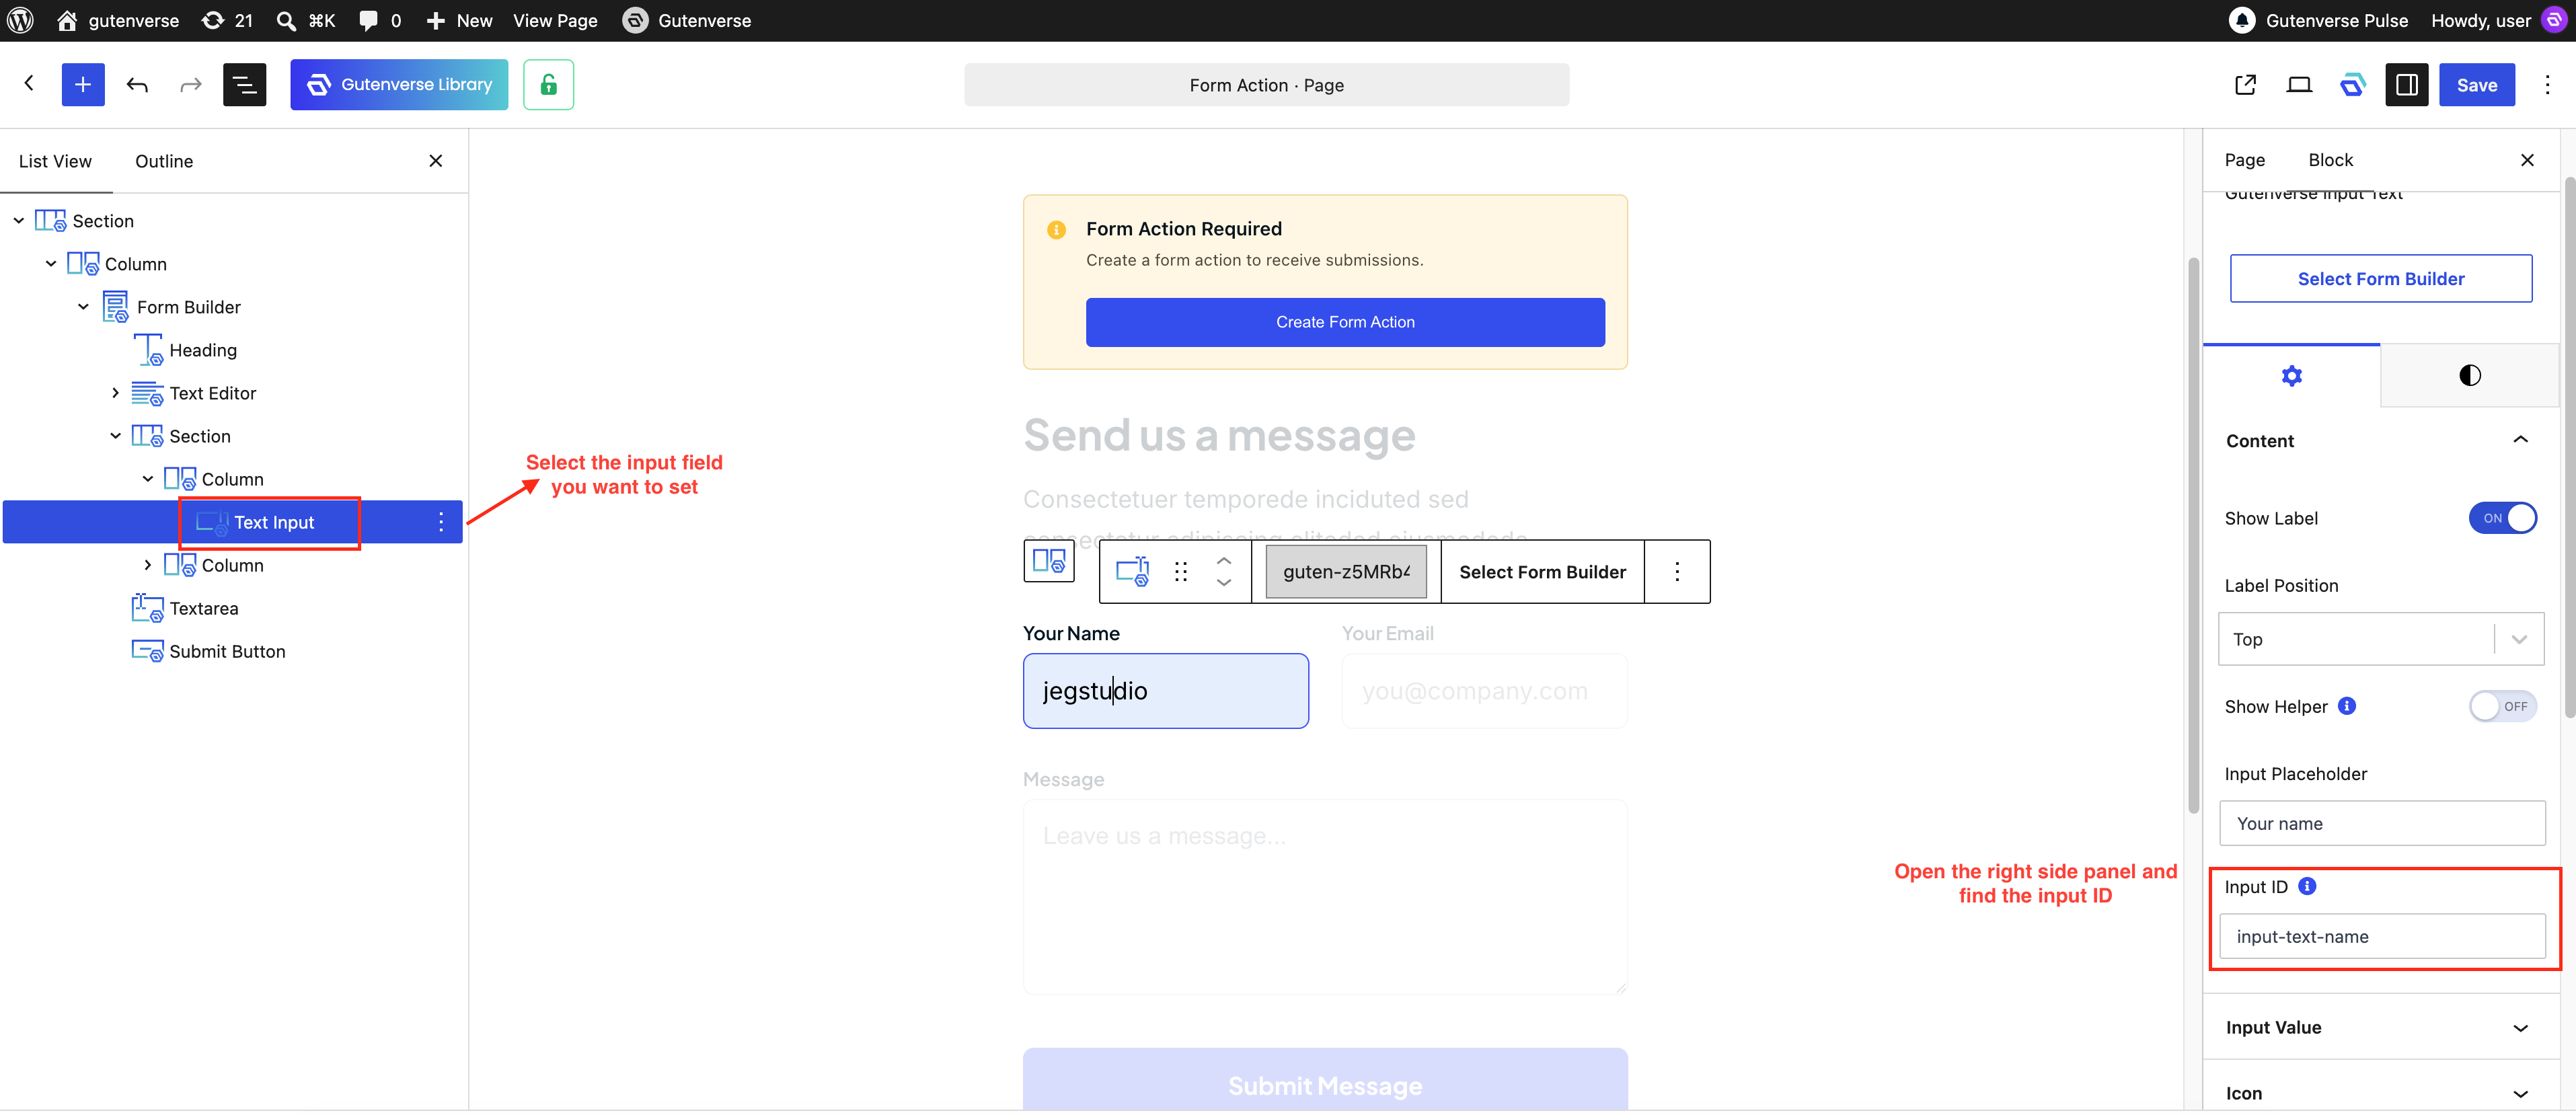
Why is the Input ID important?
You can add other fields, such as Phone, Subject, or Address, depending on what information you need.
It can be used for things such as:
For this reason, give each field a simple and unique ID.
For example:
– input-name
– input-email
– input-phone
– input-message
We recommend using lowercase letters without spaces.
Make Important Fields Required
You can make certain fields mandatory so visitors cannot submit the form without filling them in.
To make a field required:
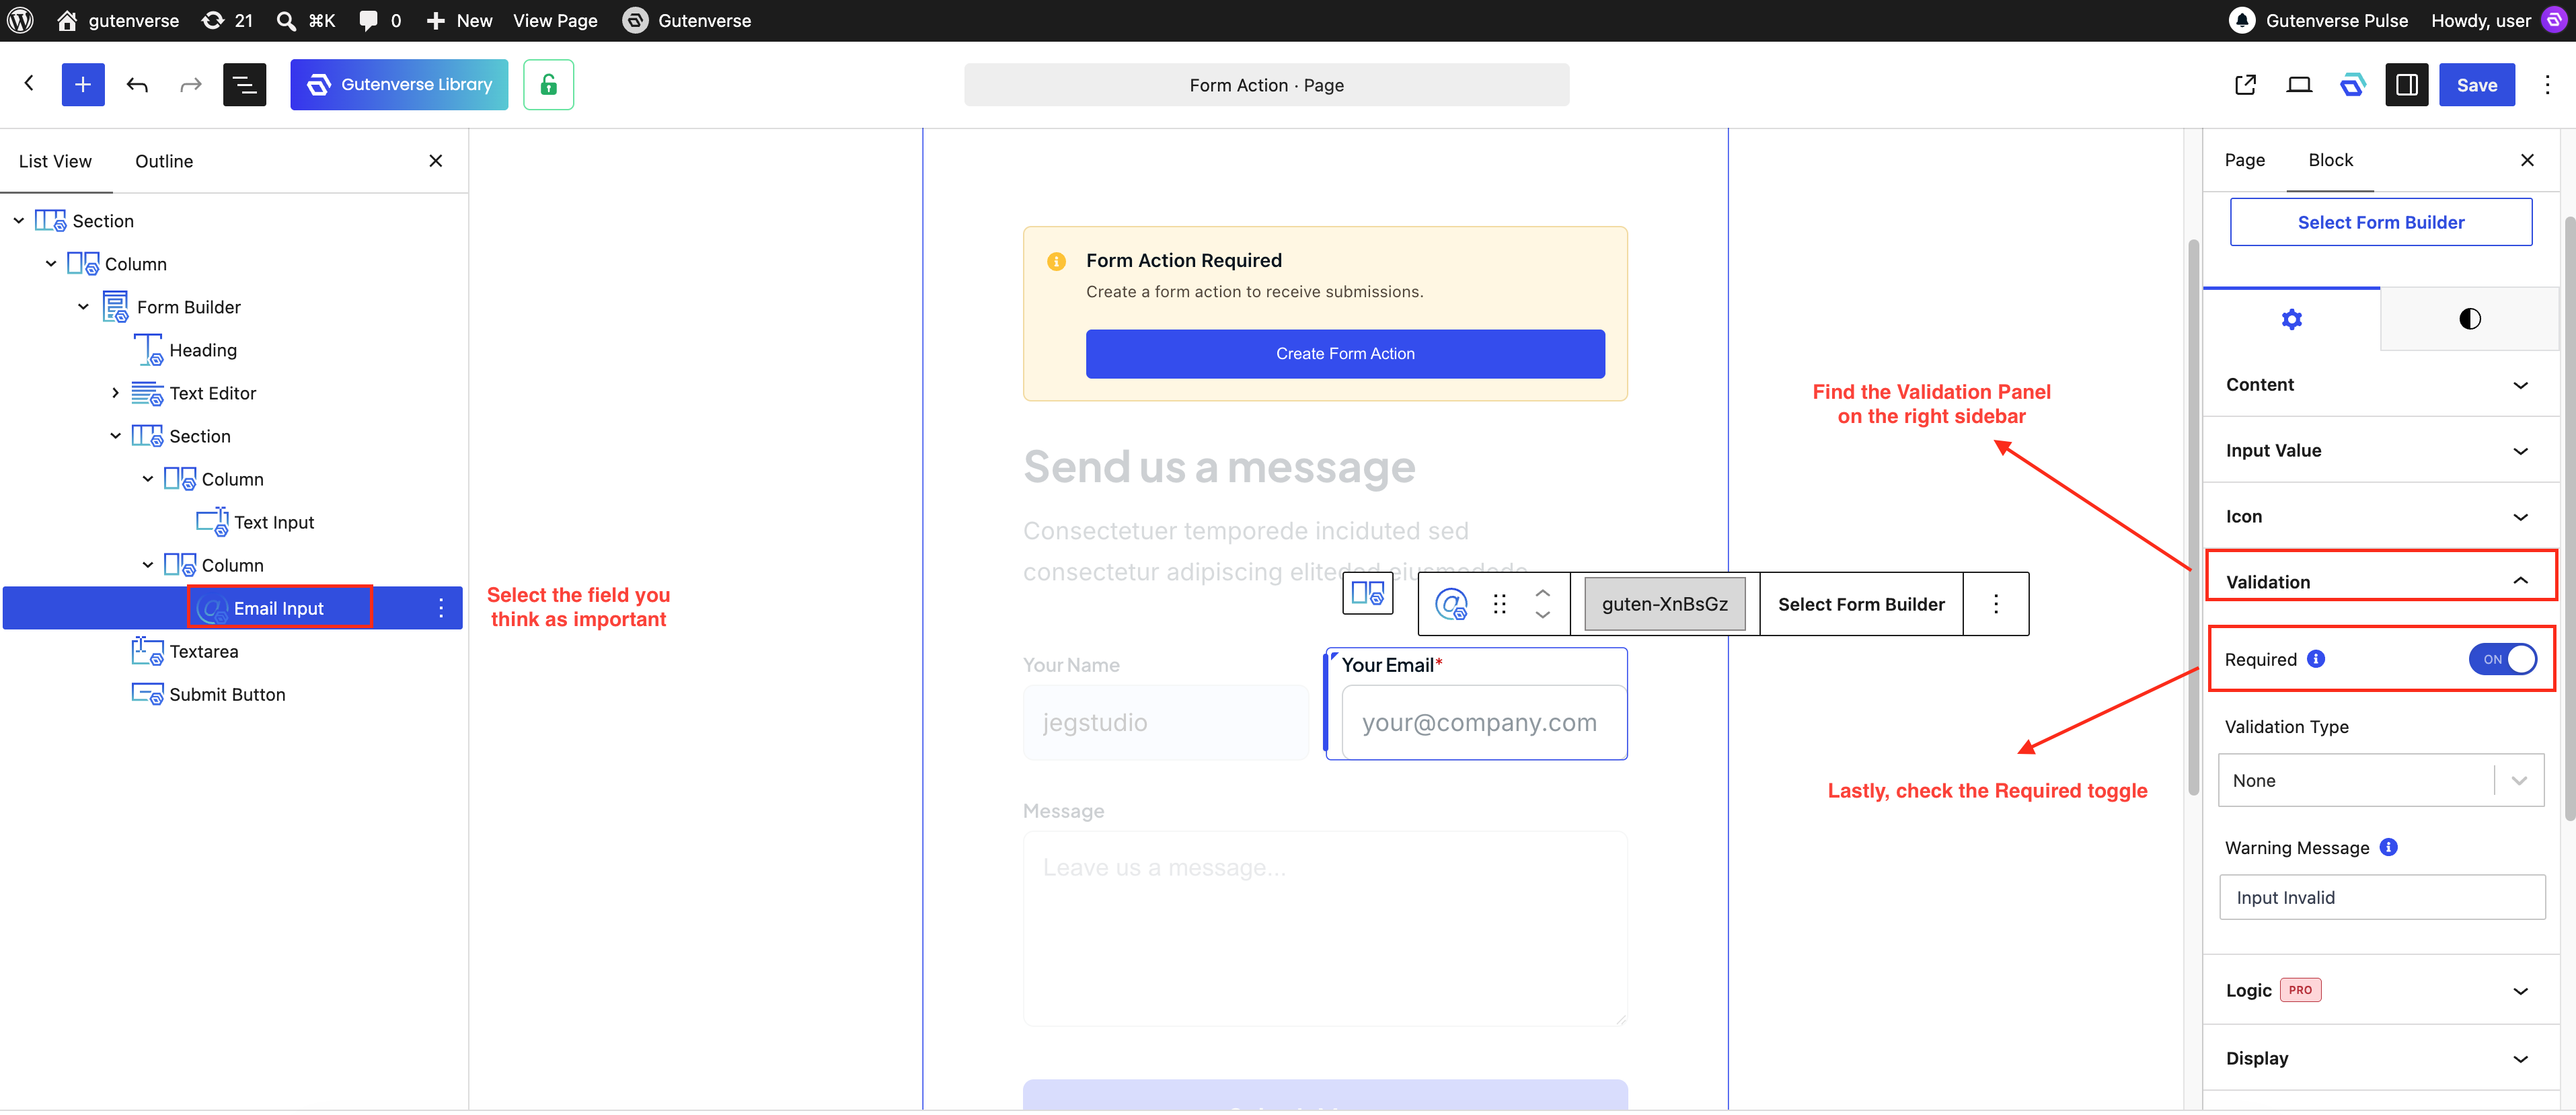
1. Select the form field.
2. Open the Validation panel.
3. Enable Required.
4. Enter a message to show when the field is left empty.
For a contact form, you may want to make Name, Email, and Message required.
The Email Input field also checks whether the visitor has entered a valid email address.
Create a Form Action
Once your fields are ready, you need to connect the form to a Form Action.
The Form Action tells Gutenverse what to do when someone submits the form.
To create one:
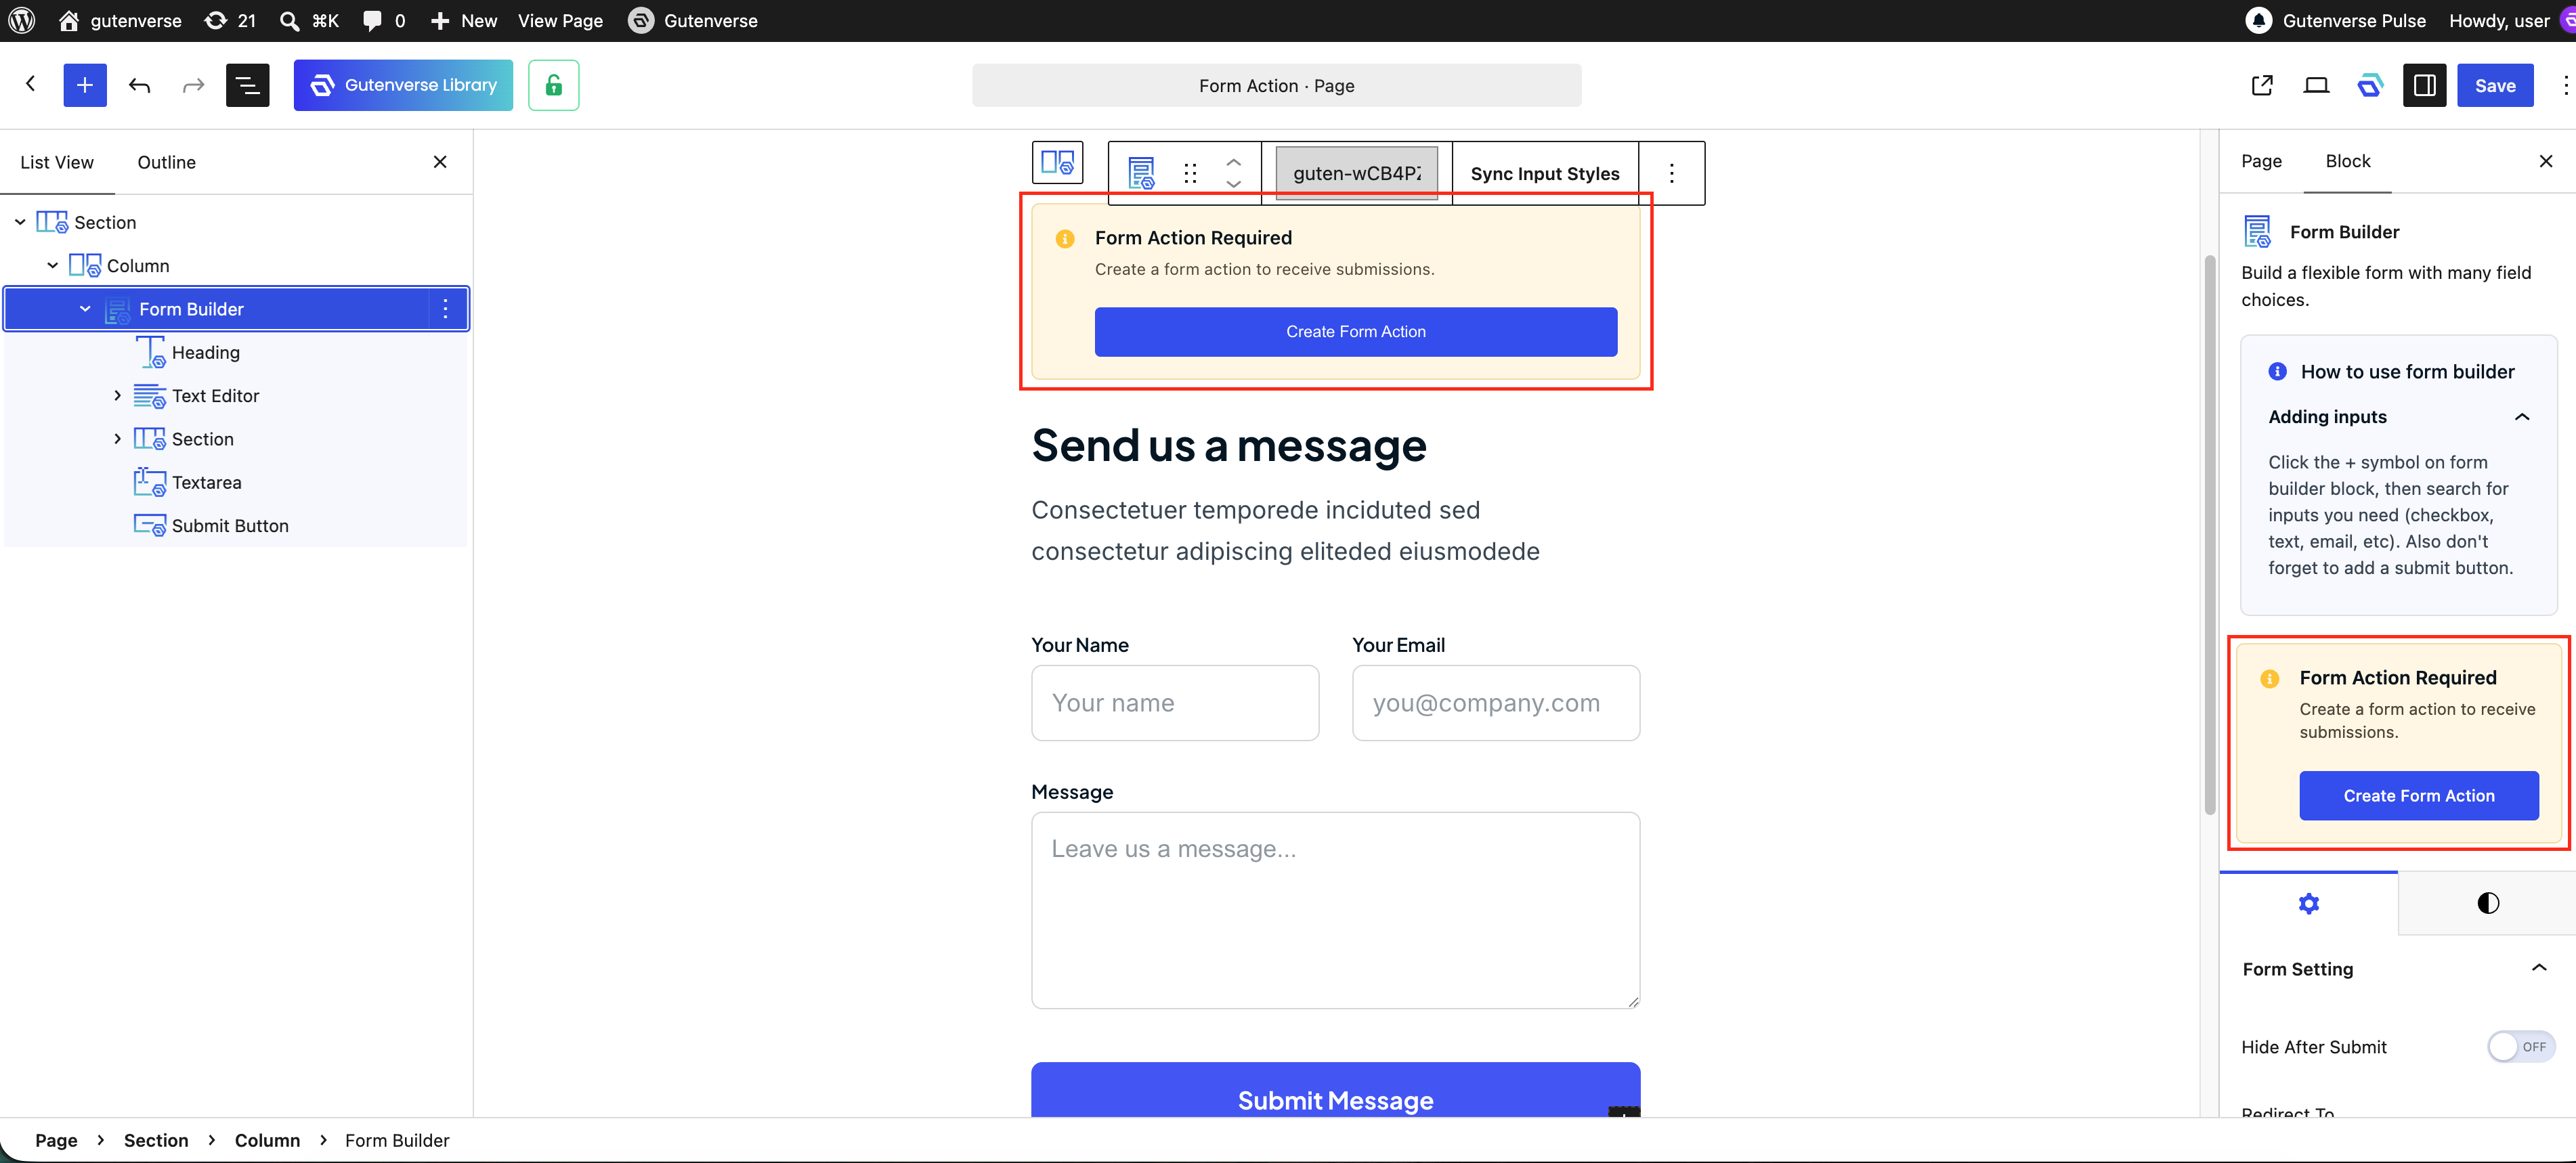
1. Select the Form Builder block.
2. Find the Form Action notice or card.
3. Click Create Form Action.
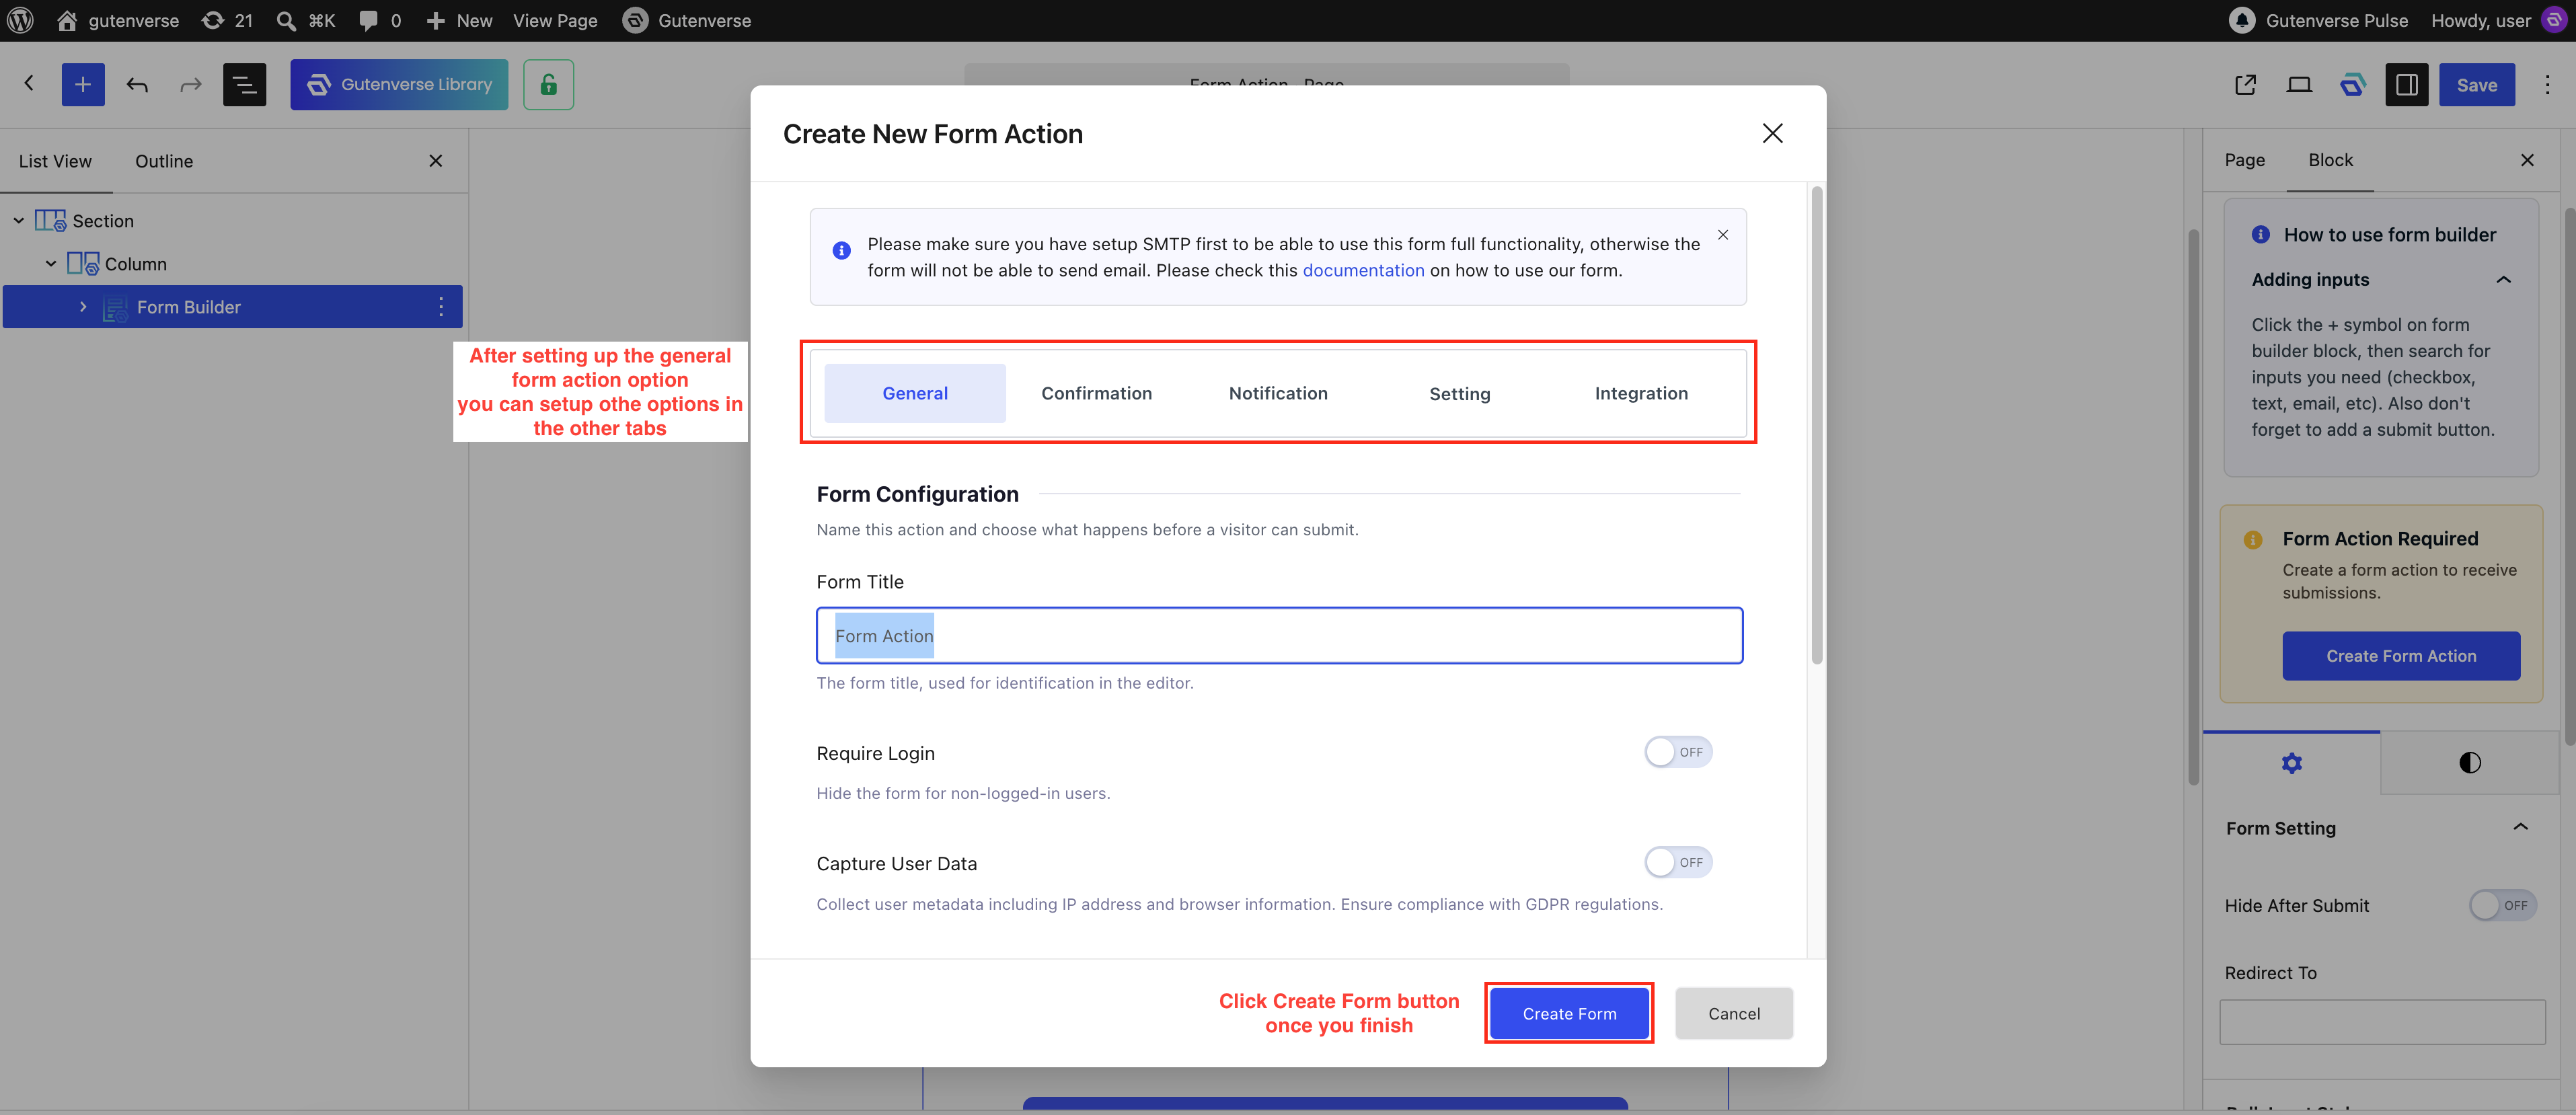
4. Enter a Form Title, such as Contact Form.
5. Review the available settings in the General, Confirmation, and Notification tabs.
6. Click Create Form.
Once it has been created, you will see the Form Action connected to your Form Builder.
This means your form is now ready to process submissions.
Configure the General Settings
After creating the Form Action, you can configure what happens when visitors submit the form.
Open the connected Form Action and go to the General tab.
Depending on your setup, you may see settings such as:
About Capture User Data
Only enable Capture User Data if you have permission to collect this information and it complies with your privacy policy and applicable requirements.
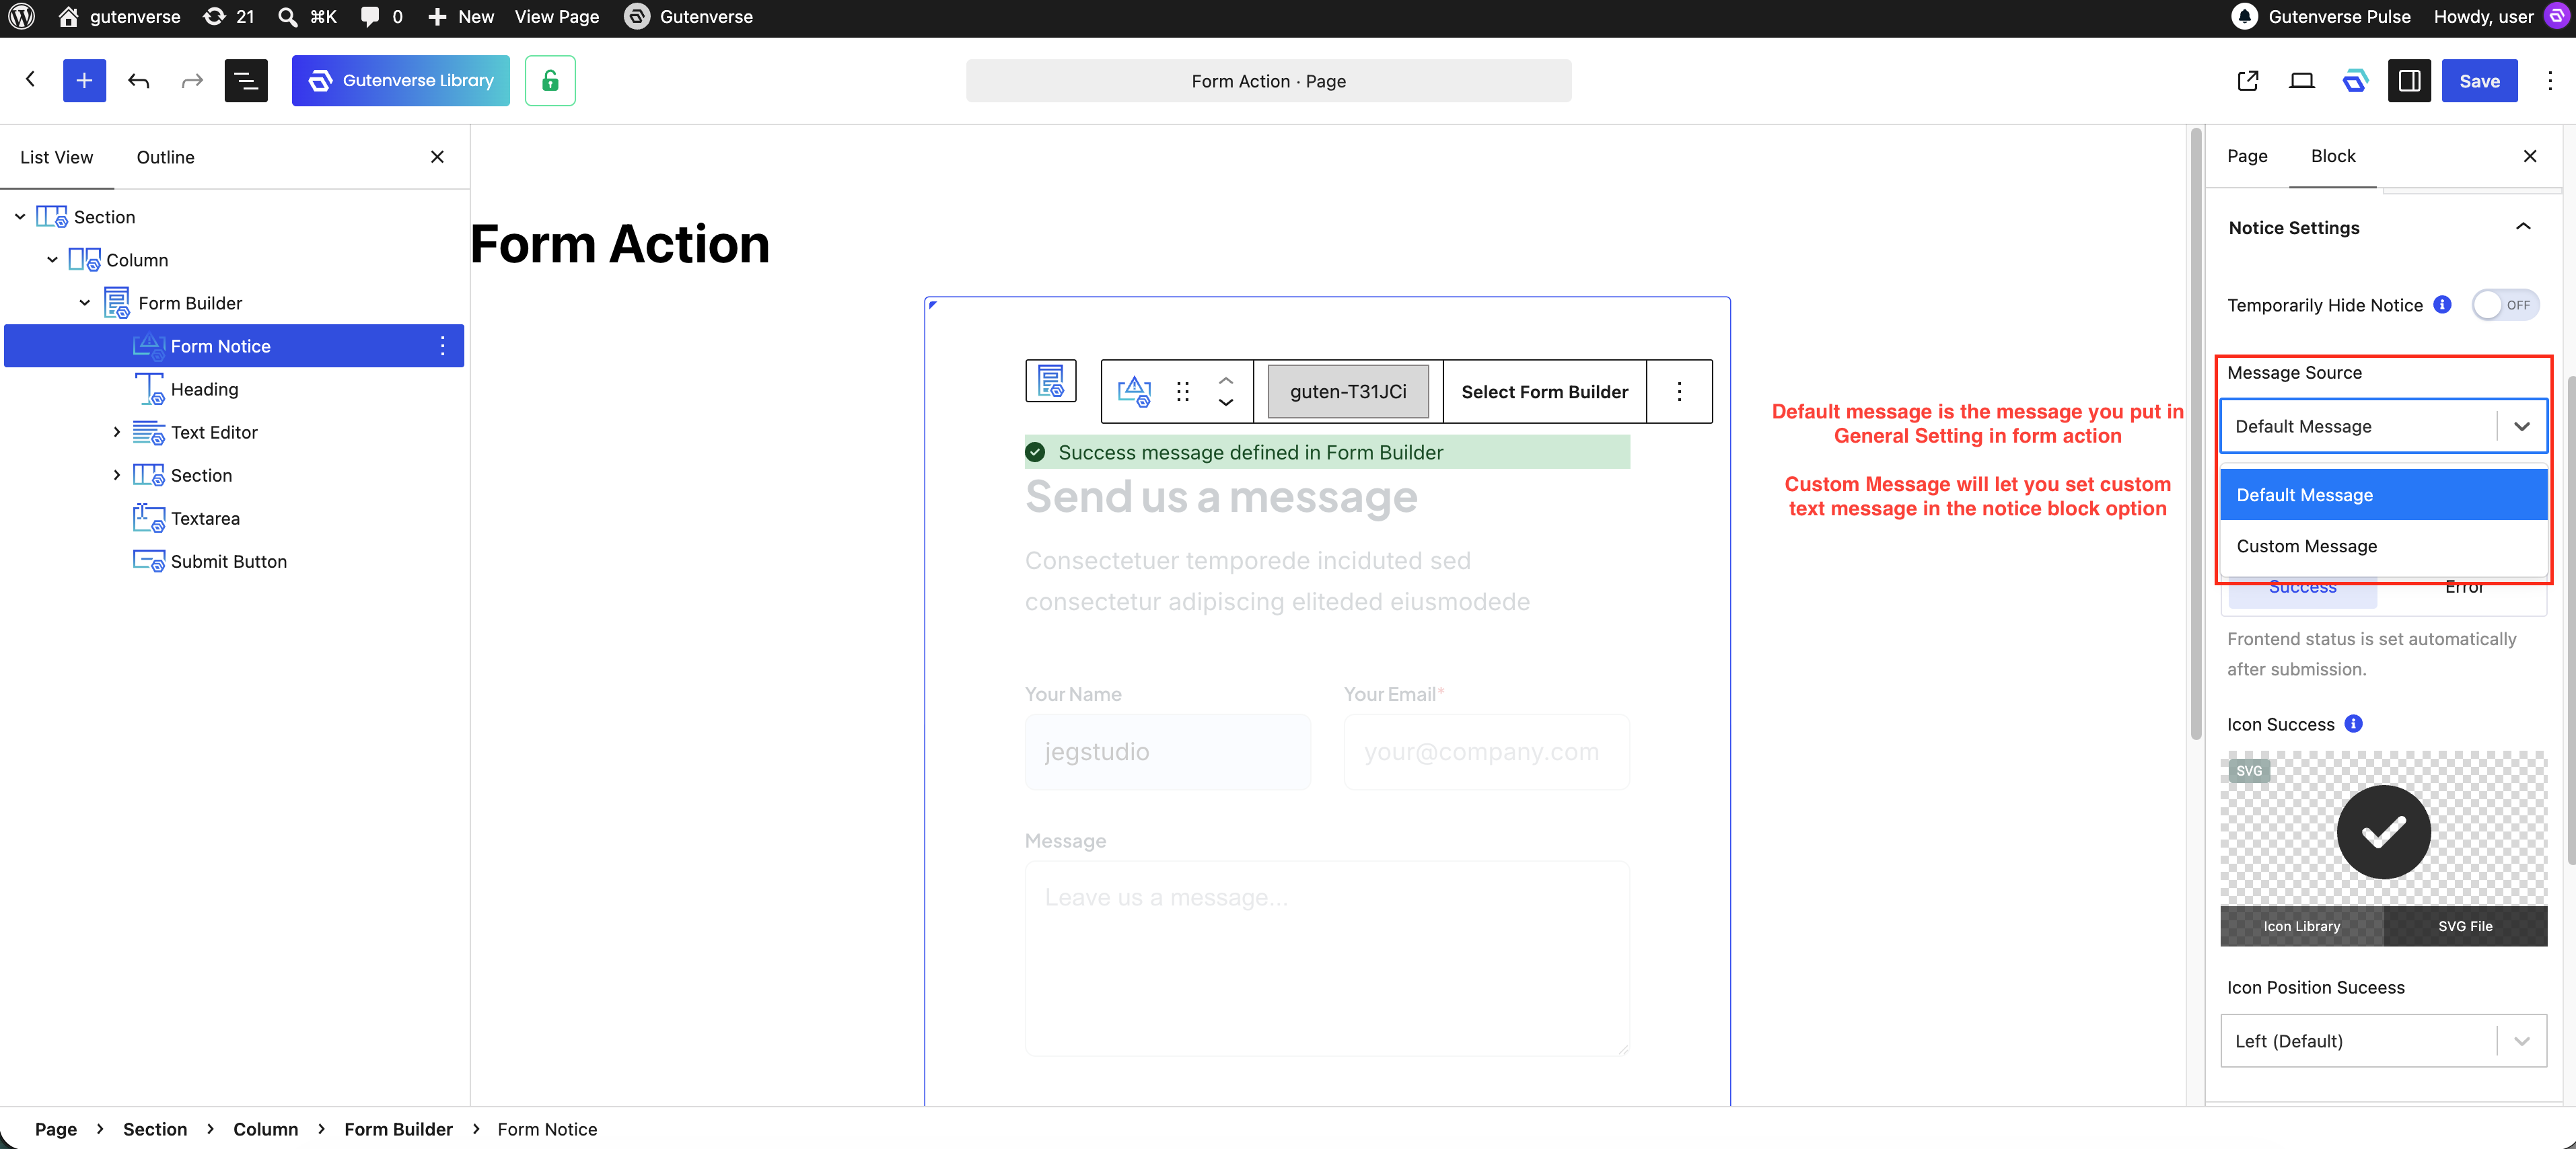
Add a Success and Error Message
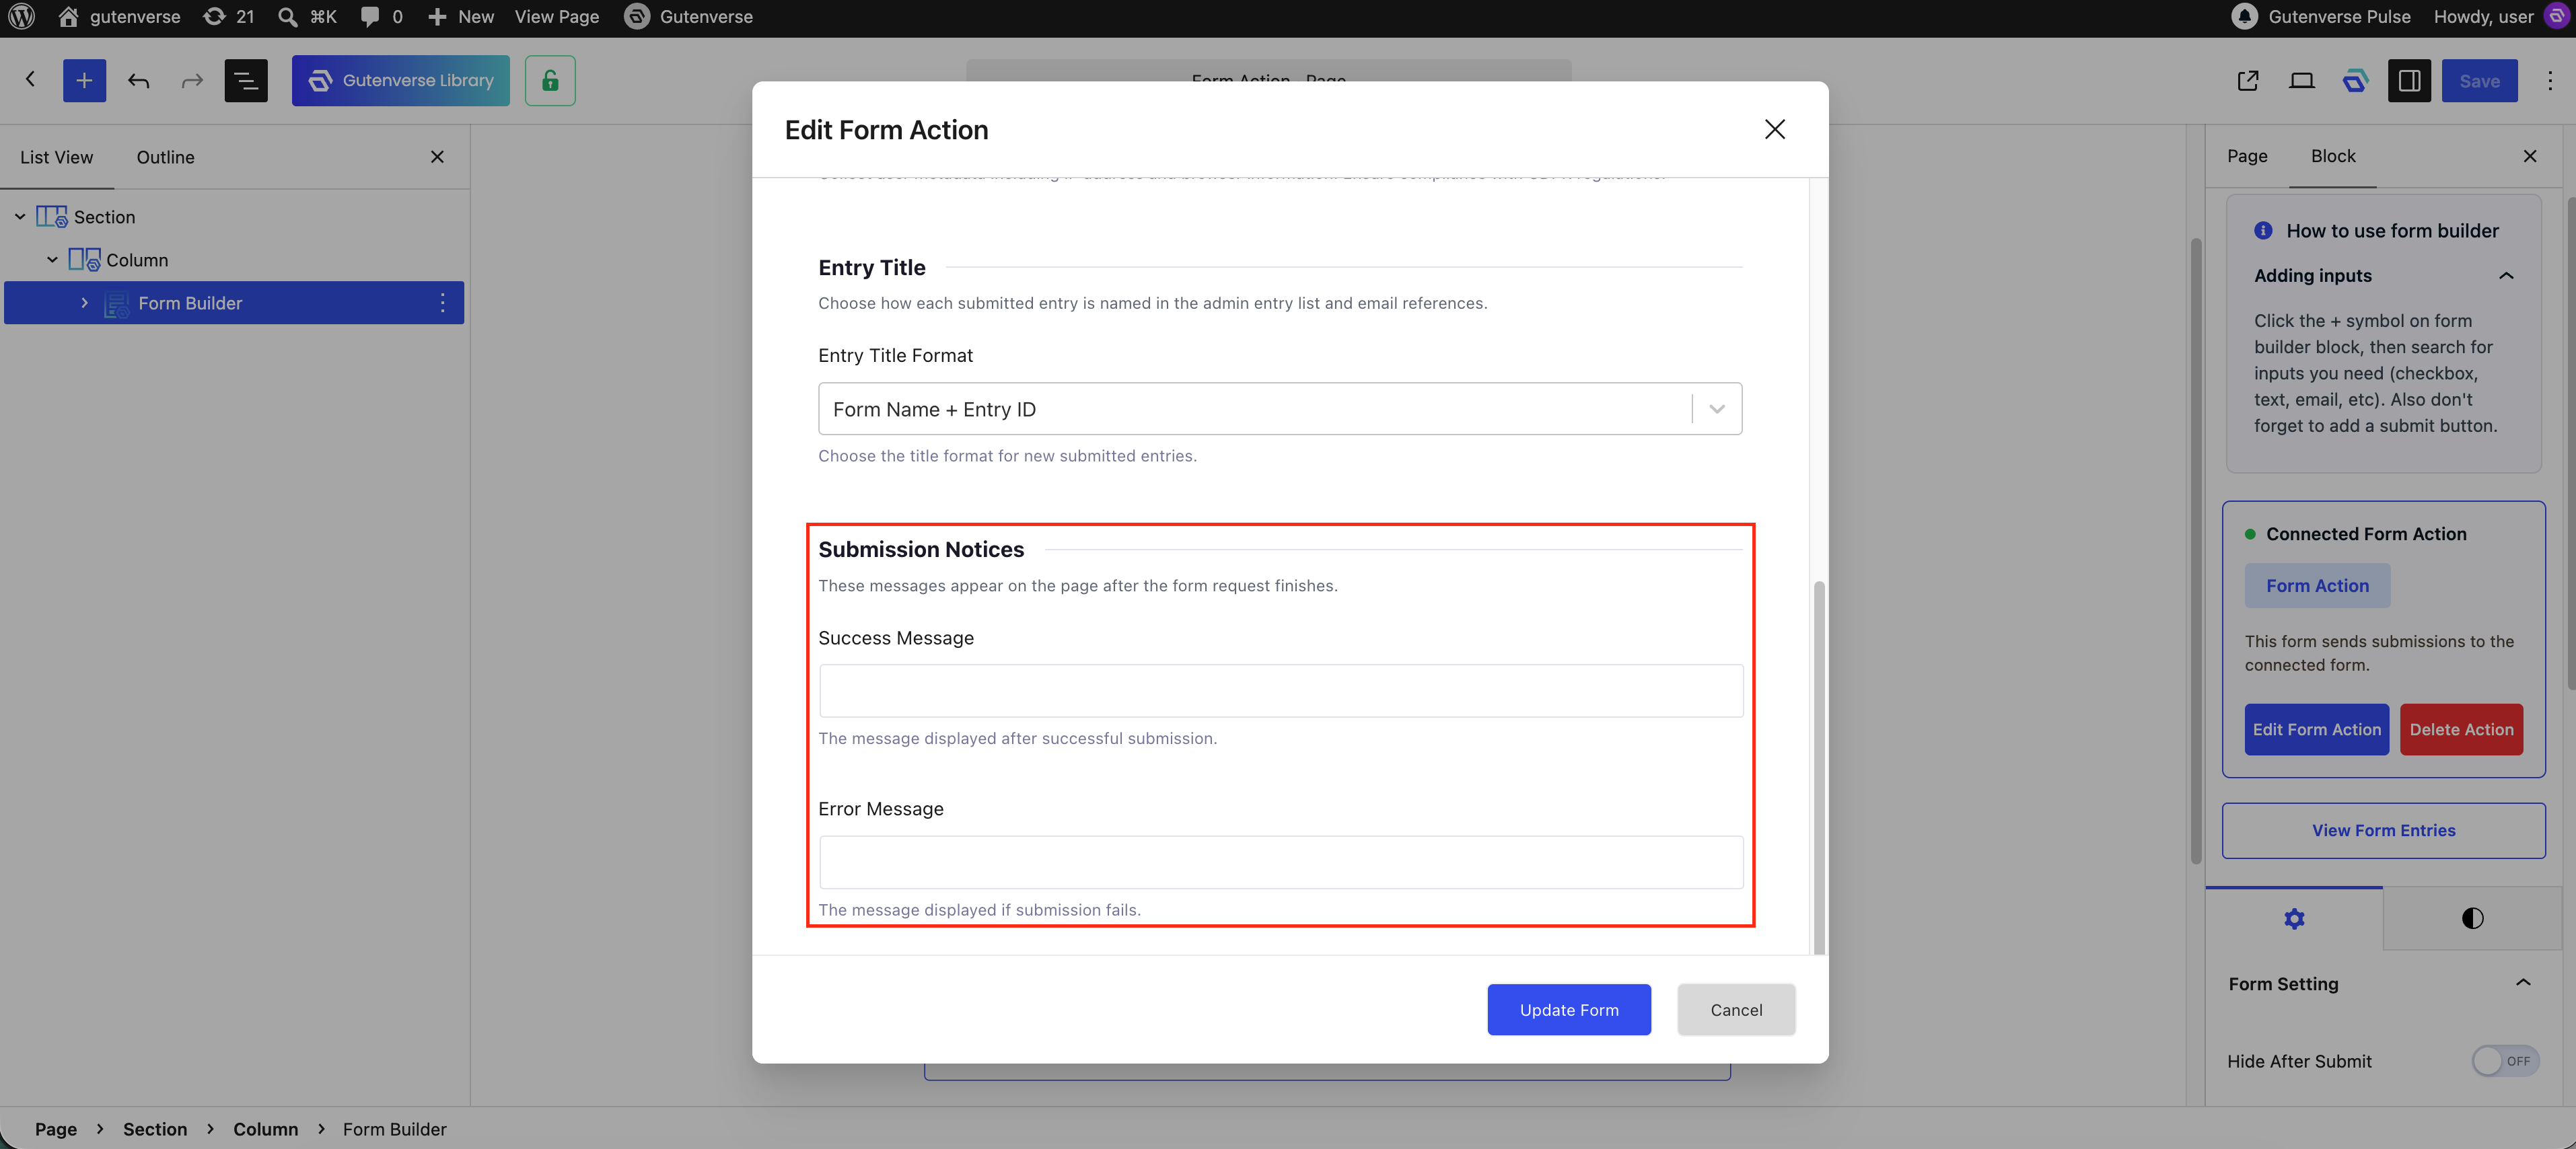
You can choose what visitors see after they submit the form.
To configure these messages:
1. Select the Form Builder block.
2. Click Edit Form Action.
3. Open the General tab.
4. Enter your Success Message.
5. Enter your Error Message.
6. Click Update Form.
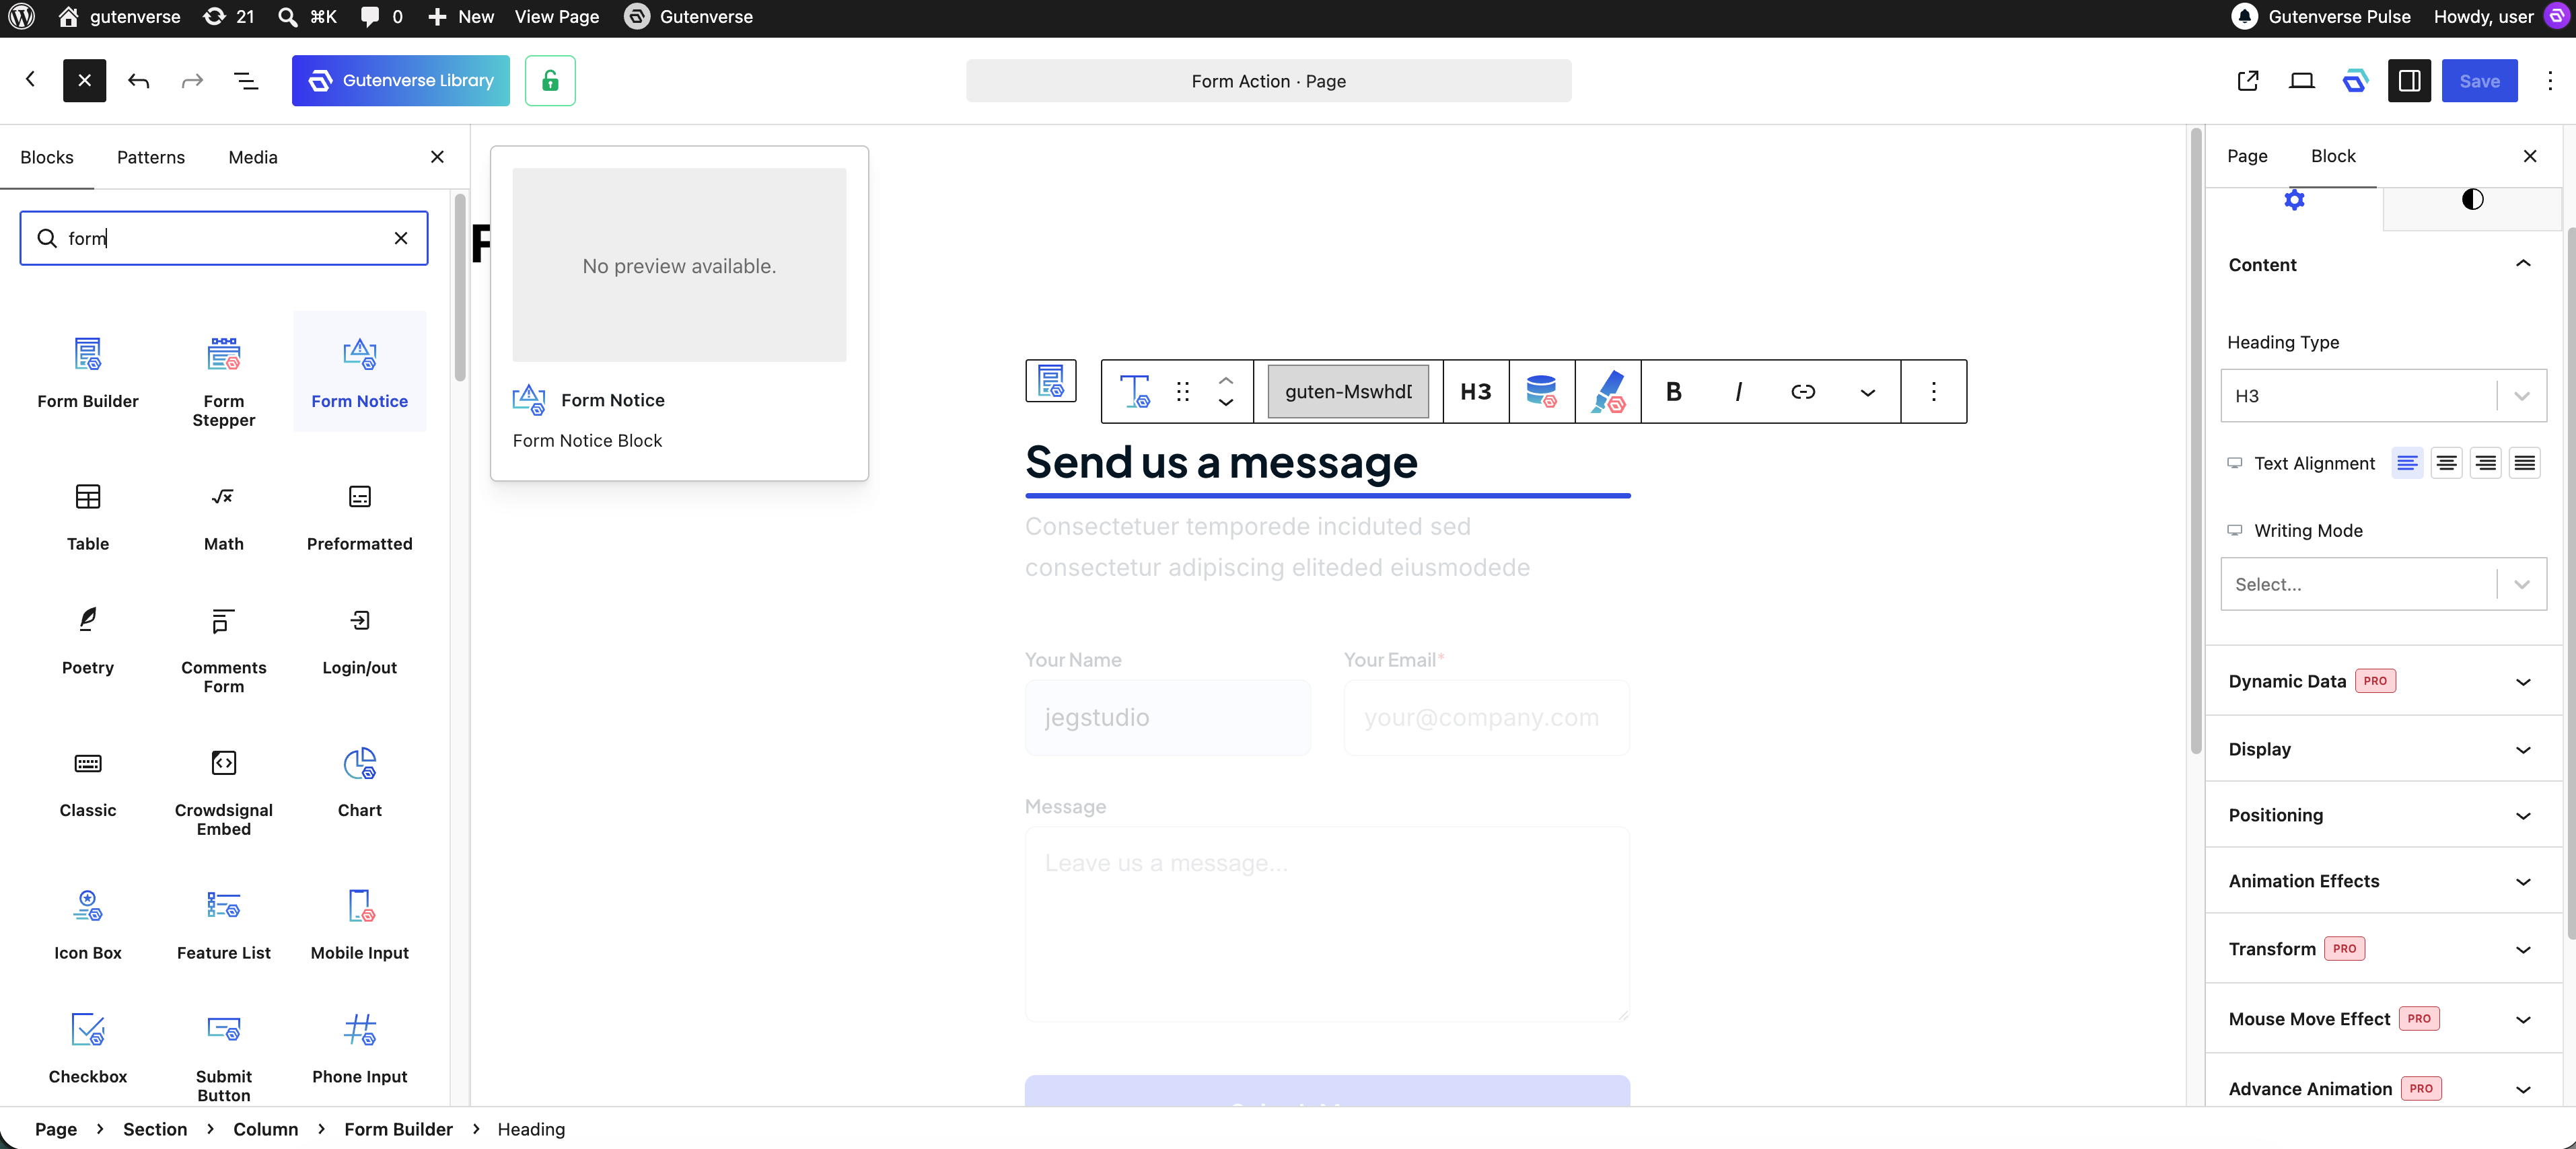
7. Optionally, you can customize how these messages look by adding a Form Notice block inside the Form Builder block.
For example:
Success Message – Thank you. Your message has been sent.
Error Message – Something went wrong. Please check the form and try again.
You can customize these messages to match your website.
Optional: Hide the Form or Redirect Visitors
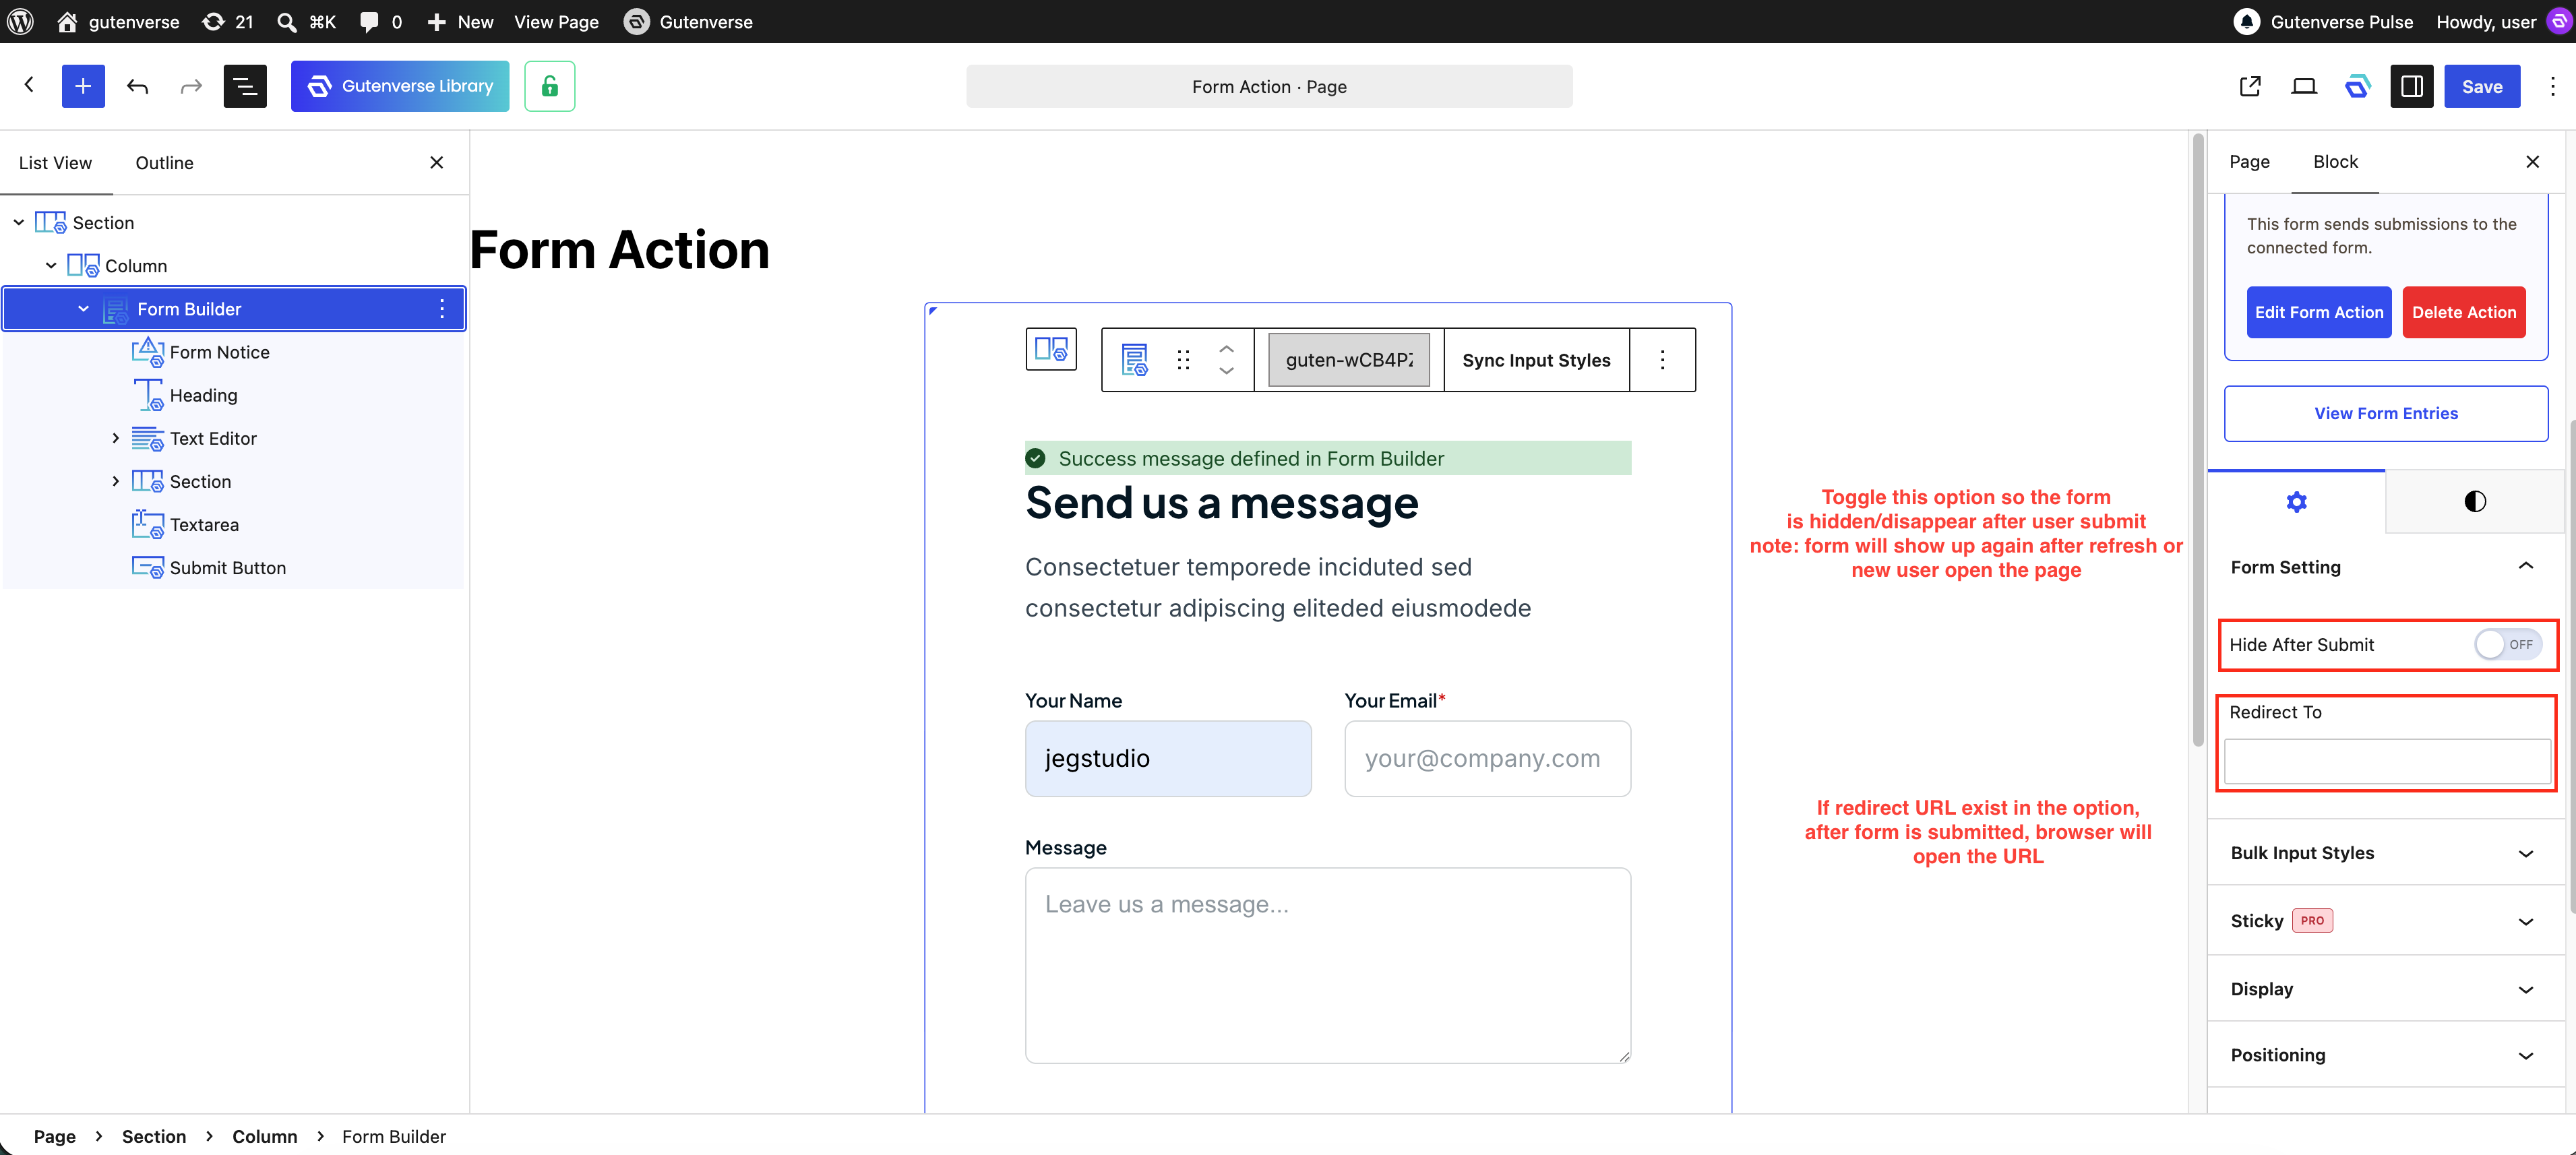
You can also choose what happens to the form after a successful submission.
These settings are available in the Form Builder, rather than inside the Form Action.
To configure them:
1. Select the Form Builder block.
2. Open Form Settings.
3. Enable Hide After Submit if you want the form to disappear after a successful submission.
4. Add a Redirect To URL if you want to send visitors to another page.
A redirect can be useful when you have a dedicated Thank You page, booking process, or download page.
Edit an Existing Form Action
You can change your Form Action settings at any time.
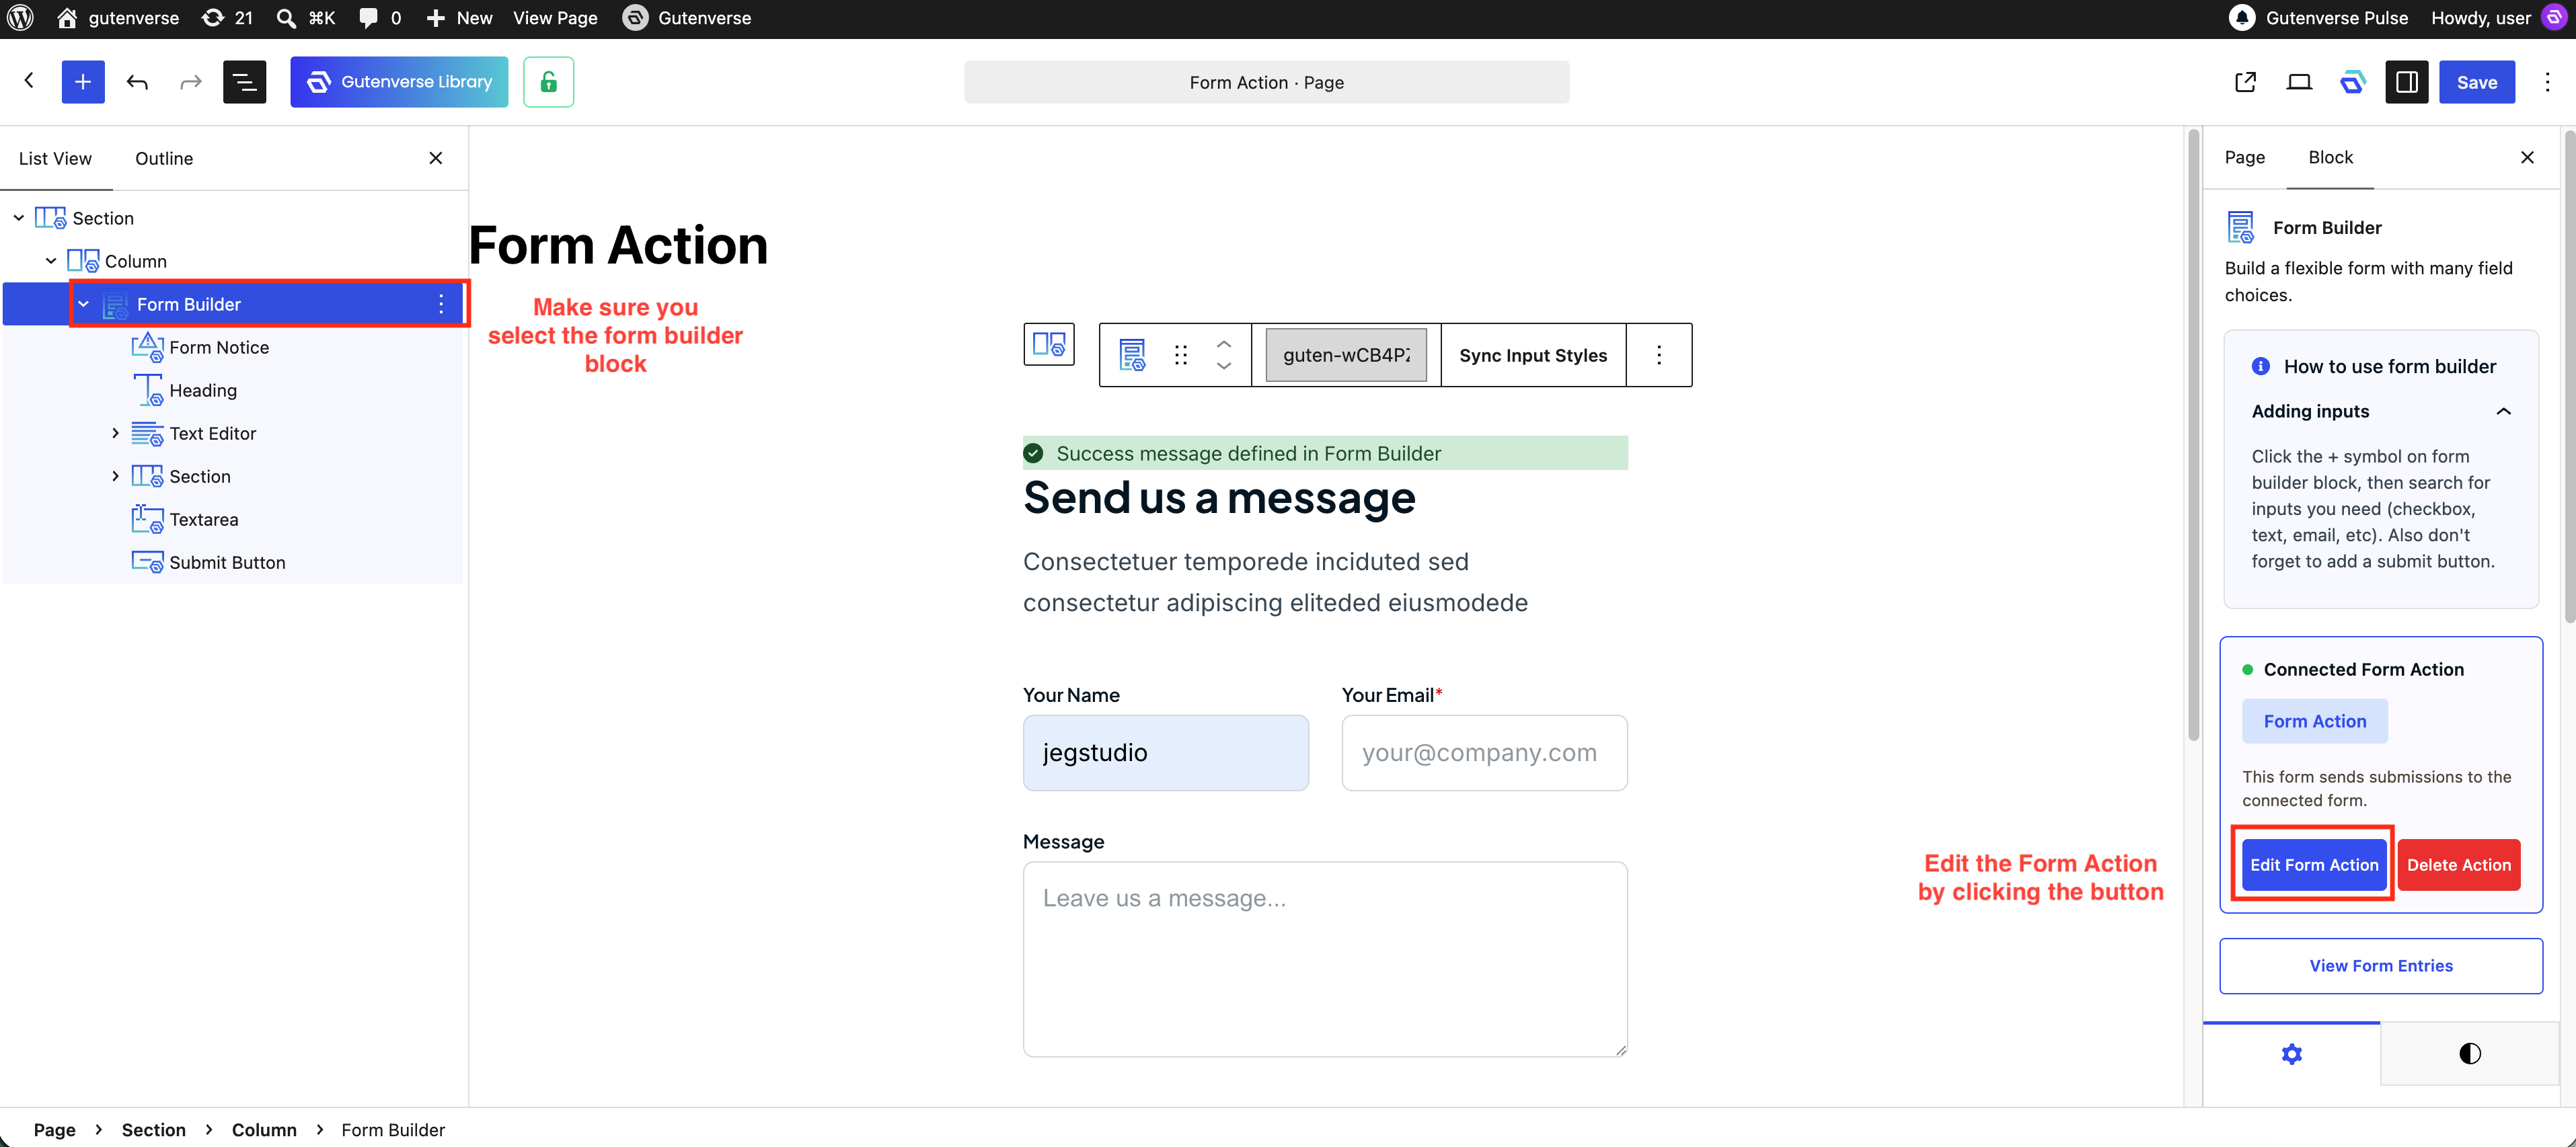
To edit it:
1. Select the Form Builder block.
2. Find the connected Form Action card.
3. Click Edit Form Action.
4. Make your changes.
5. Click Update Form.
If you also make changes to the form fields or layout, remember to save or update the page afterward.
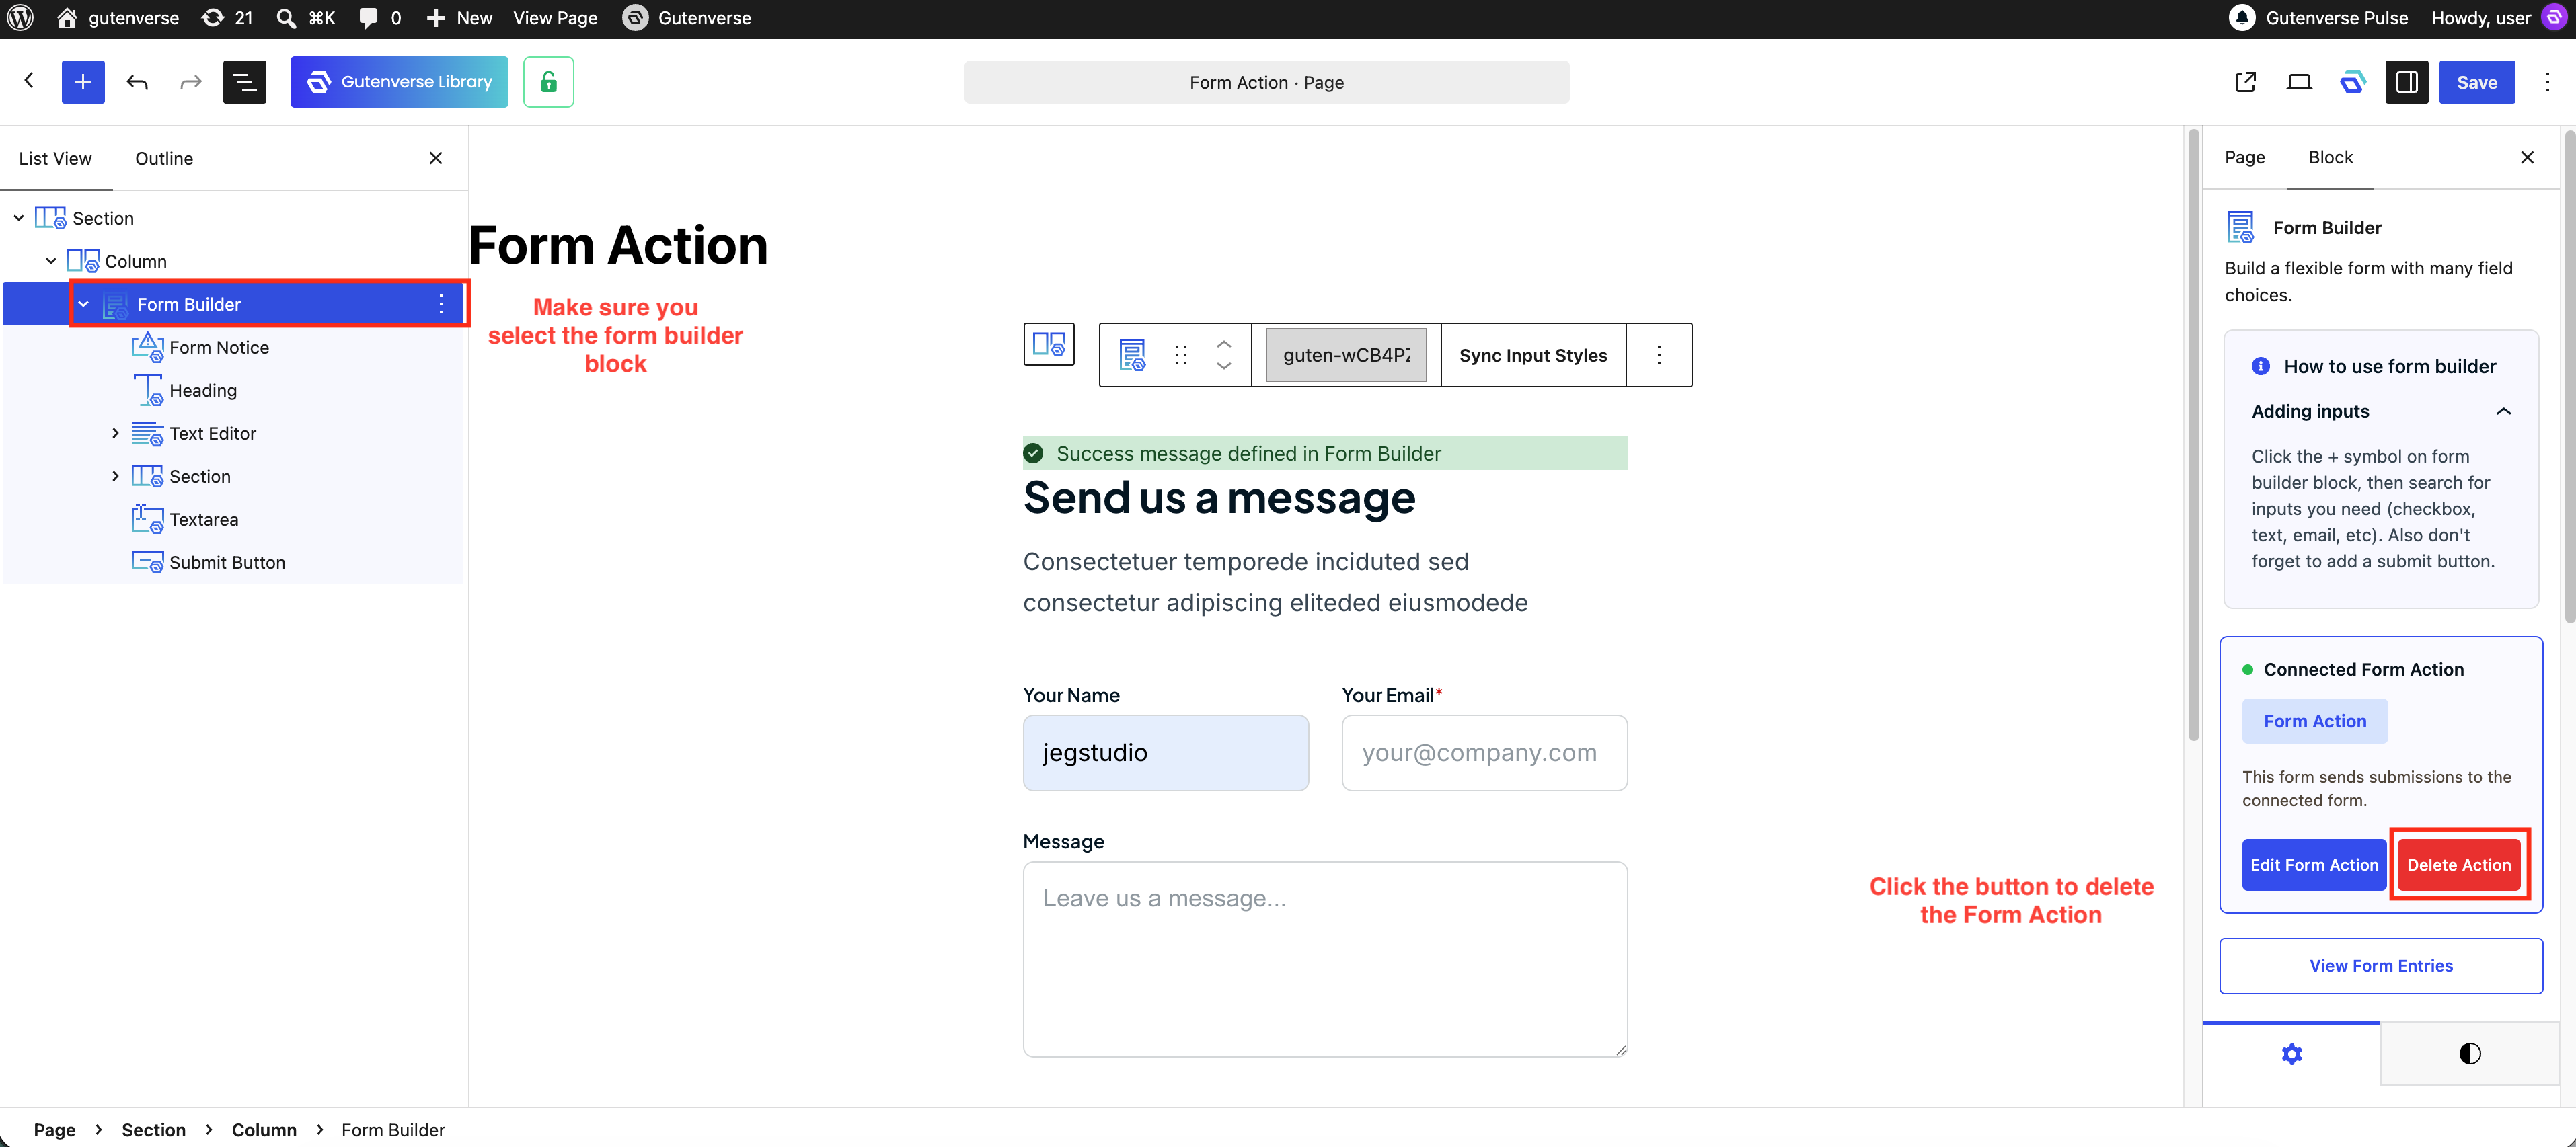
Delete a Form Action
If you no longer need a Form Action, you can remove it from the Form Builder.
1. Select the Form Builder block.
2. Click Delete Action.
3. Confirm by clicking Delete Permanently.
Warning: Deleting the Form Action removes its saved settings and disconnects it from the Form Builder.
Make sure you really want to remove it before confirming.
Publish and Test Your Form
Your form is now ready to test.
Before sharing it with visitors, we recommend submitting a test entry yourself.
1. Save or publish the page.
2. Open the page on the front end of your website.
3. Fill out the form.
4. Submit the form.
5. Go to Form > Entries in WordPress.
6. Check that your test submission appears.
7. If email notifications are enabled, check that the emails are received.
If the Form Doesn’t Submit
If something isn’t working, check the following:
Once your test submission works correctly, your form is ready to use.