











Last Update: August 31, 2026
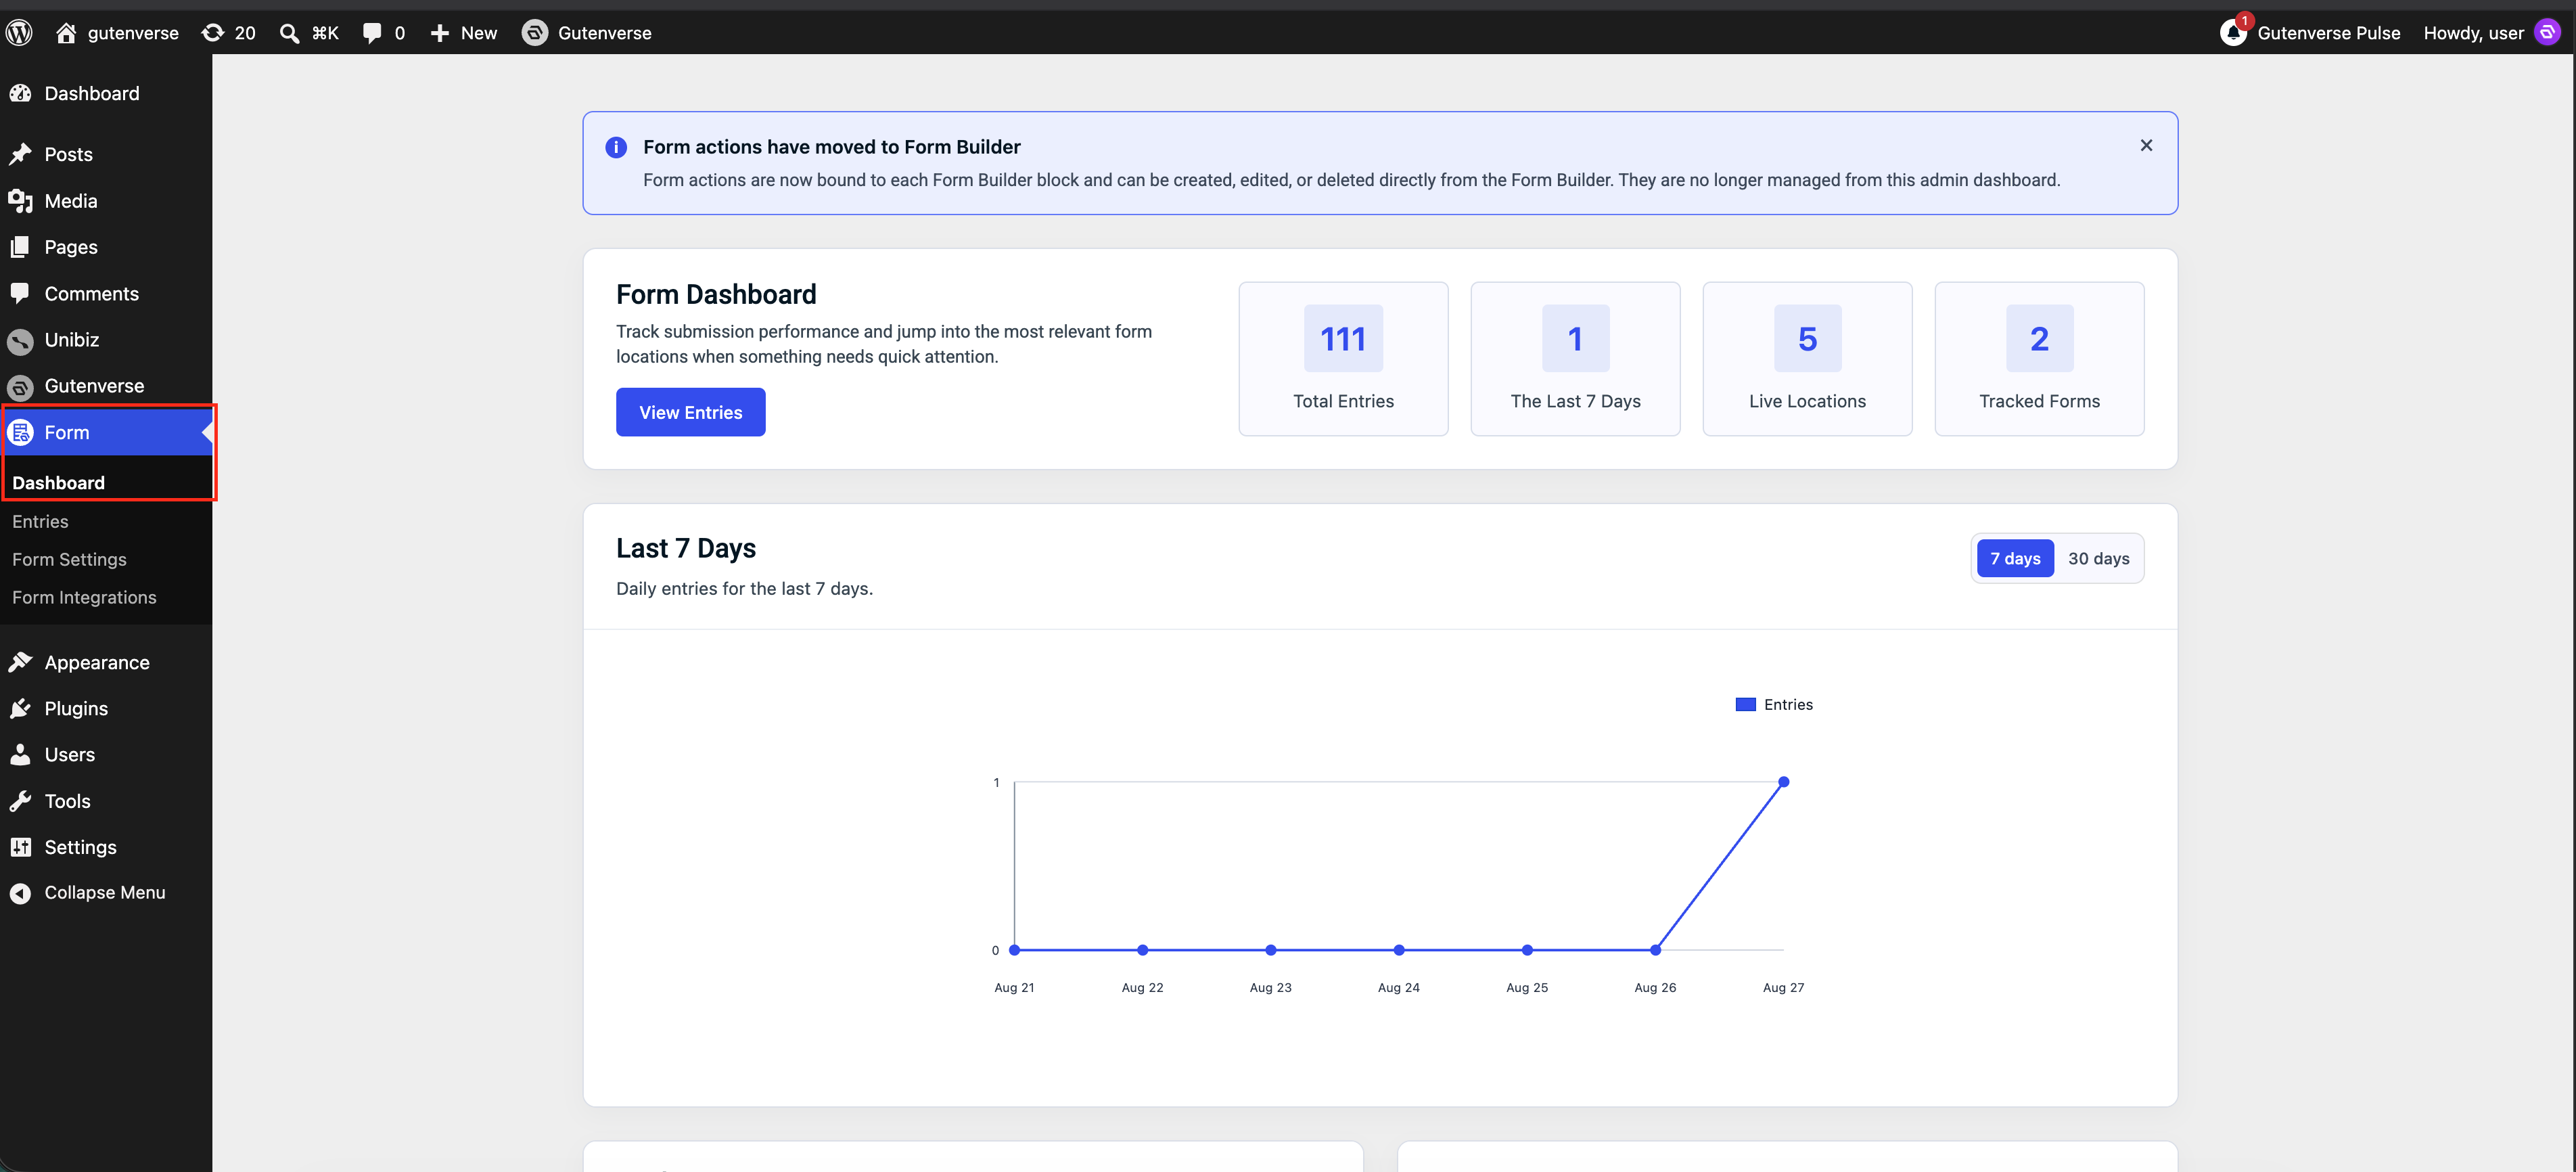
The Form Dashboard helps you monitor form activity from the WordPress admin area. Use it to review submission totals, open entries, check active form locations, and manage dashboard reporting preferences.
Open the Form Dashboard
1. Open the WordPress dashboard.
2. Go to Form > Dashboard.
3. Review the dashboard summary.
The dashboard is for monitoring forms. Form Actions are now created, edited, and deleted from the Form Builder block in the editor.
What You Can See
The Form Dashboard can show:
Some dashboard insight panels and range controls may depend on the license or capabilities available on your site. If a panel is locked, upgrade or activate the required license for that installation.
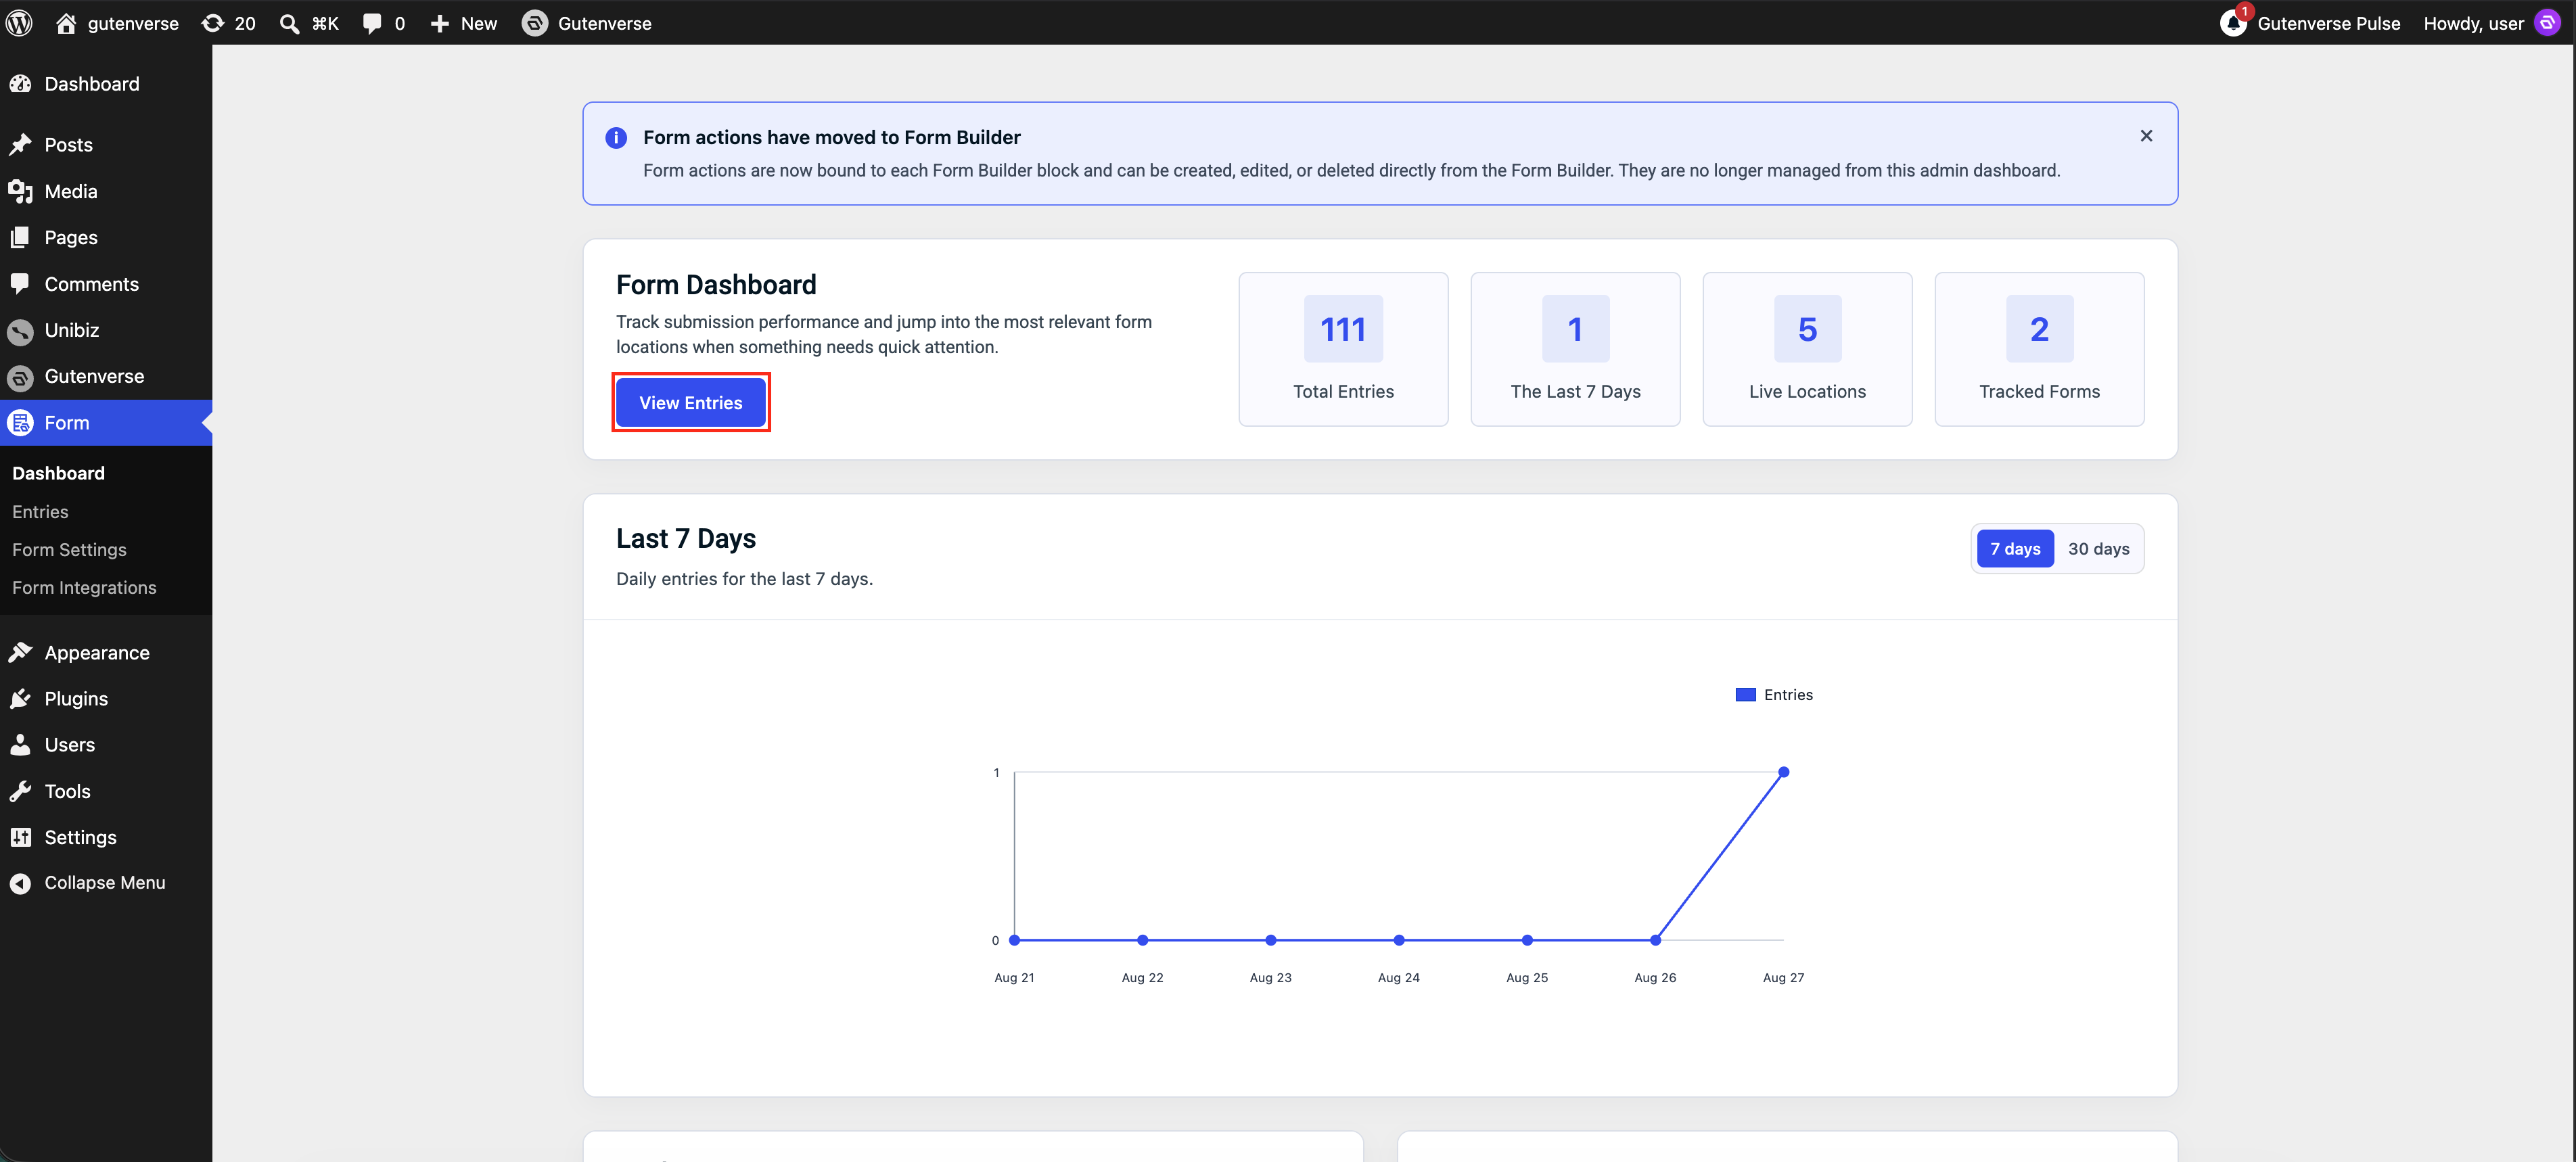
View Entries from the Dashboard
1. Go to Form > Dashboard.
2. Click View Entries.
3. Review submissions in the Entries screen.
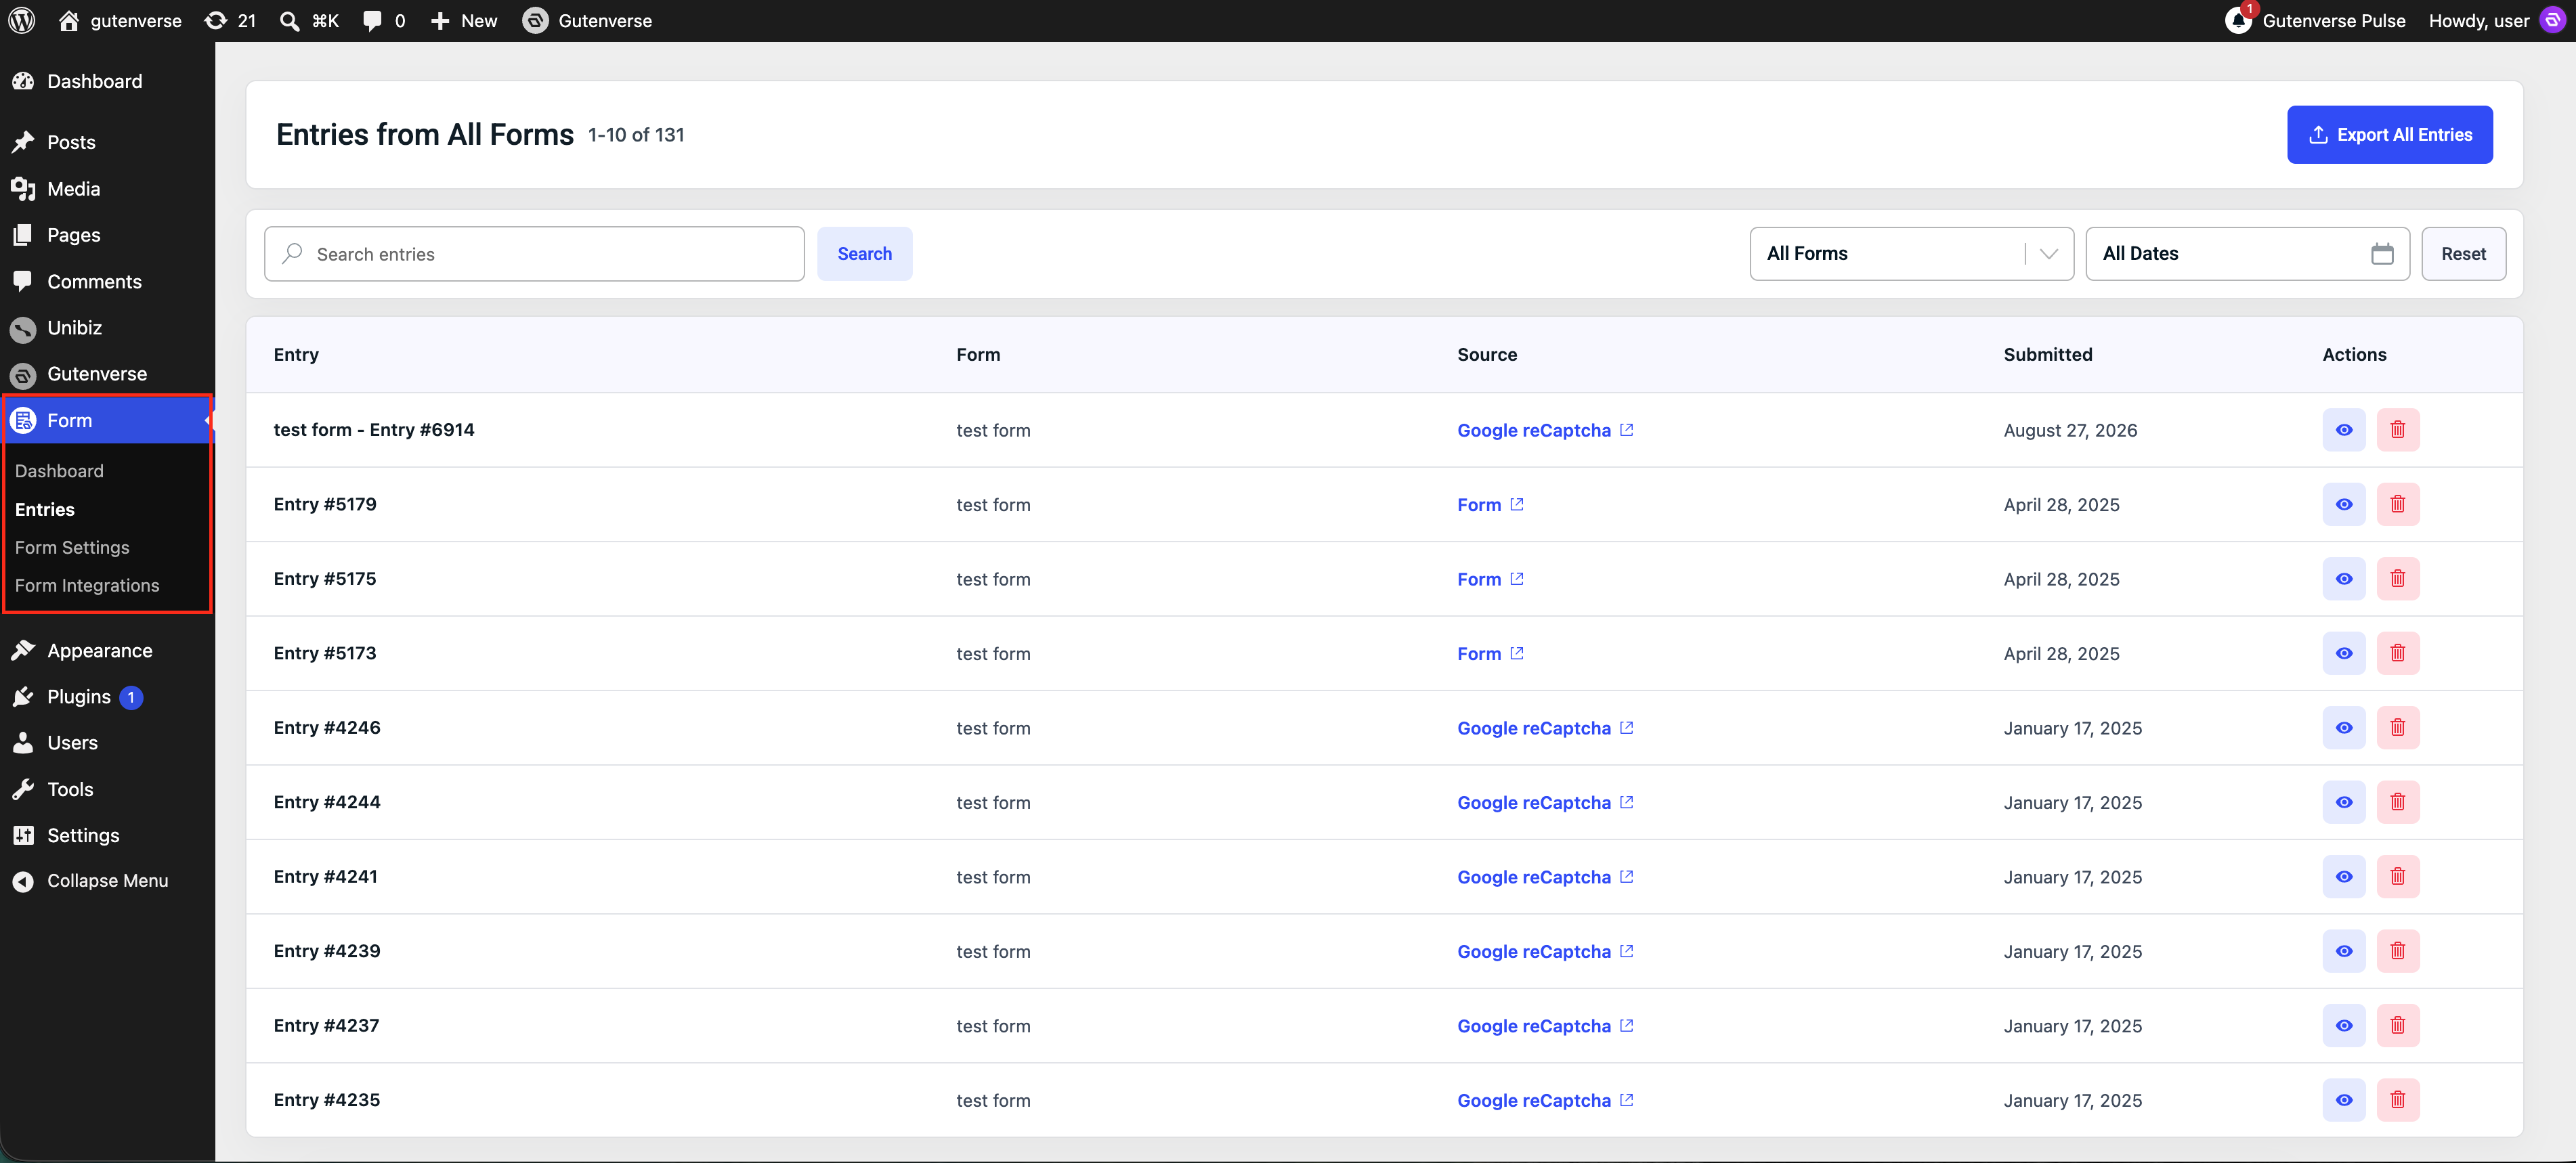
The Entries screen can show all forms or entries from a selected form, depending on the filters and capabilities available on your site.
Manage Entries
1. Go to Form > Entries.
2. Open an entry to review submitted data.
3. Delete test entries if they are no longer needed.
4. Use filters or export the entries to a CSV file.
Enable Daily Admin Summary Email
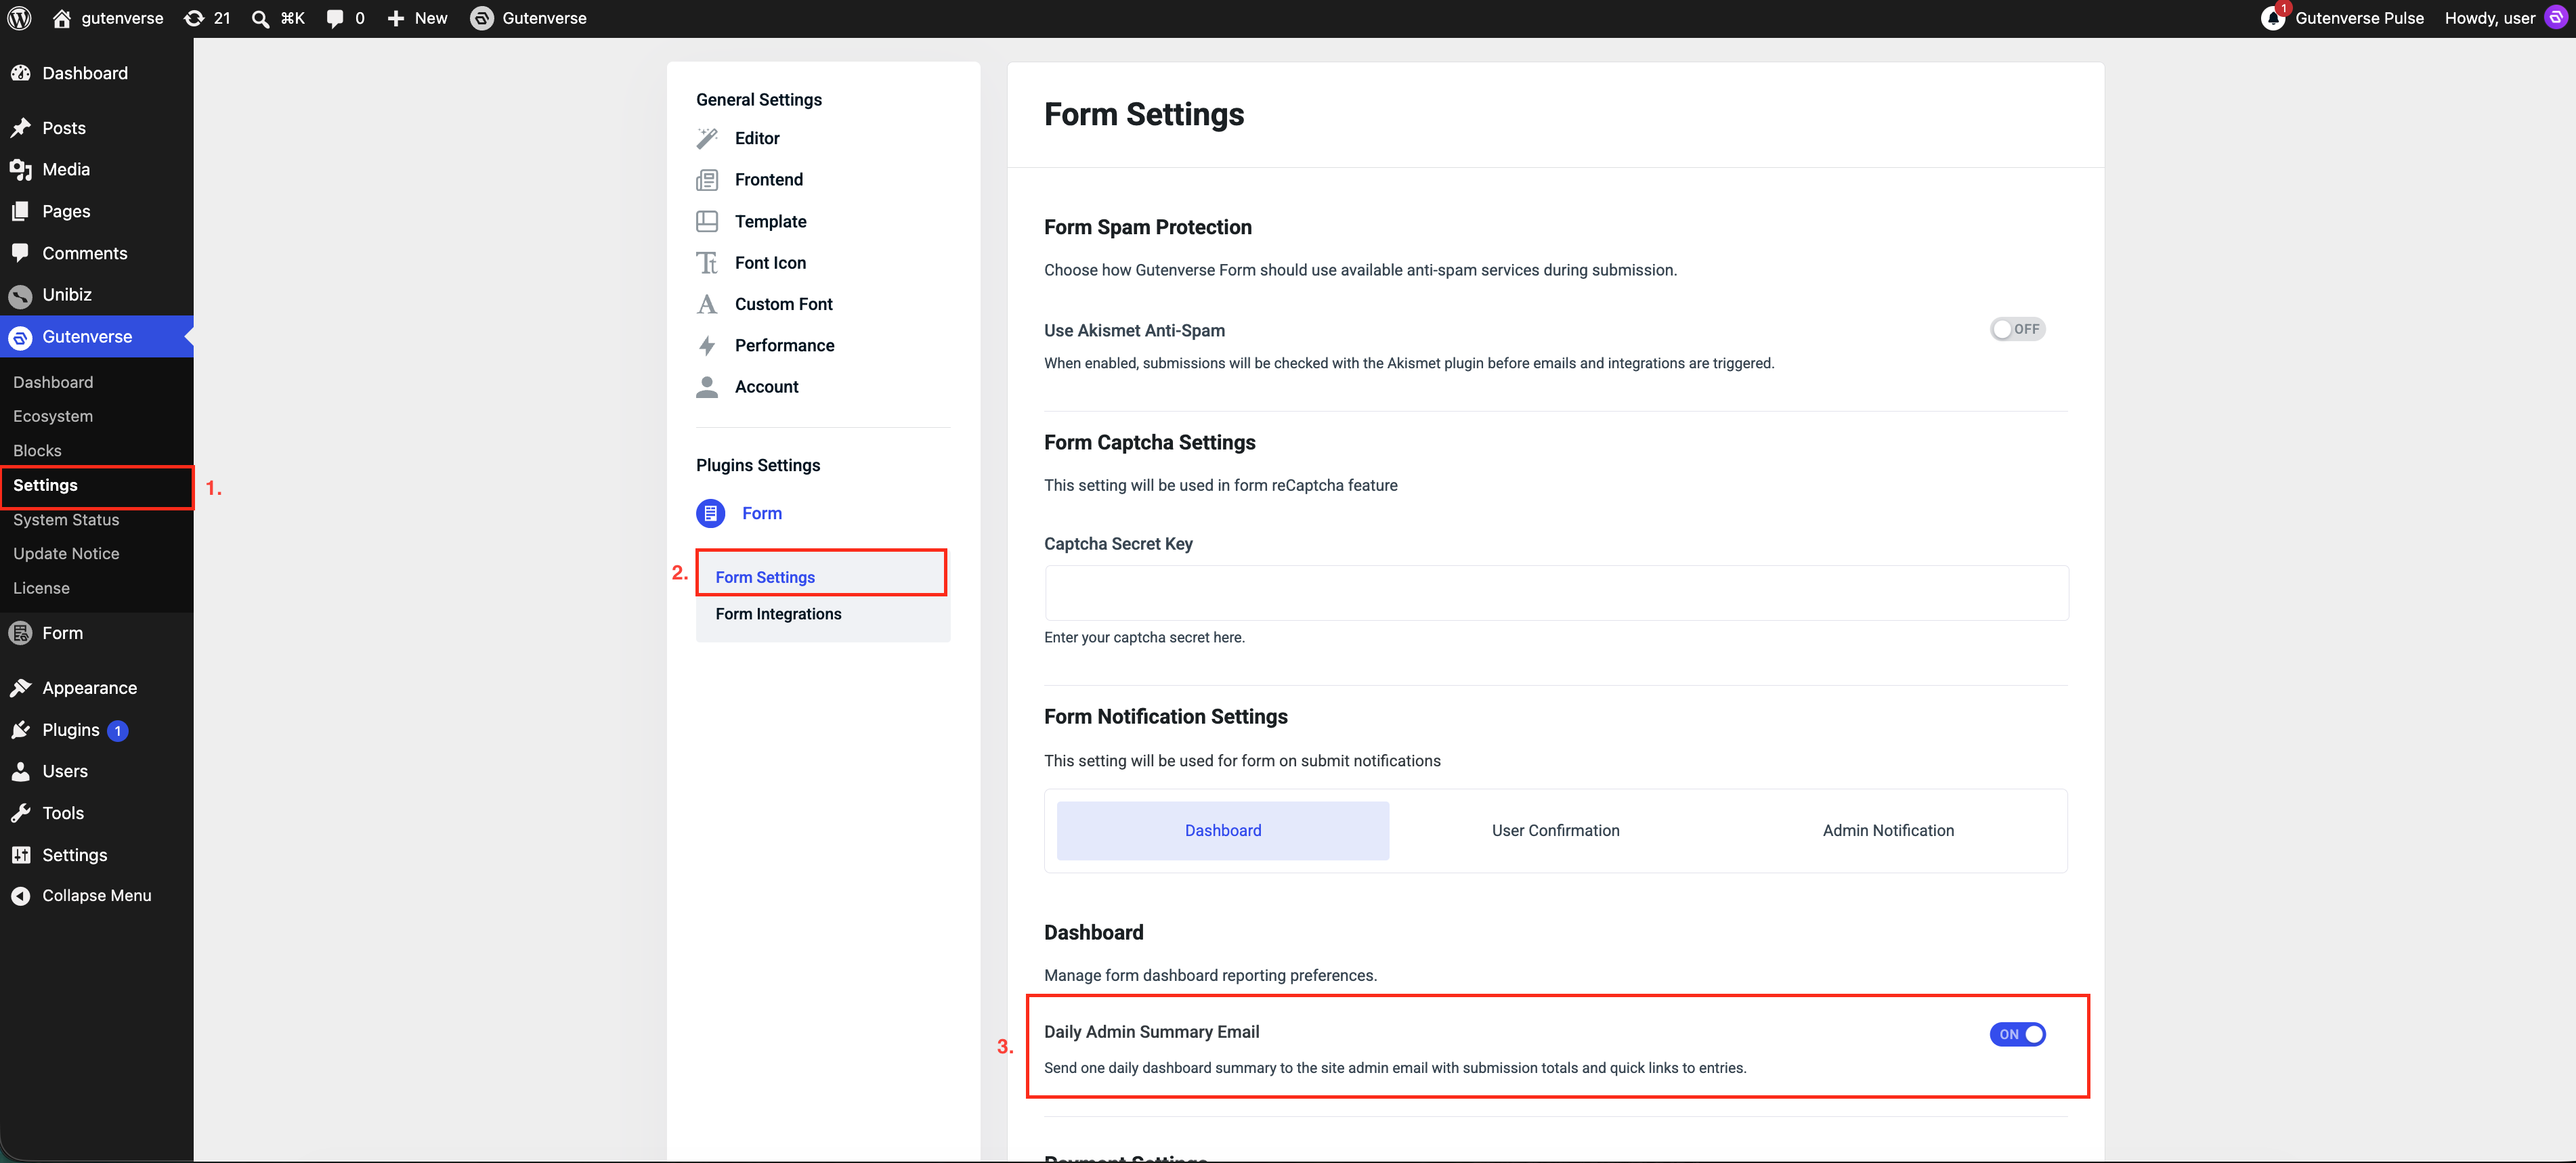
Daily Admin Summary Email sends one daily summary to the site admin email with submission totals and quick links.
1. Go to Form > Form Settings.
2. Open the Dashboard tab.
3. Enable Daily Admin Summary Email.
4. Save the settings.
Use this when the site owner wants regular form activity updates without checking the dashboard manually.
Enable Daily Admin Summary Email
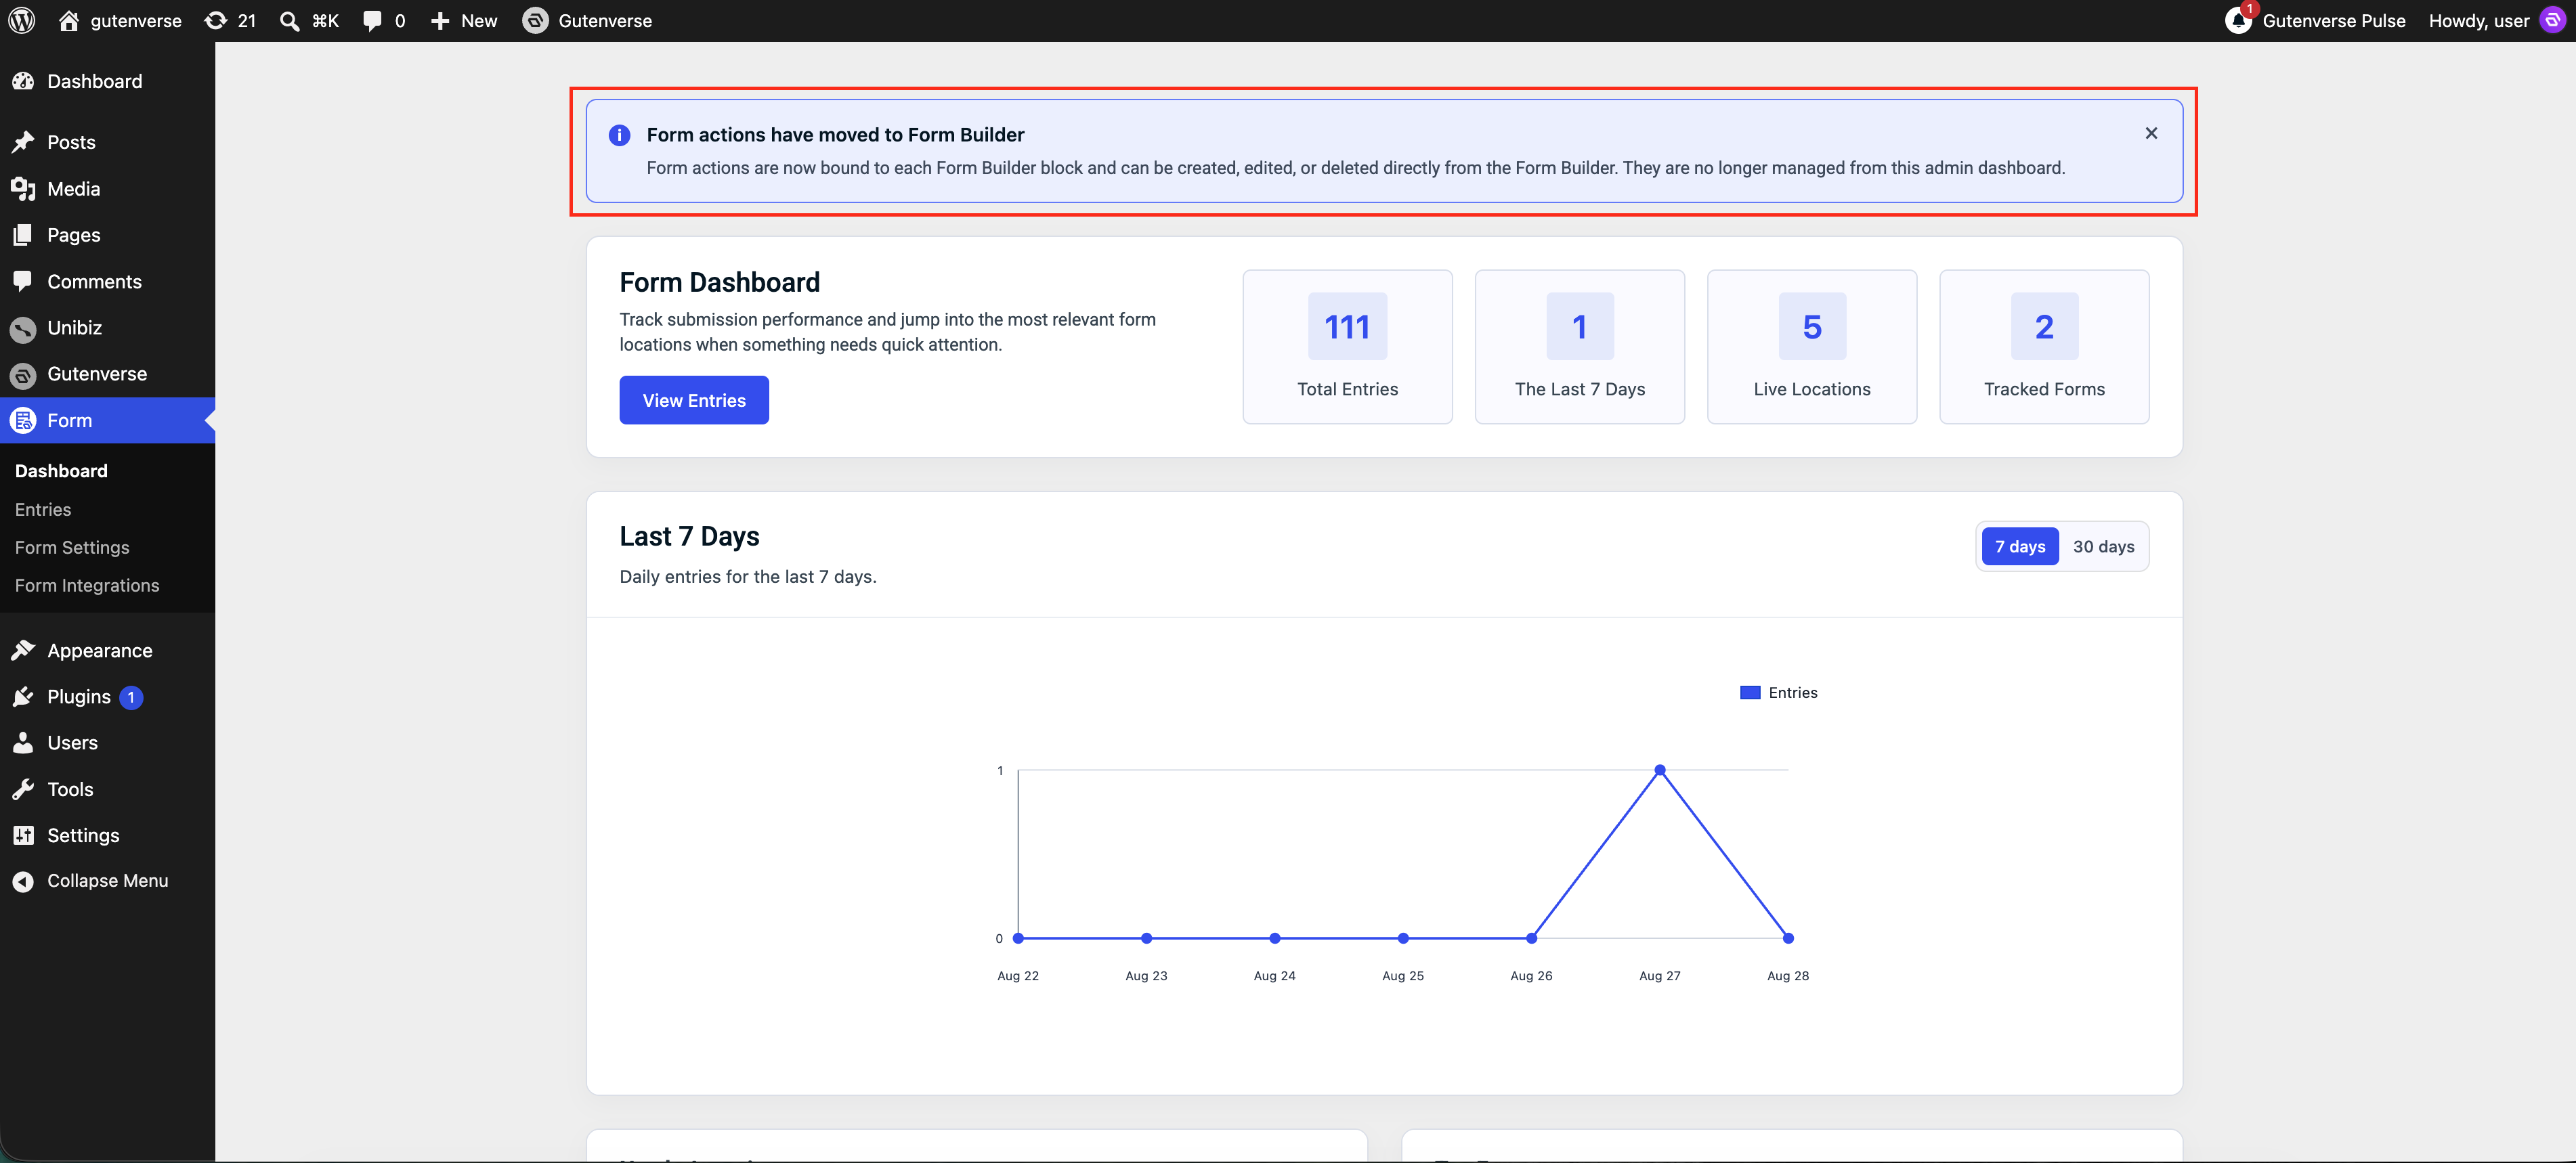
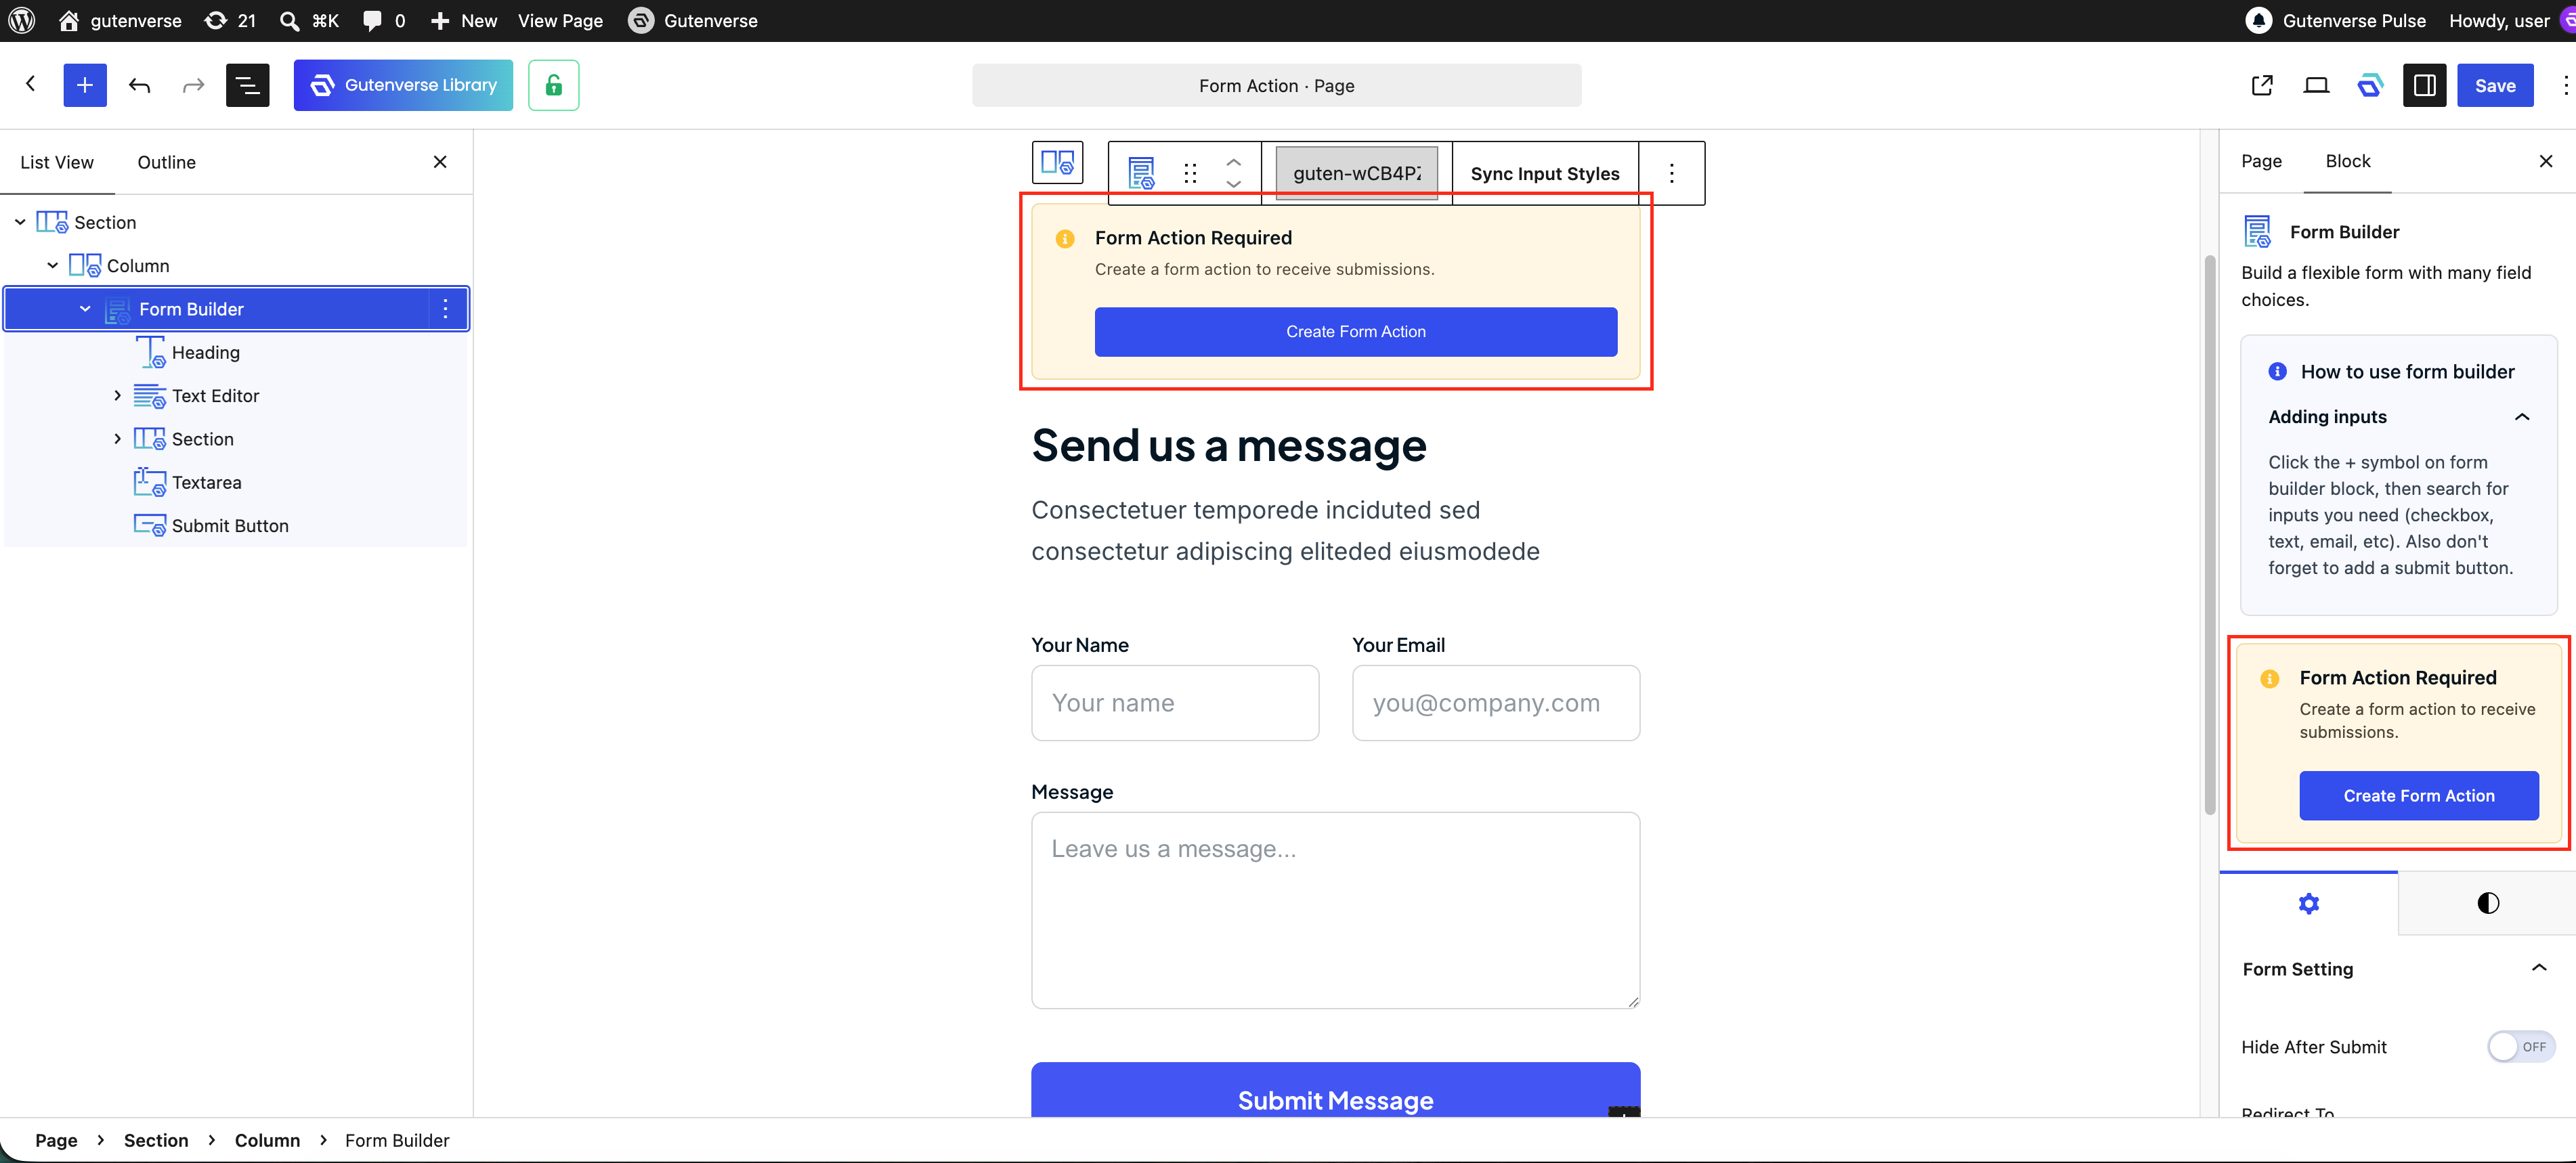
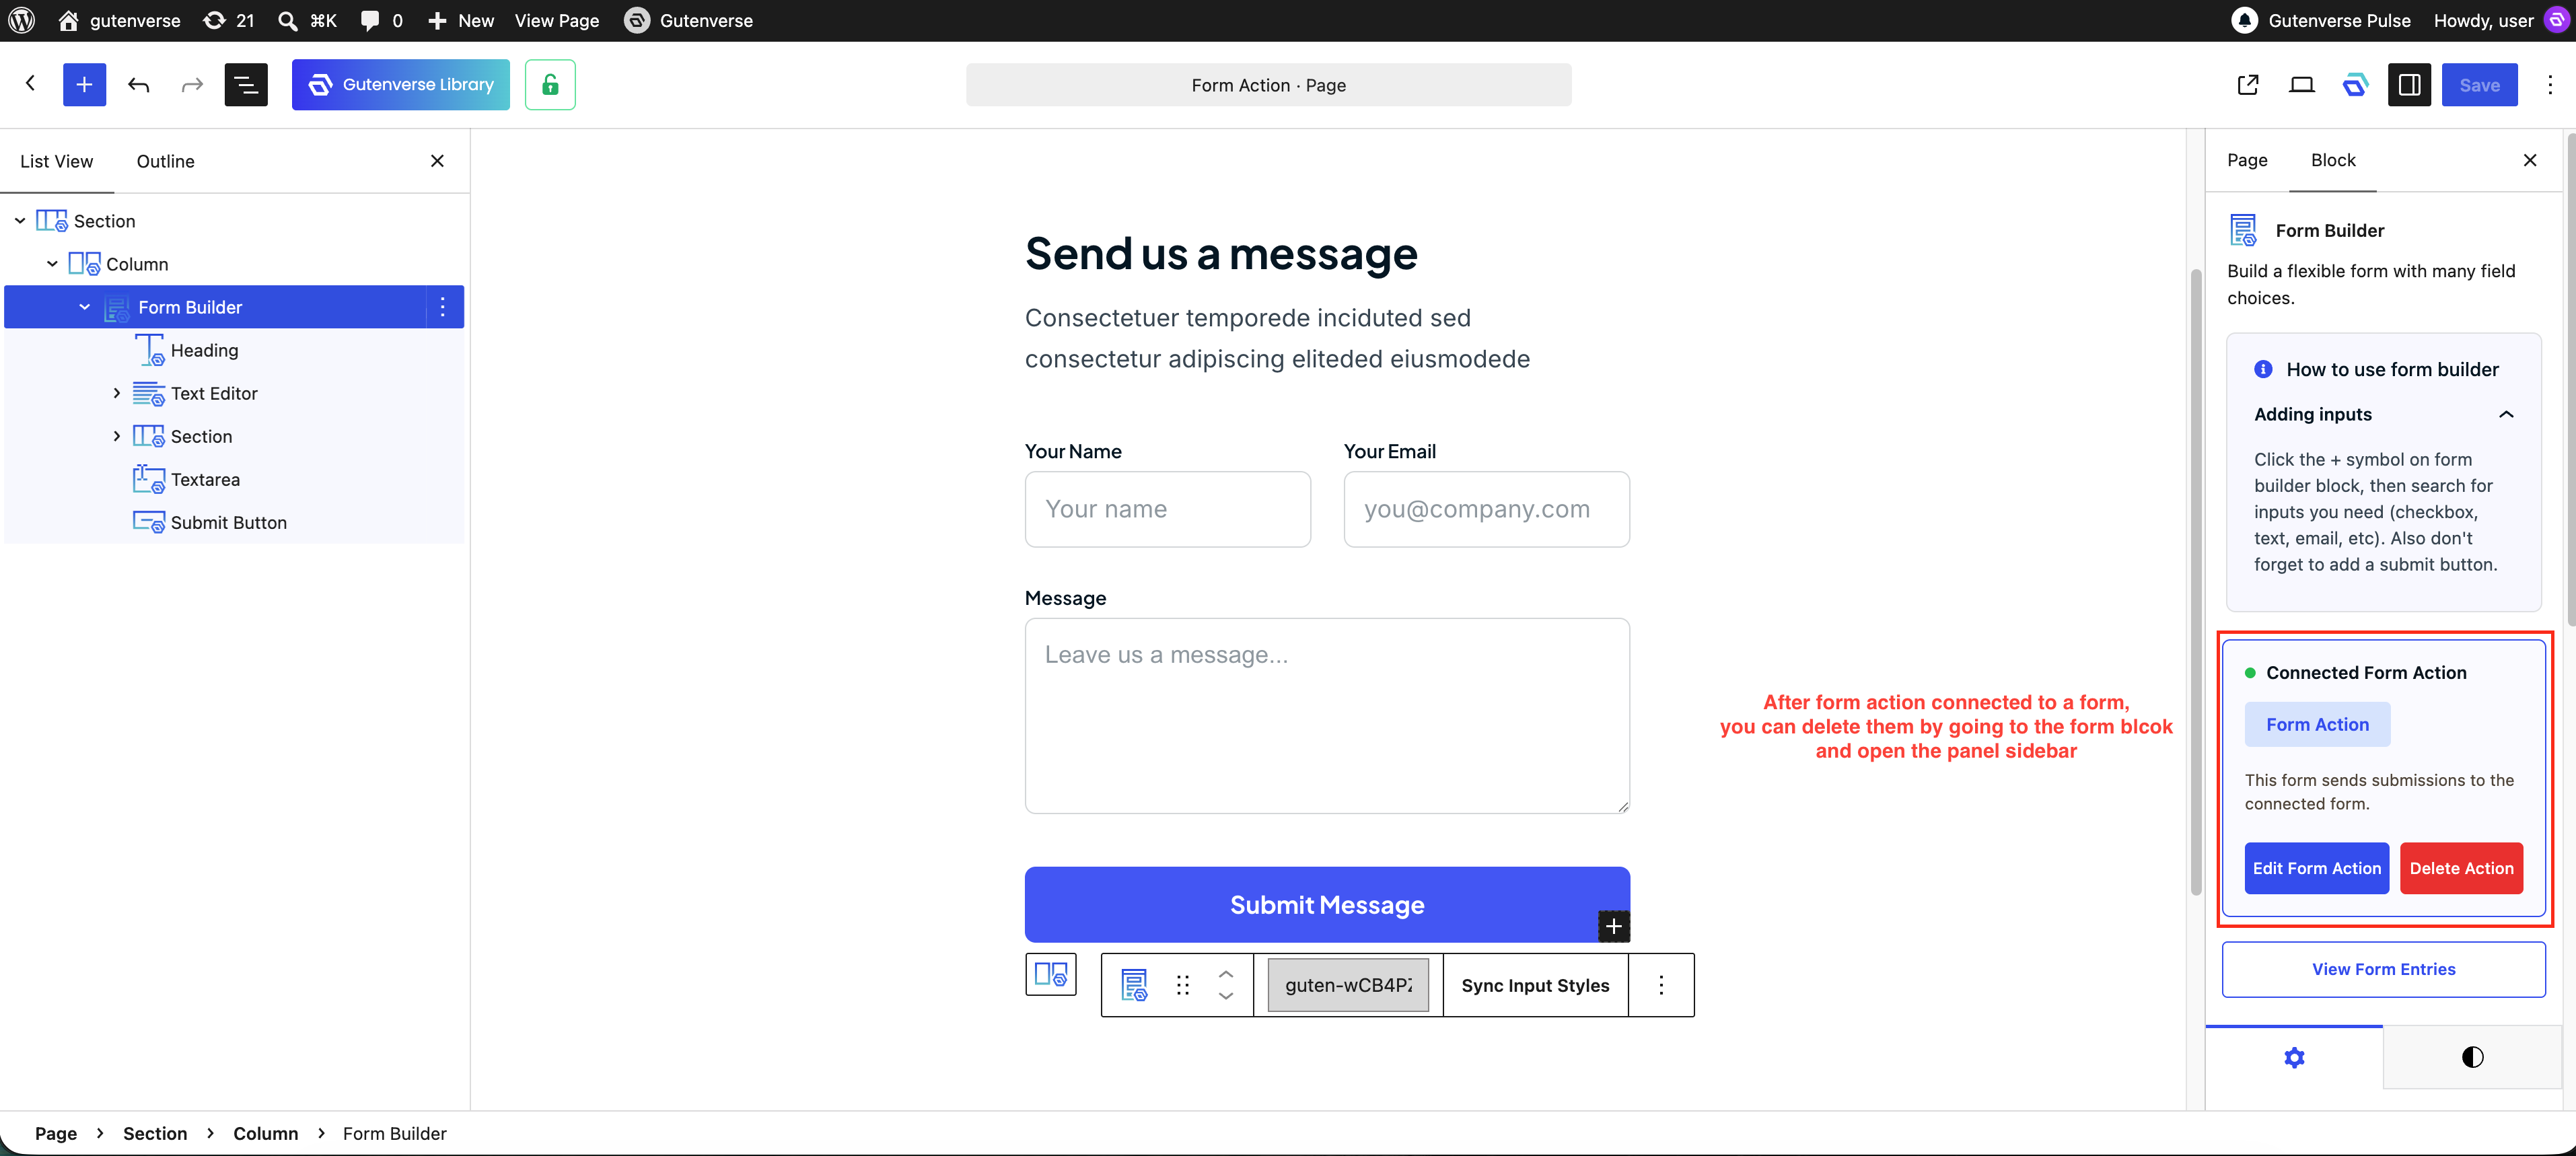
If you see a notice that Form Actions have moved to Form Builder, it means the dashboard is no longer the main place to manage form actions.
To manage a Form Action:
1. Open the page that contains the form.
2. Select the Form Builder block.
3. Use the connected Form Action card.
4. Click Create Form Action, Edit Form Action, or Delete Action.
Troubleshooting
If the dashboard does not show the expected data: