Transform your website with interactive Image Border Radius Animation that responds to users scrolling. These scroll-triggered effects reshape your images with fluid, customizable borders, enhancing the visual appeal of your content. Perfect for highlighting important visuals, directing user attention, and adding a touch of interactivity to your site.
How To Set Image Border Radius Animations on Scroll Trigger
You can set this animation on Pages or Appearance -> Editor. Then open the pages or site editor :
1.
Inside the Editor, click on the image you want to add Image Border Radius Animation
2.
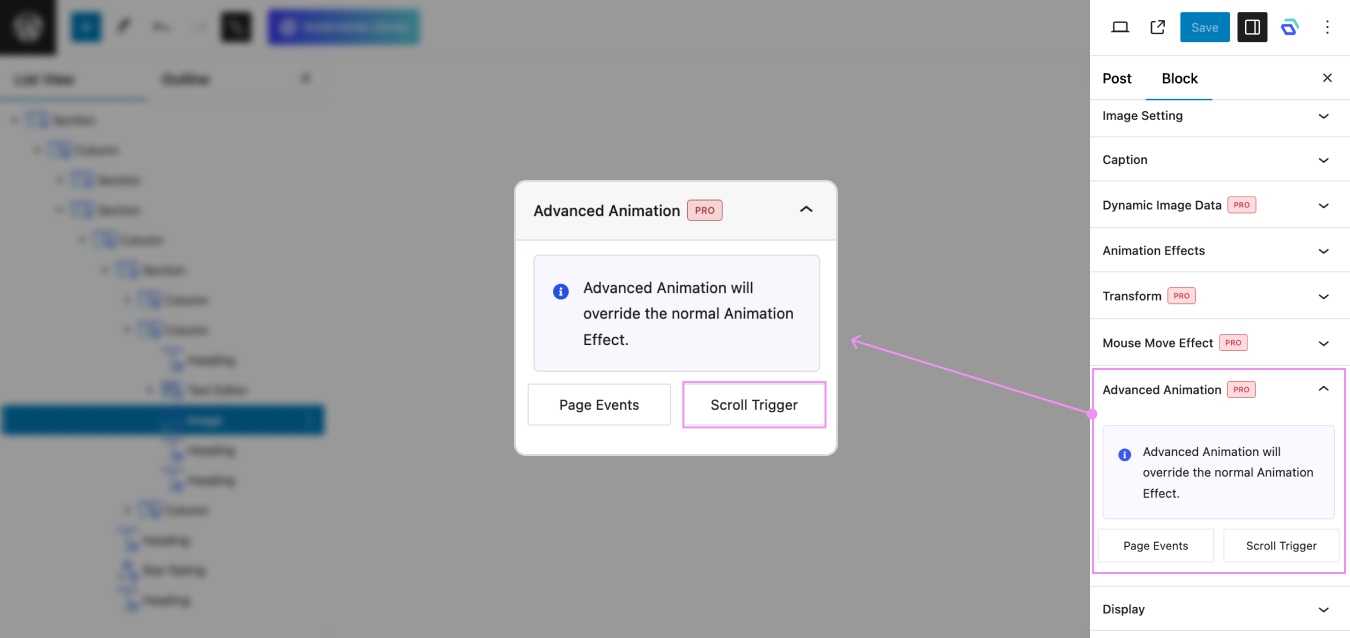
Then a side bar will opened and click panel Advanced Animation -> Scroll Trigger
3.
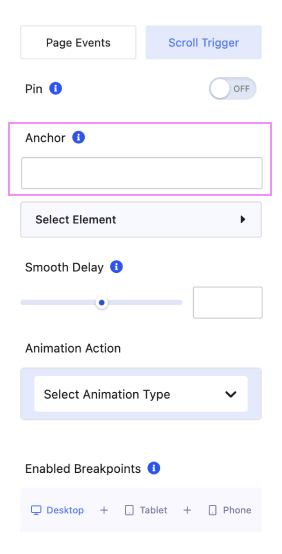
Set Animation Anchor first on Scroll Trigger, to ensure your animation works perfectly. You can learn how to set an animation anchor in This Article.
4.
After setting Anchor, select Animation Type -> Image Border Radius
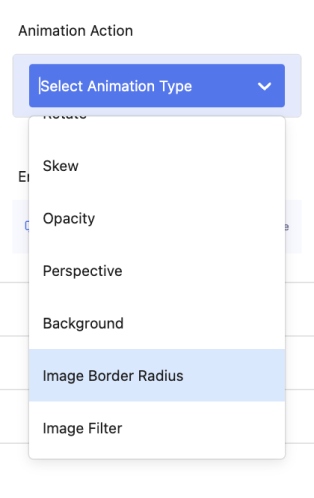
5.
After selecting Image Border Radius, you must set Start or End Animation, and Easing.
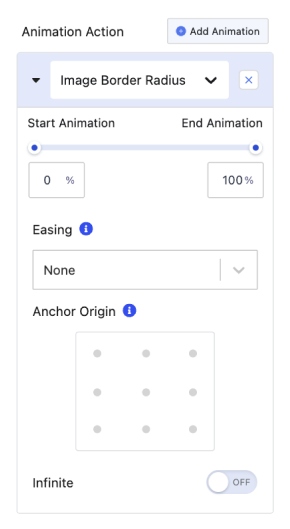
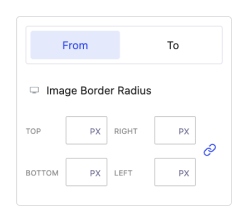
Set the initial and final border radius values for the image using the From and To fields. You can define different values for each corner (top, right, bottom, left) in pixels (PX). The From value specifies how the image’s corners appear when the animation starts, while the To value determines the shape the image will transition to as the user scrolls. This allows for smooth transformations, such as changing an image from sharp corners to rounded or circular edges.
6.
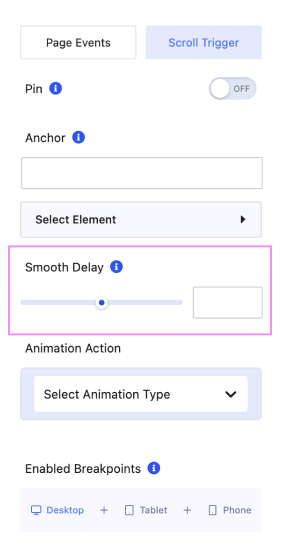
You can setting Smooth Delay to create a smoother user experience, making transitions appear more natural and less abrupt.
7.
Last but not least, you can enable this animation for Desktop, Tablet, and Mobile.
