


Before setting up the form, please ensure you have set up SMTP.
Note: After Gutenverse v2.0.0, the Gutenverse Form is now a separate plugin. To install the Gutenverse Form please check this article.
Create A Form Setting
After you set up SMTP, you can start creating a form.
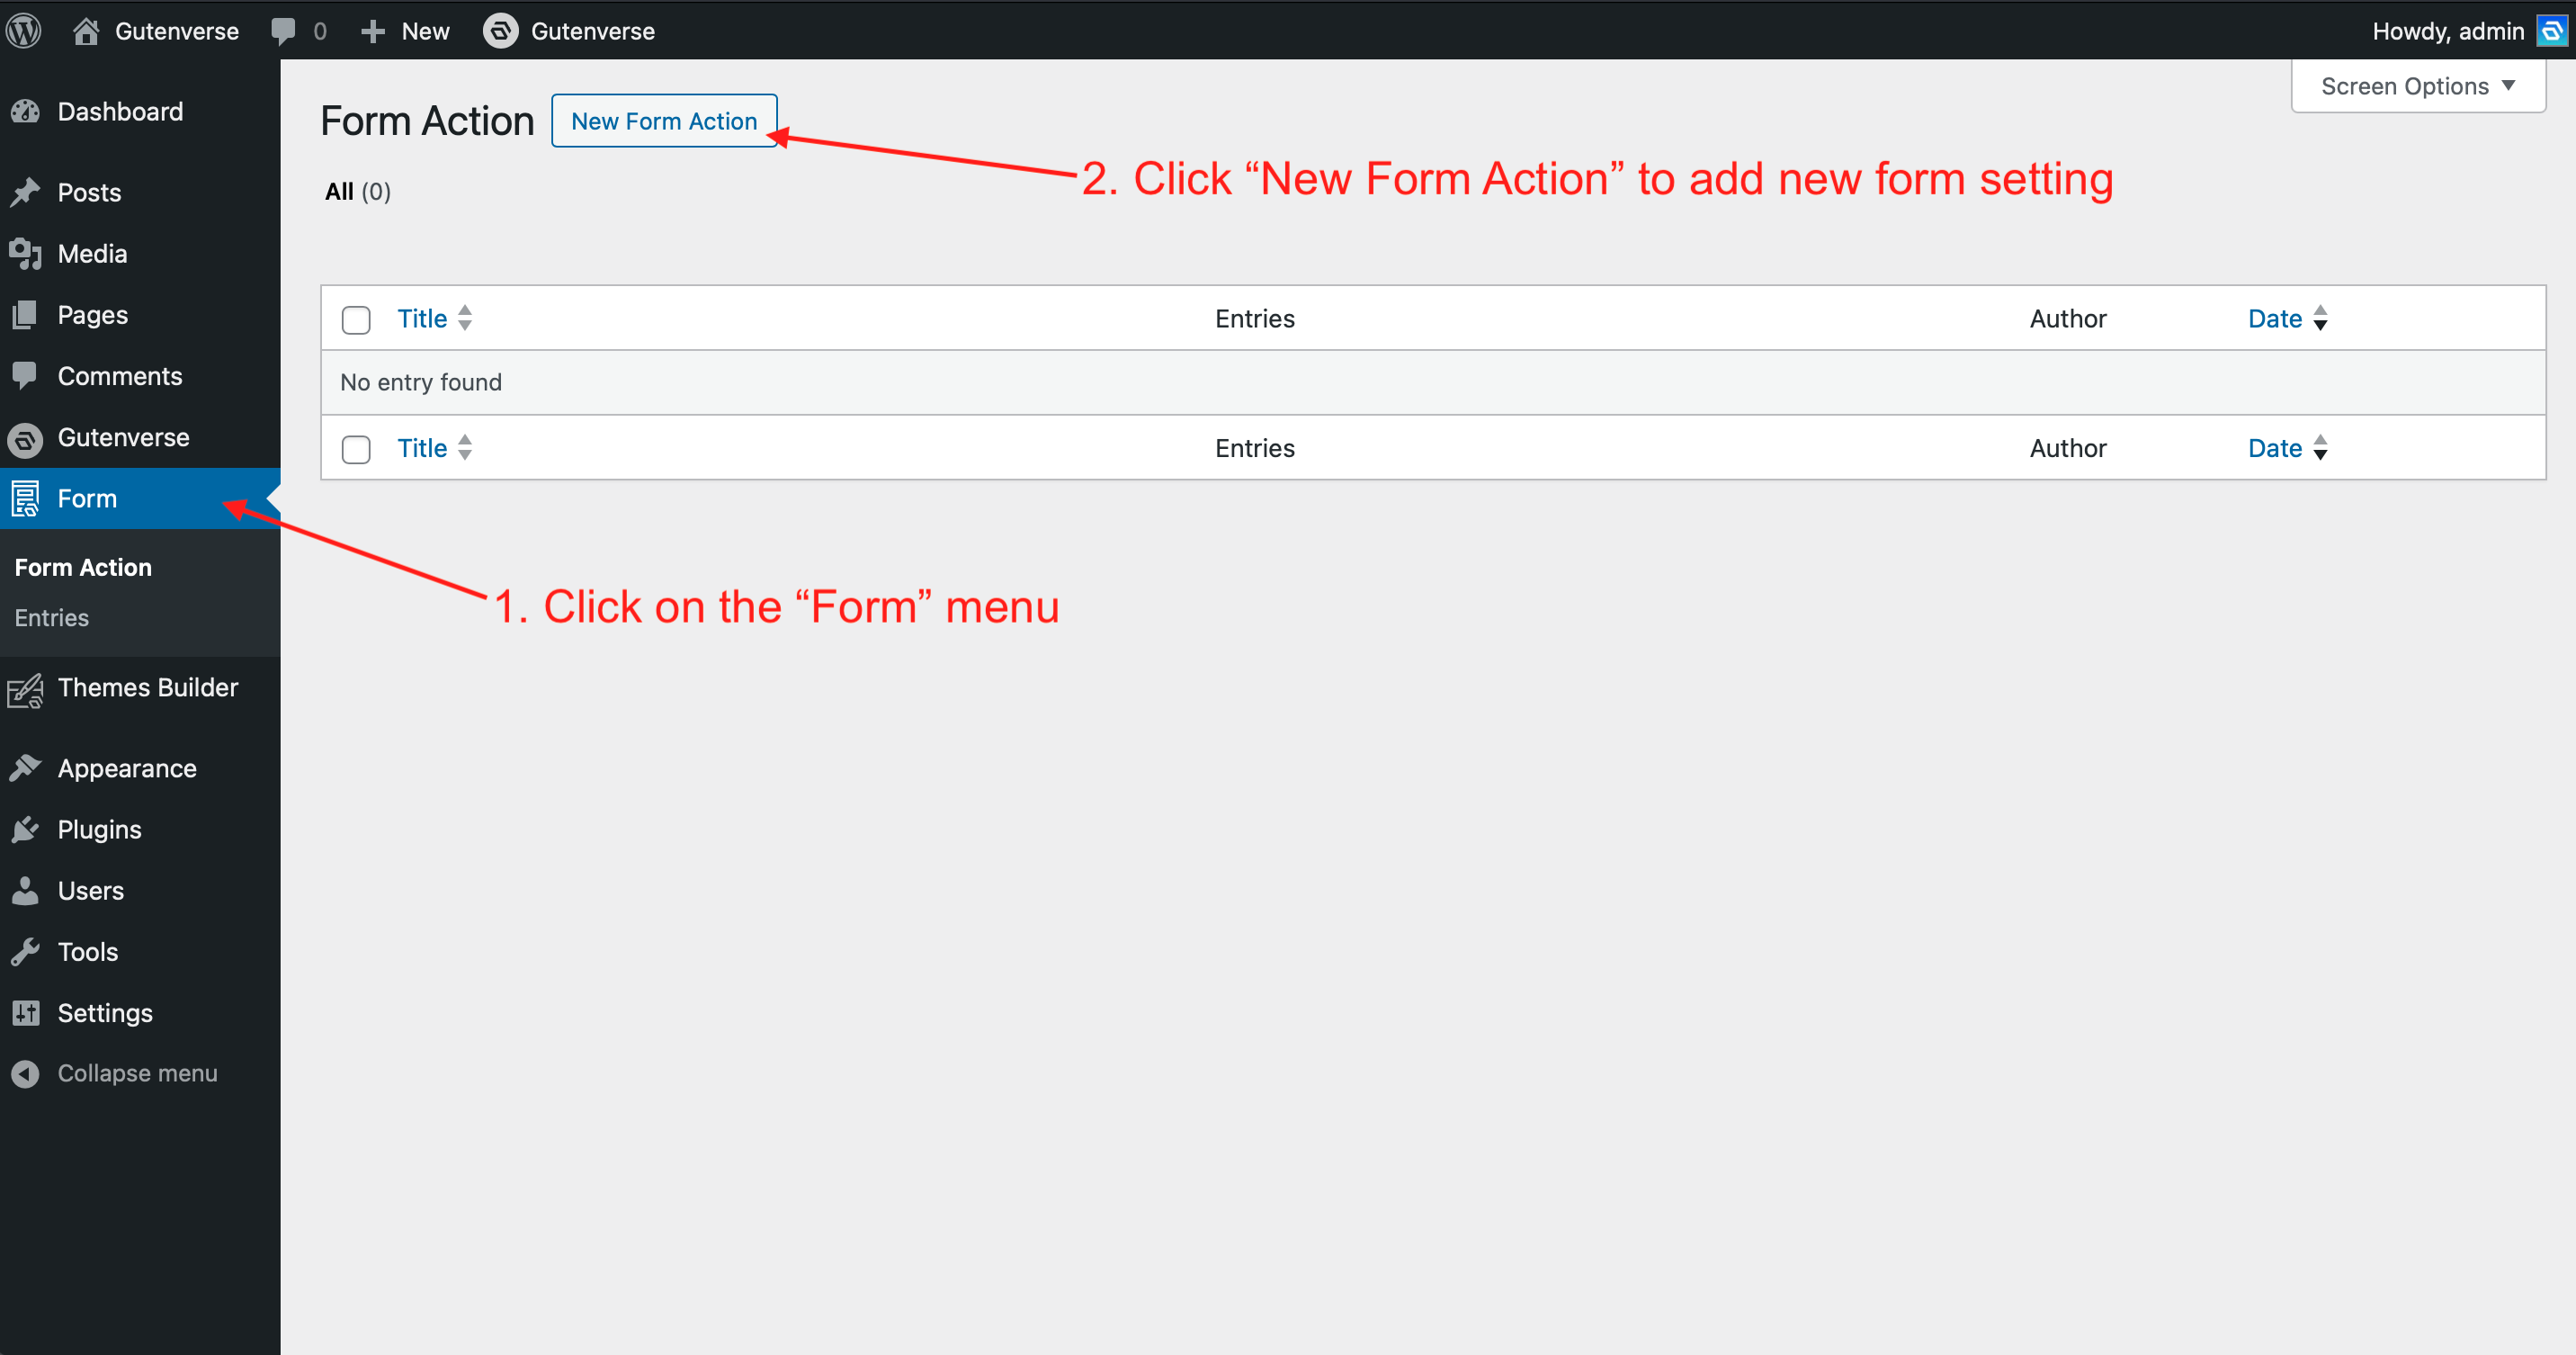
1. From the admin dashboard, click on the Form menu on the left sidebar.
2. Click the “New Form Action” button to add a new form setting.
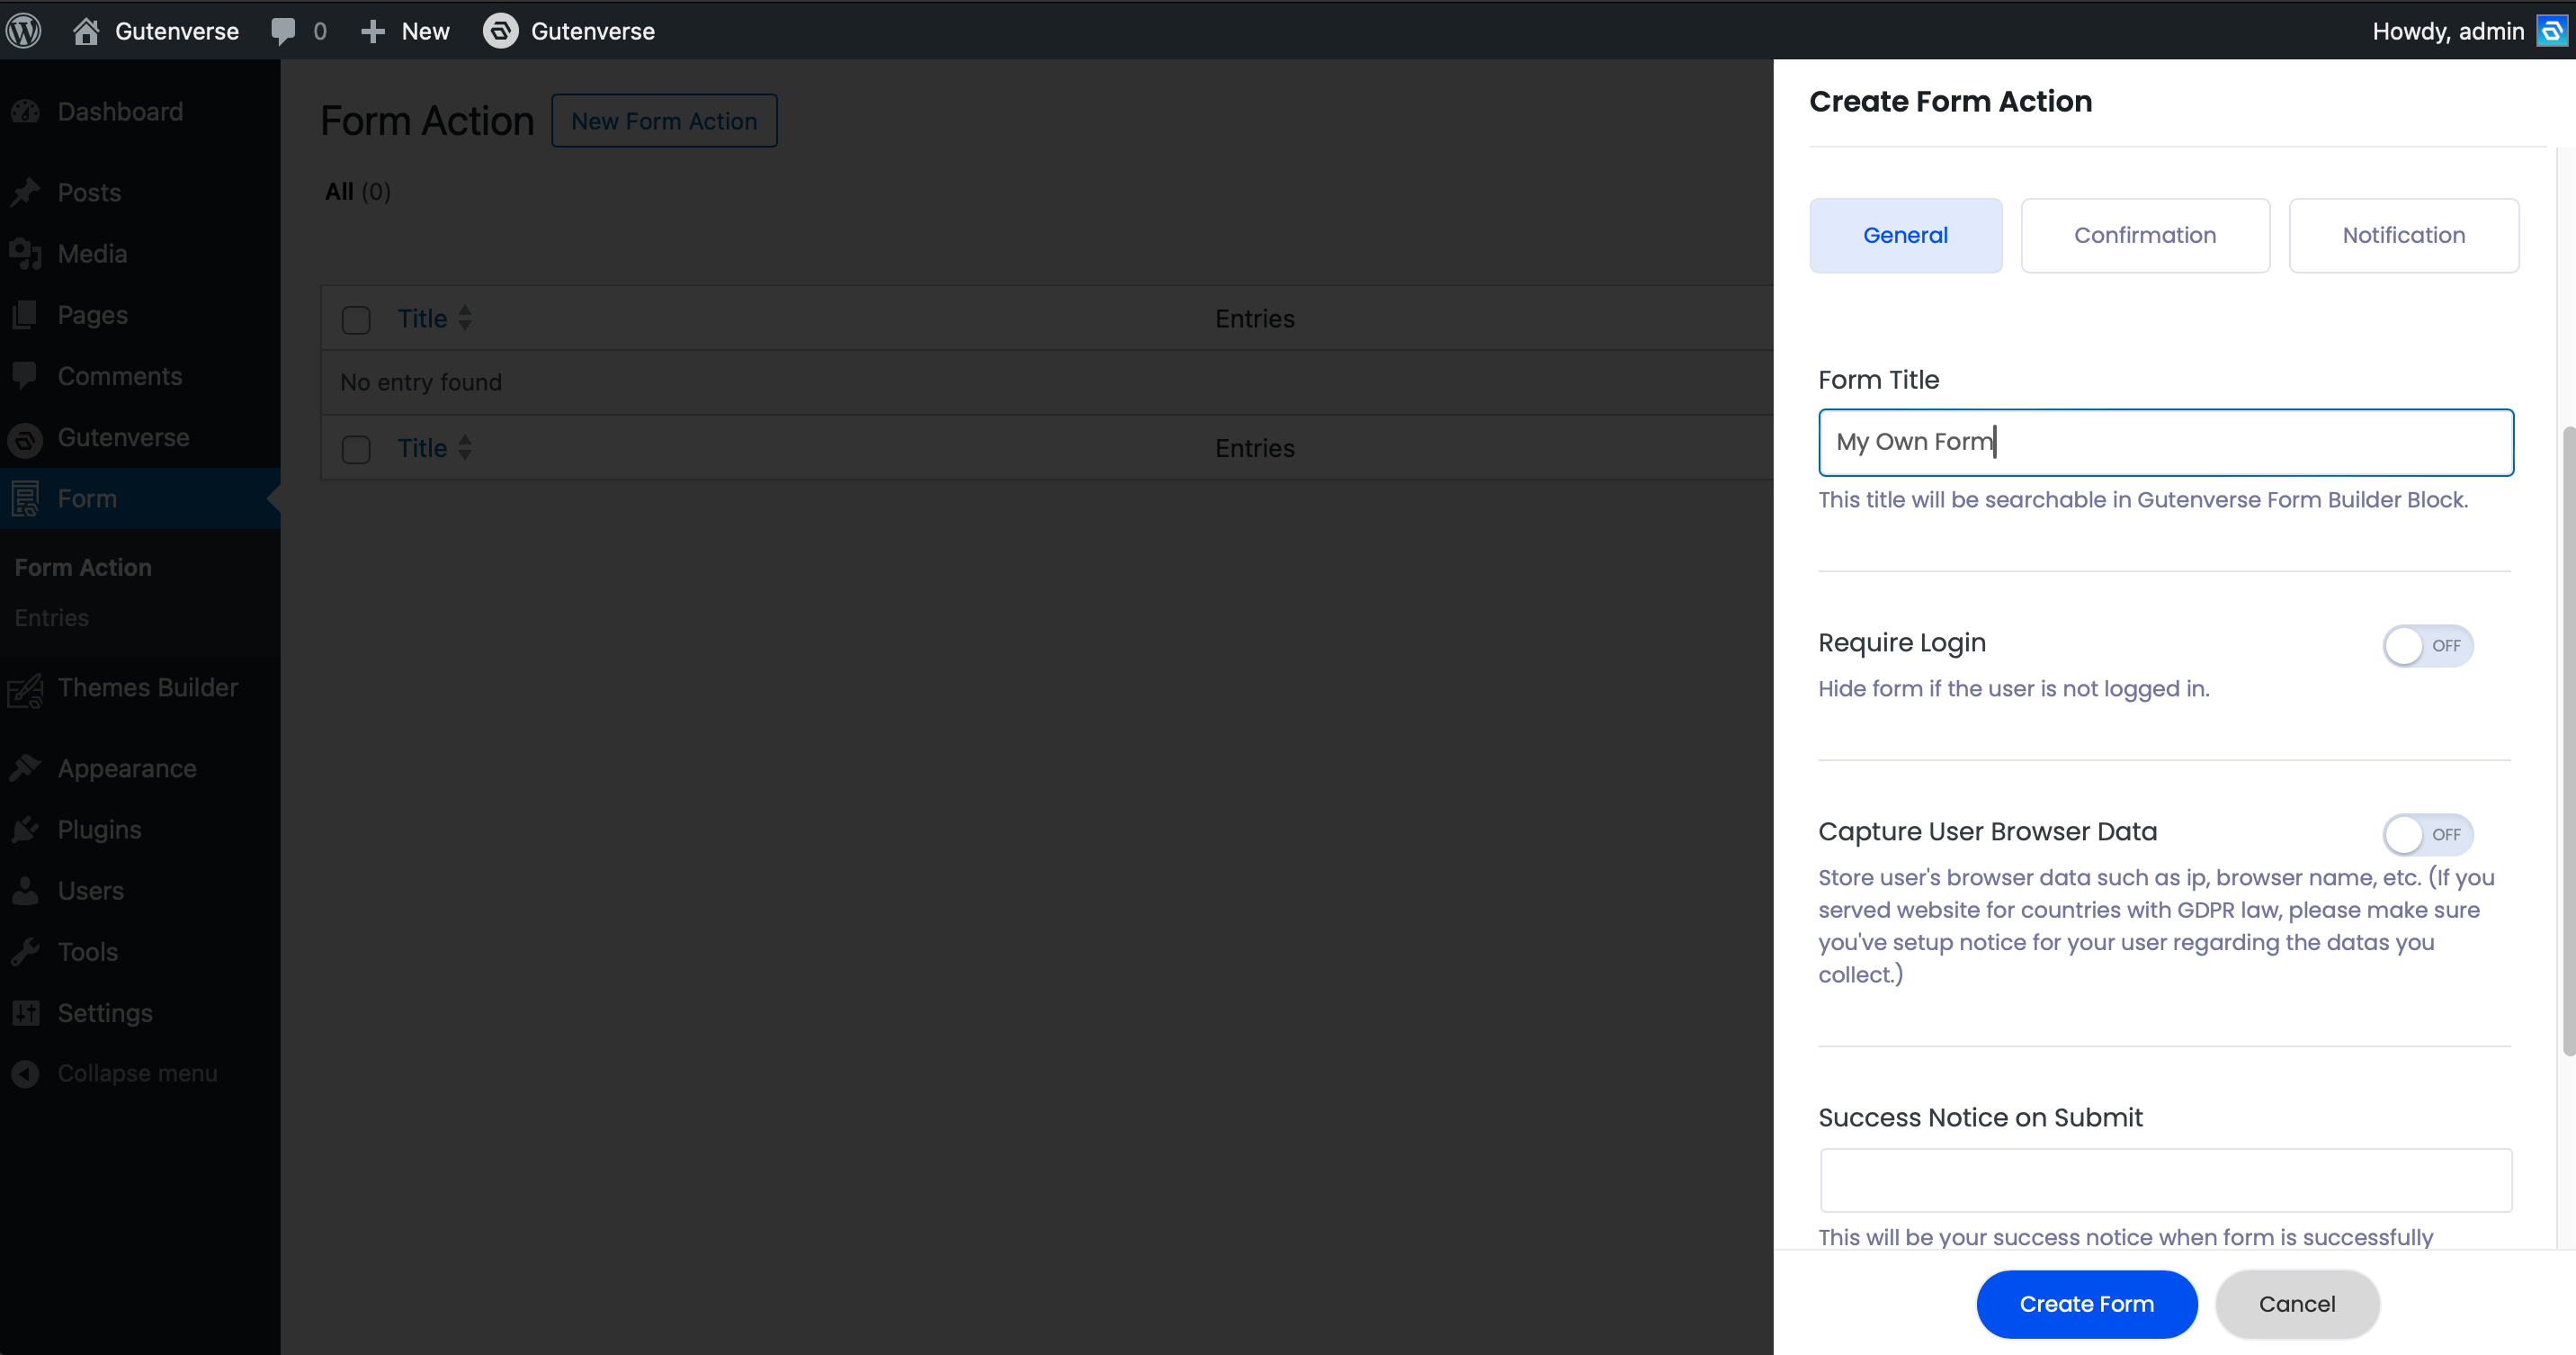
3. Then a popup will appear with three tabs: General, Confirmation, and Notification.
4. Input your basic form setting in the General tab, such as form name, success & error message, form requirement, etc
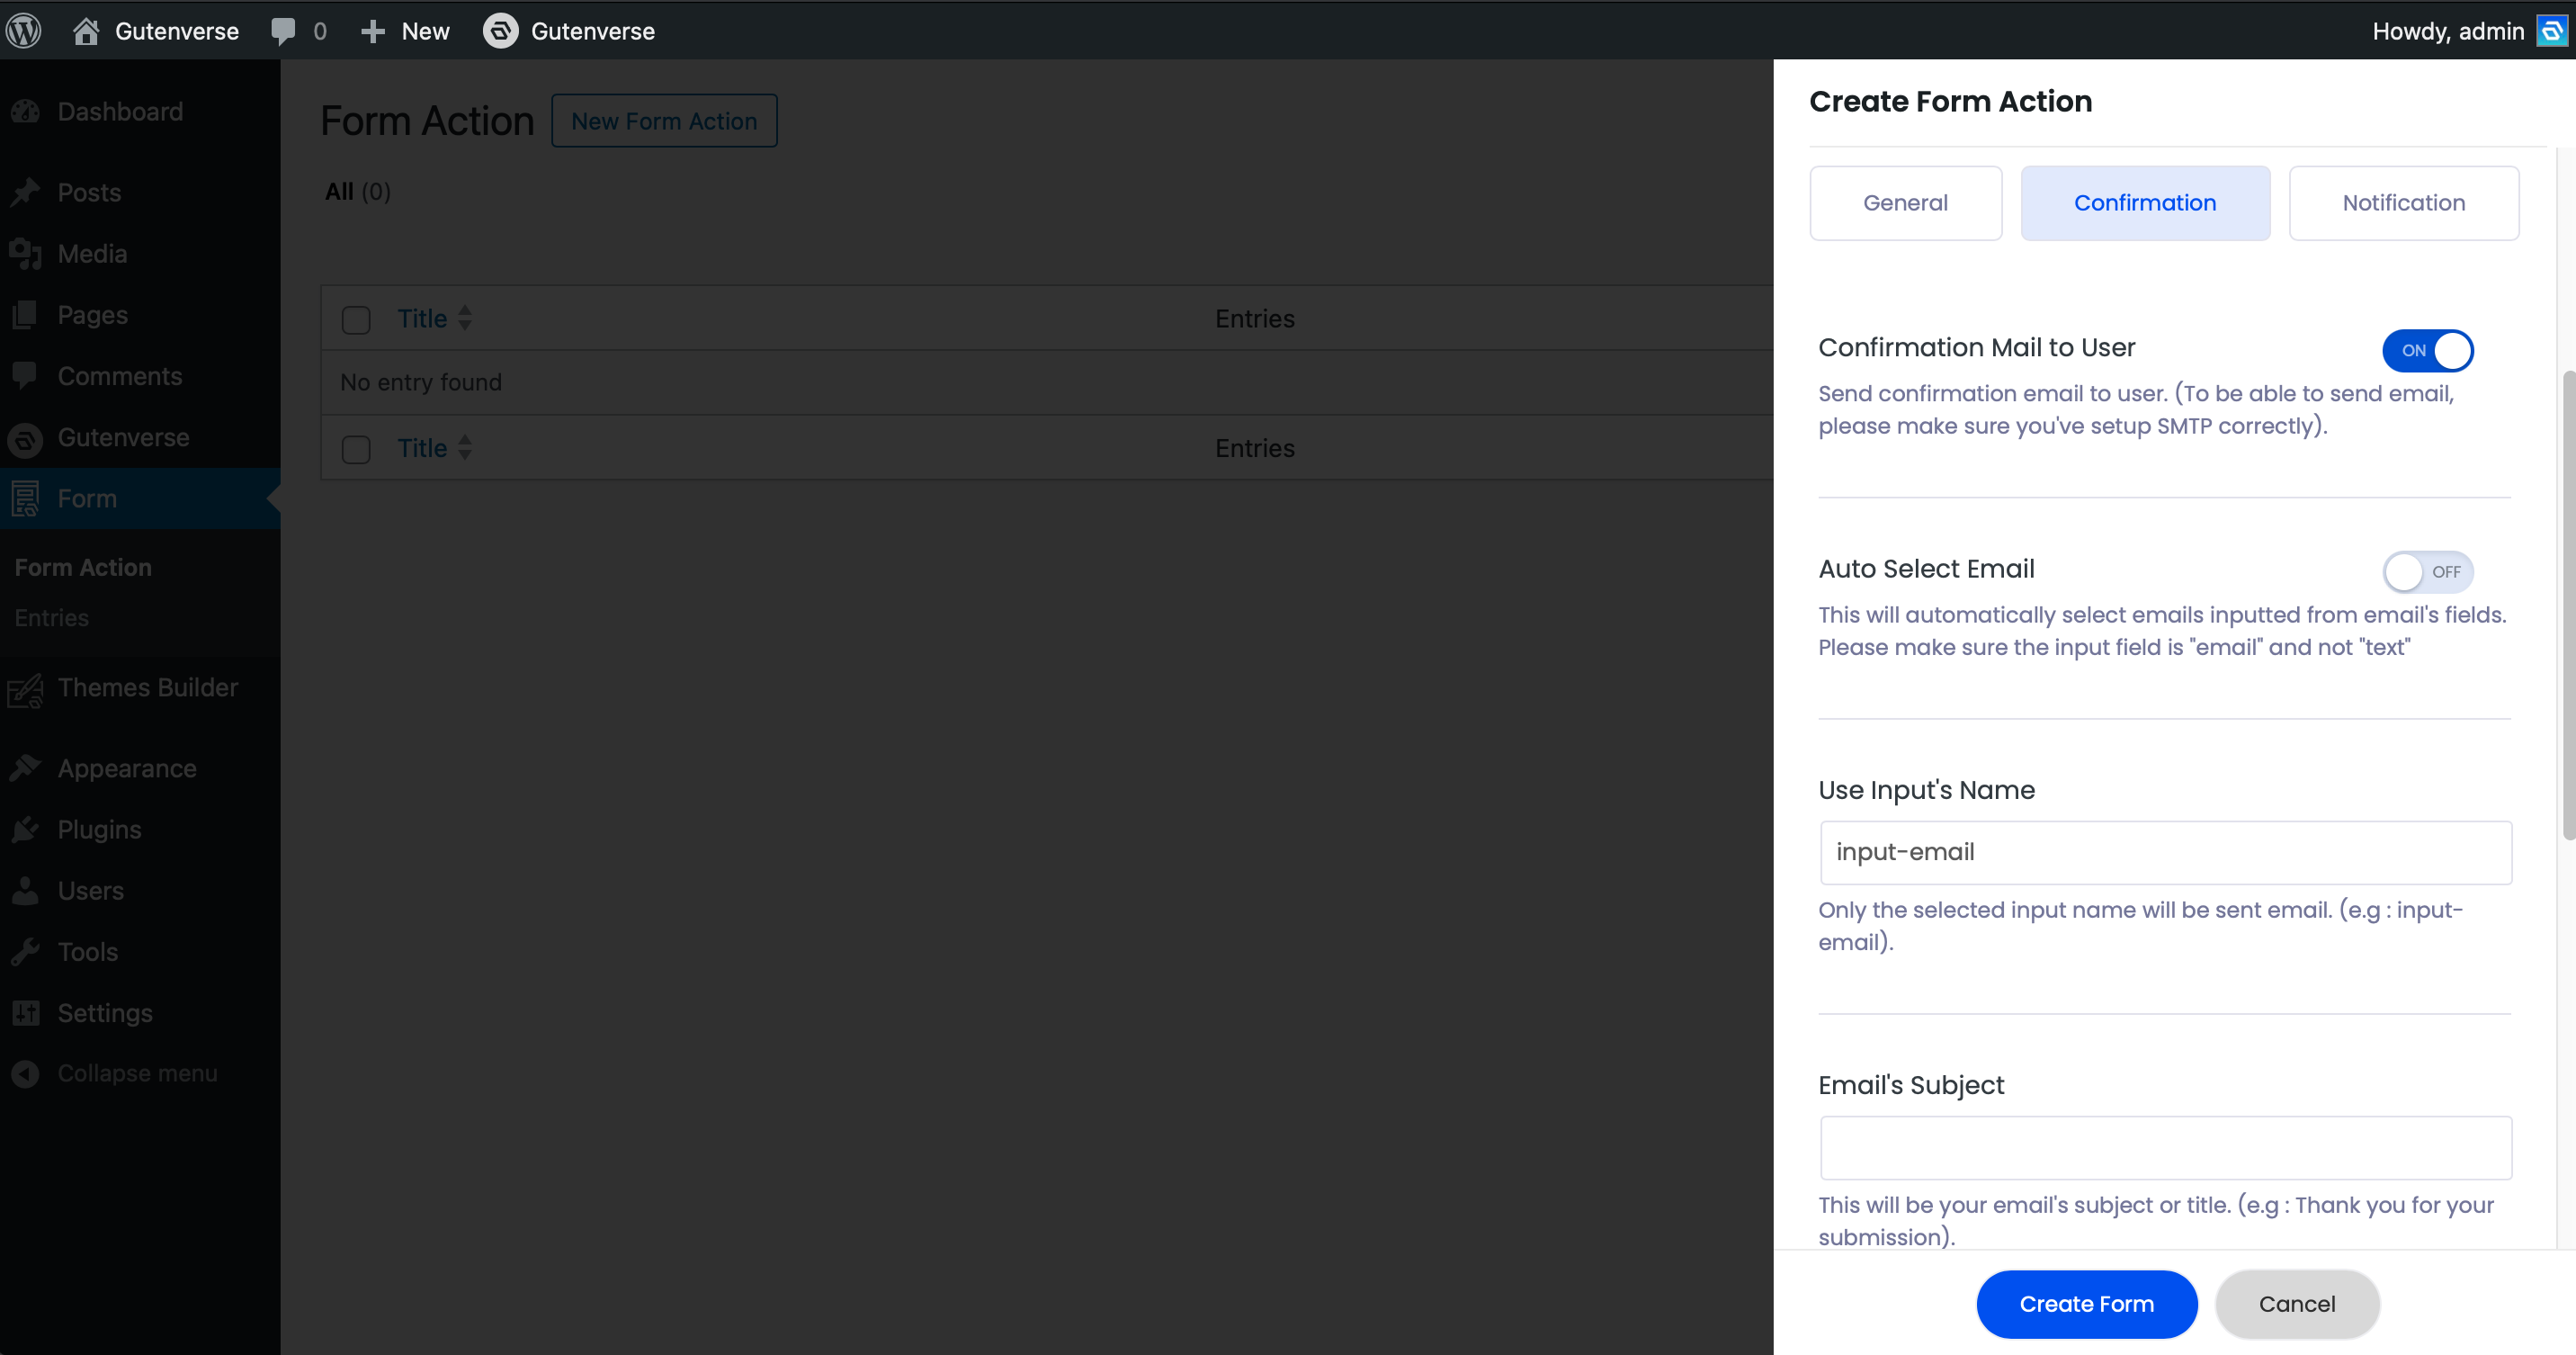
5. In the Confirmation tab, you can enable this option to give your user an email notification when they submit a form. (This only works if your form contains an email input box).
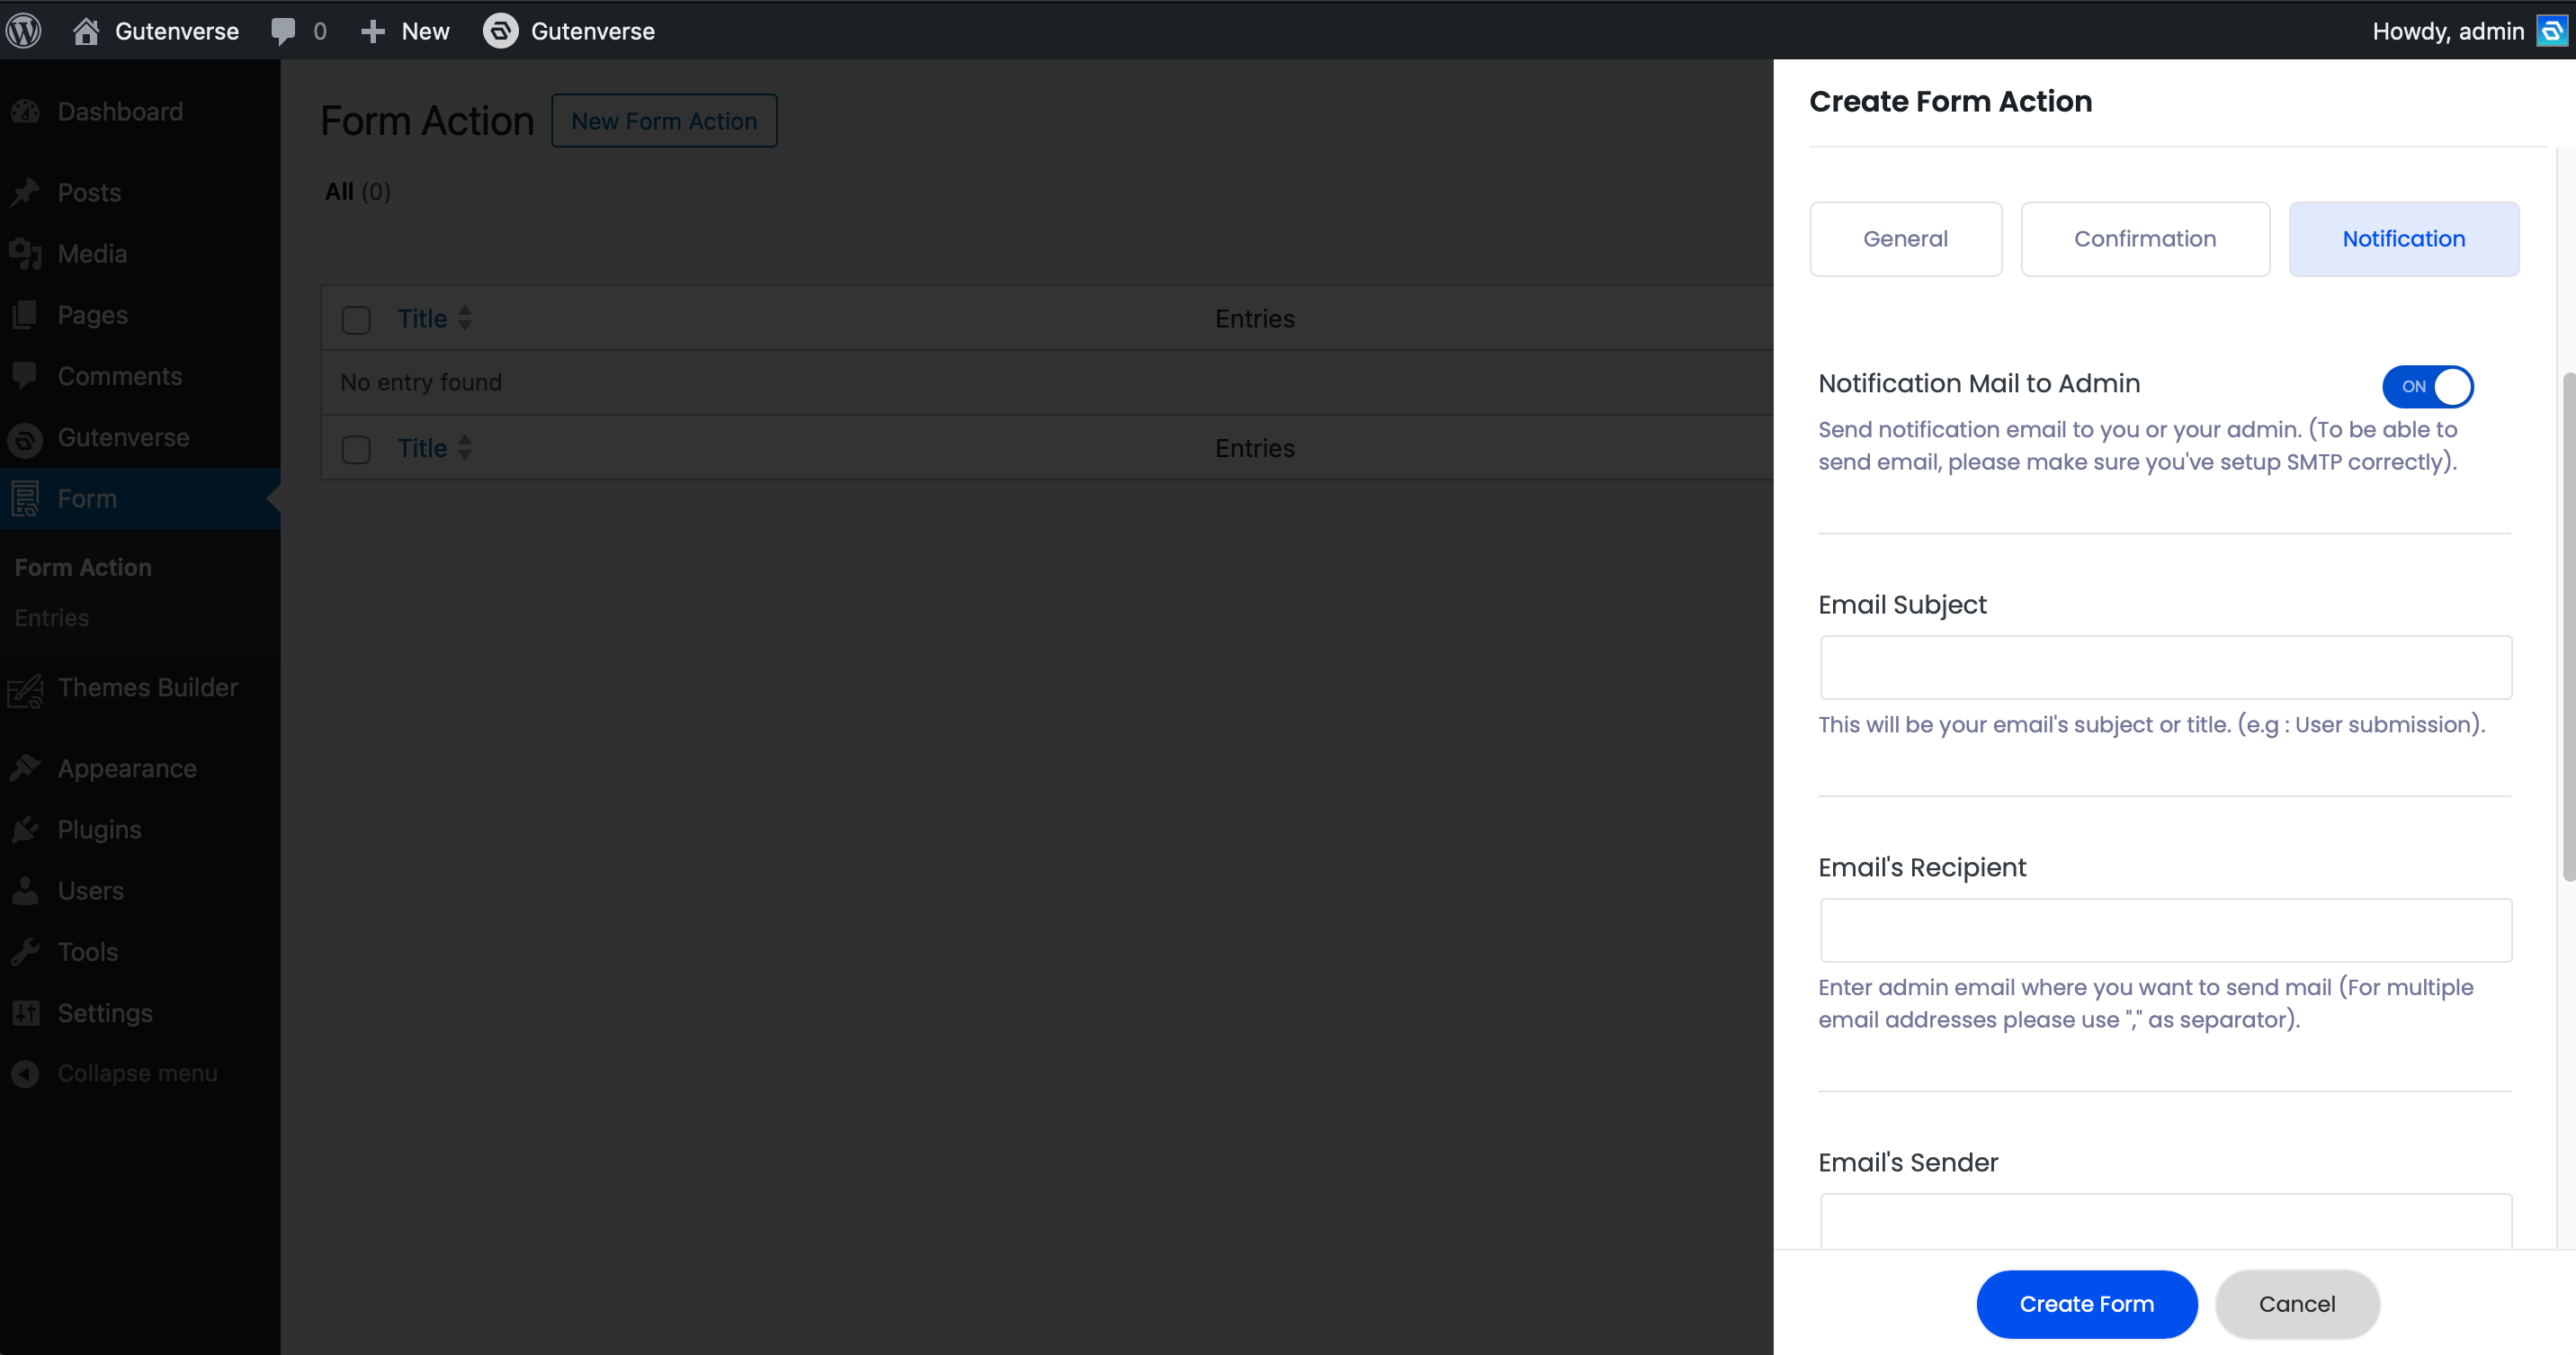
6. In the Notification tab, you can enable this option to make the system send you or your site administrator an email when a user submits a form.
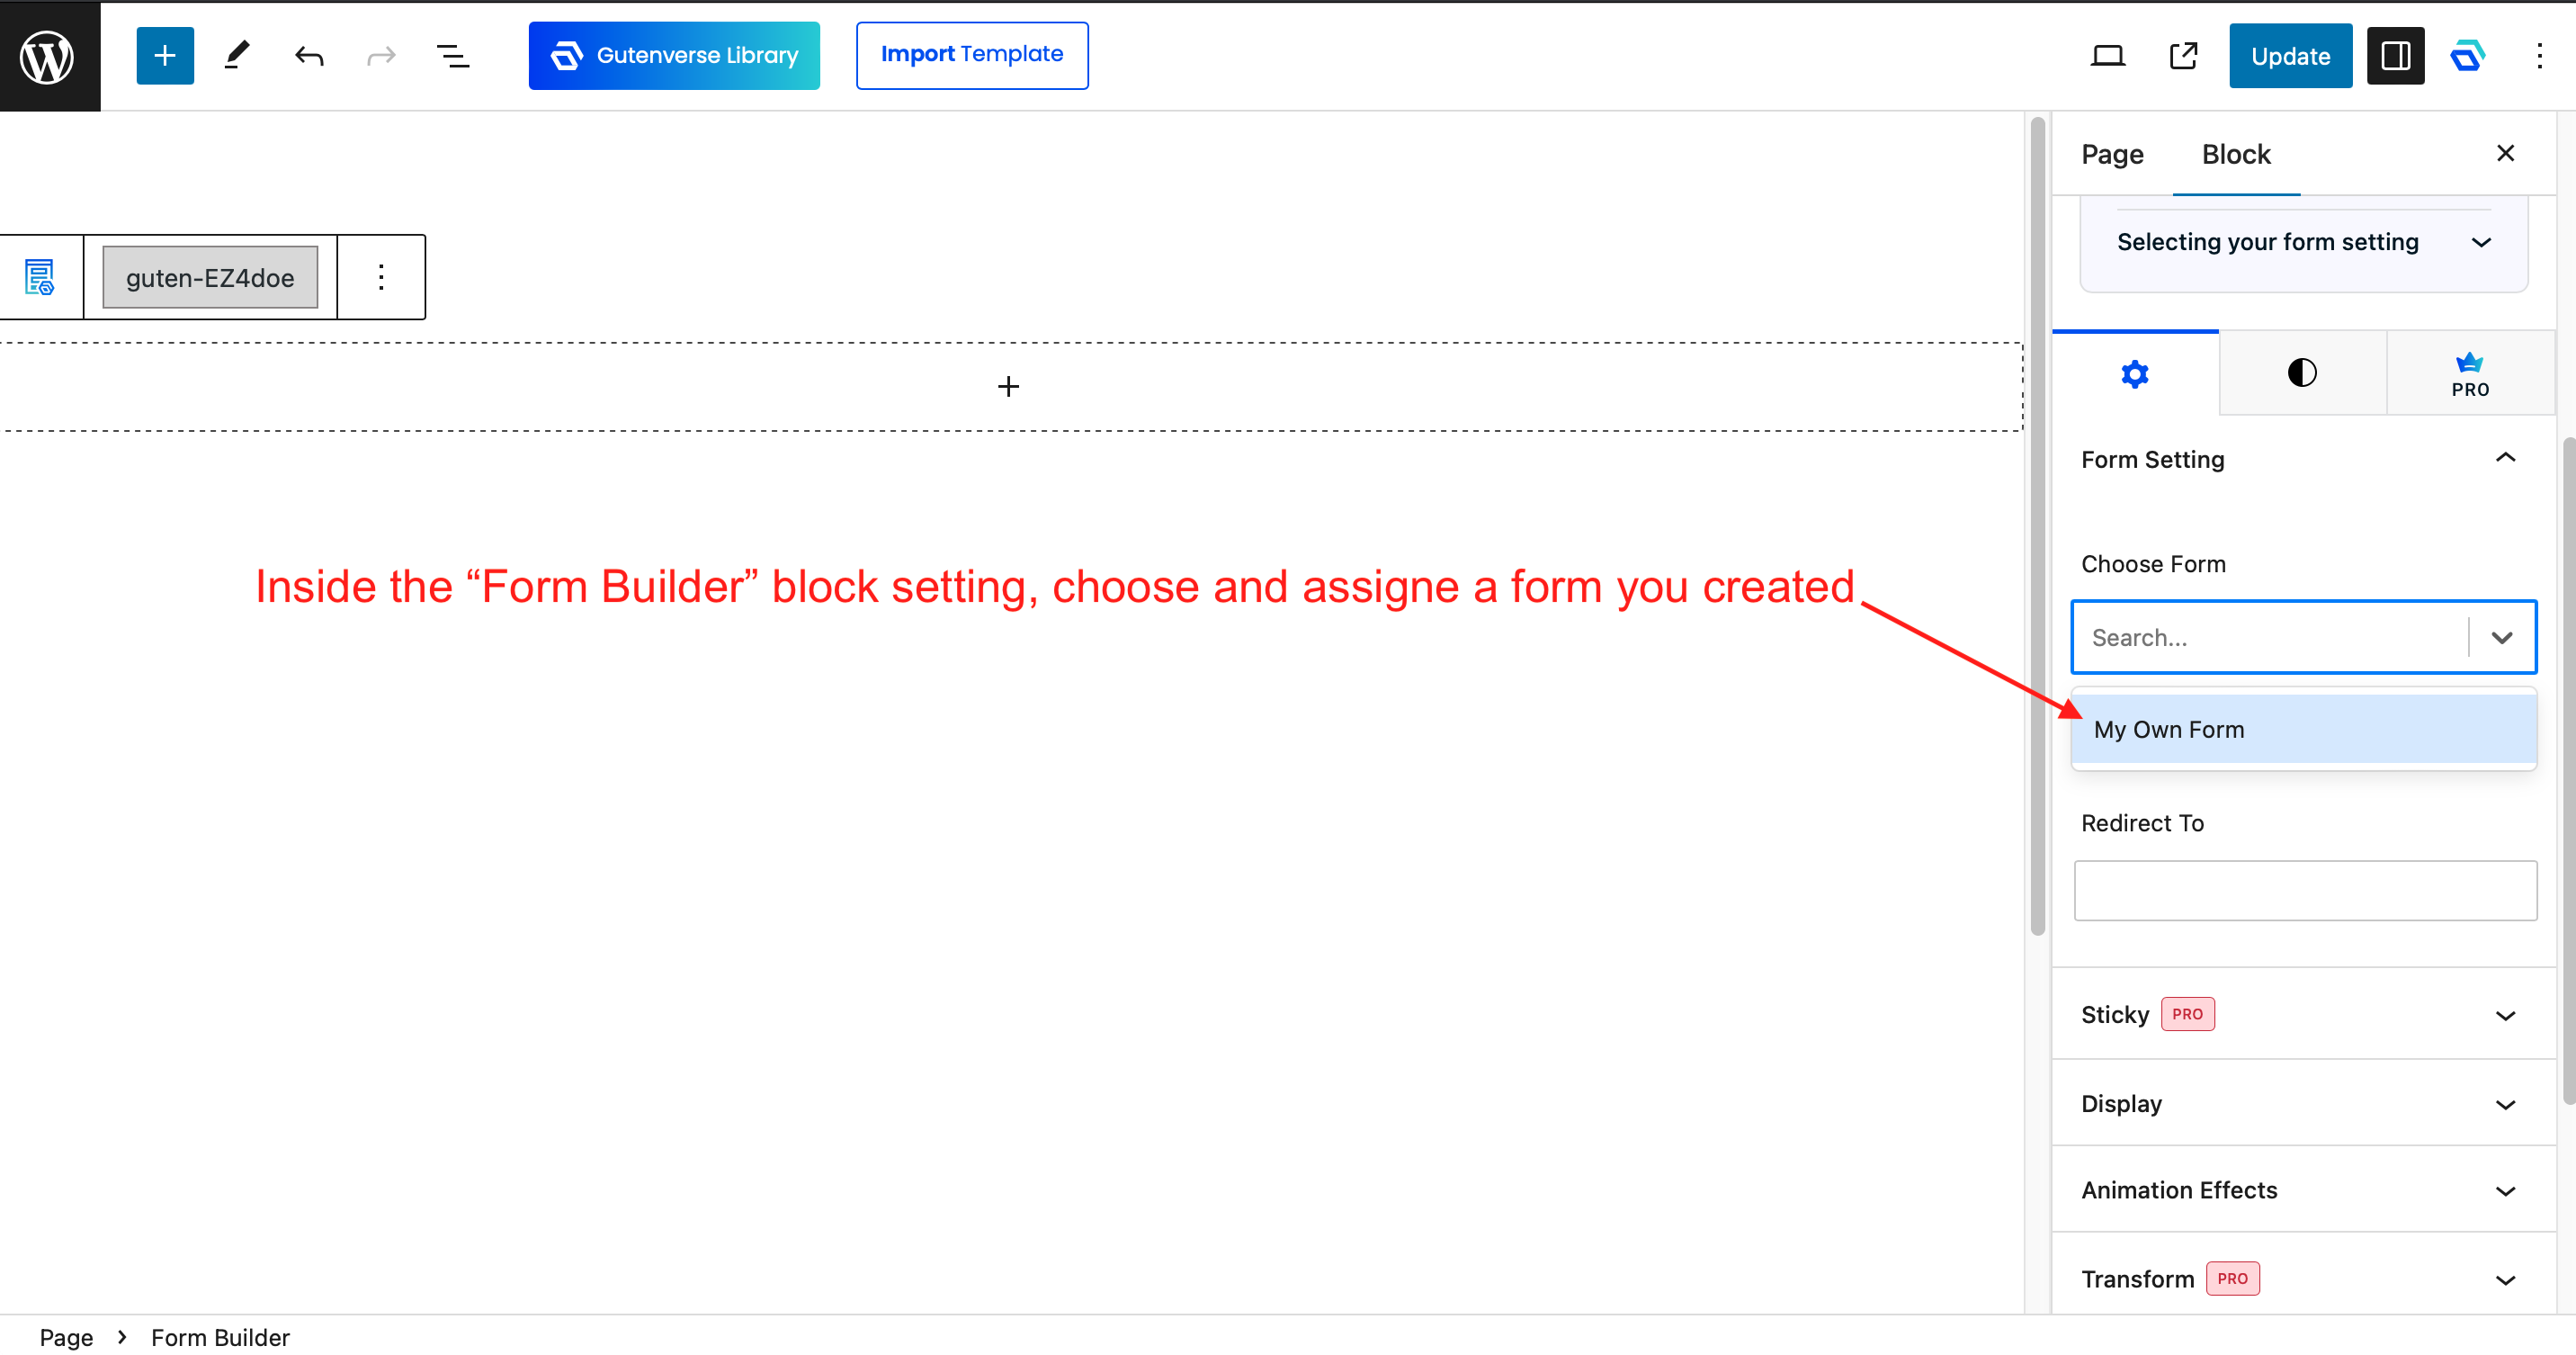
Assign the Form Setting
After you create a form setting, go to the Page or Template where your form is located. Then click on the Form Builder block and choose/assign a form you created previously.
Your form is now ready to use!